


Today is a good day. I finished off the fifth Realm of Battle board of the eight that I started a little over two months ago. This board has thus far been by far the most challenging I’ve completed. Both technically and creatively. I remember at one point thinking I’ve arrived at the place where my vision and my technical ability no longer over lap. I kept going though, determined to push myself and see what I started through. I’m glad I did preserver too because the final piece is my most pleasing to date.
I also have to point out that I’ve been doing some work on my photography skills and had some tutoring from my friend and fellow Blogger Troy on using Photoshop. I went and downloaded photoshop and this morning Troy spend several hours with me showing me some basic techniques to improve the quality of the pictures that I post on my blog. You’ll notice that they look different, although not perfectly the way I’d like them its a new direction for me and I intend on working on this skill and honing it moving forward. Go and have a look at Troy’s blog too, its still model building just a different genre to ours. I am working on him though you’ll all be happy to hear. Thanks again for your help on this Troy and being so generous with your time.
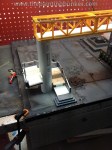
So lets get down to business, I’ll put up some pictures and leave a few remarks under each one and walk you through what went on. Also, take a good look at the working photos to see what I meant. It may not look like much, but a lot of work went into these pieces and I think I jagged bits of it too.
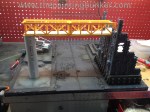
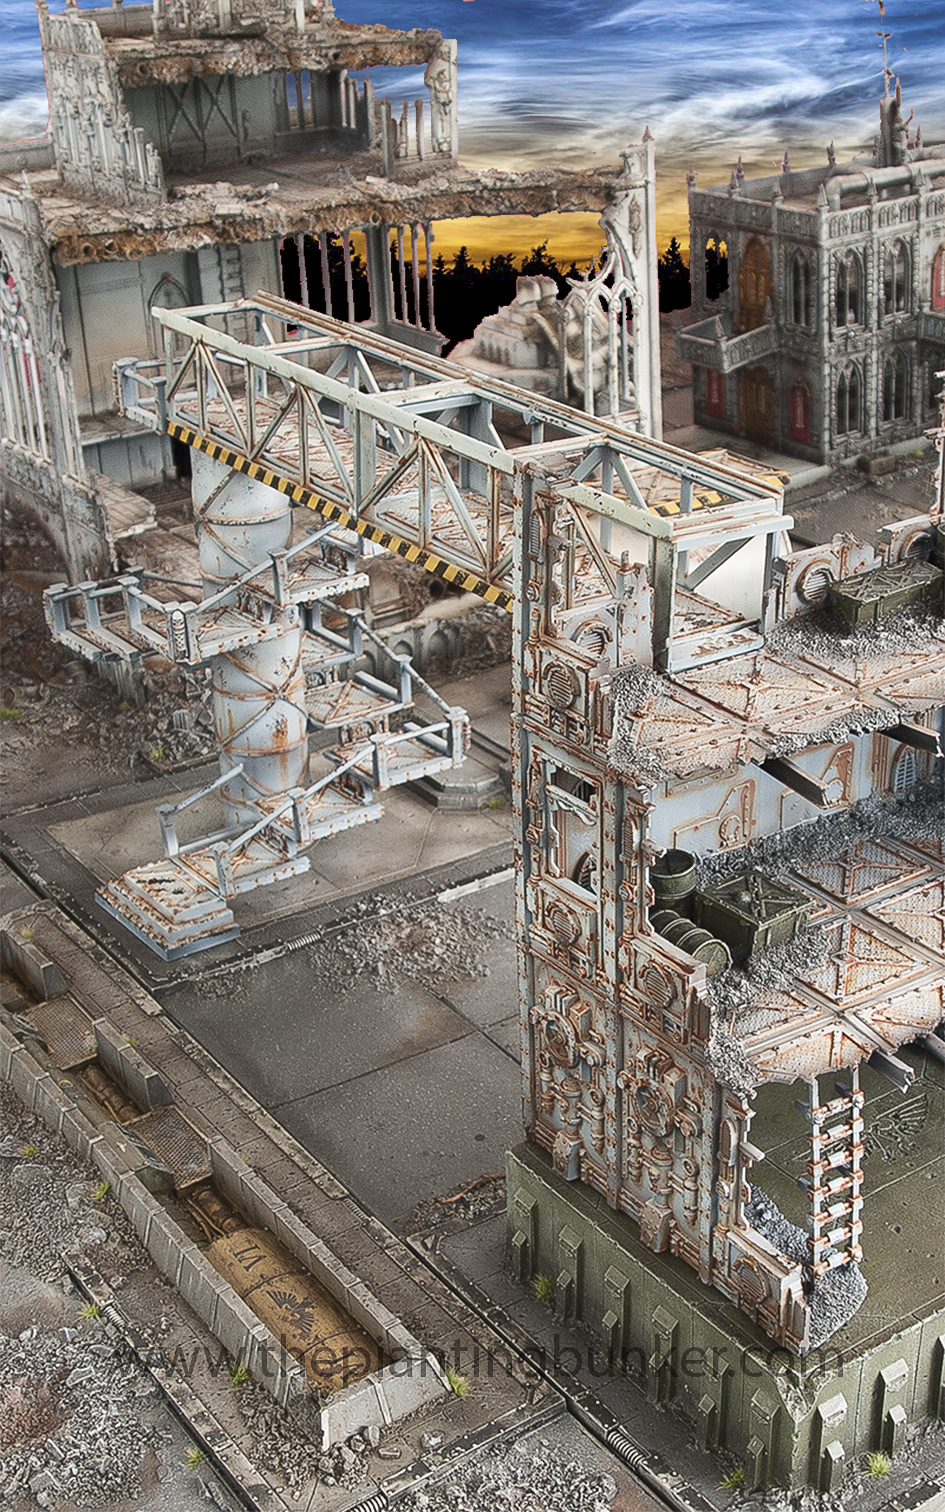 The overpass of doom and spiral stair case of despair… As some of you will remember one of the first boards I did was of a giant crane that I purchased for $35!!! (can you believe it!) from Toys’r us. Well, when I built that crane I had two of the centre sections left and I always planned on using them on one of the other boards. With the last board of the industrial precinct about to commence I thought it would make sense to use it somewhere on it, and seeing as it looked a bit like a walk way, I thought it would be interesting having it spanning over the large double lane road that runs through the centre of this board. I knew one of the ends of the walk way would run into a building, however I had to really put my thinking cap on to work out where the other end would go.
One of the first technical challenges I had to overcome was the heights. One end that went into a building was more or less governed how high it was going to be, in this case, on the second story of a three story building. What made it difficult though was the foundation that the building was resting on, it was just a random height, and the other side was at street level. So the building on the other side, even if it was a GW plastic kit, would not match up height wise and the walk way would be un-level.
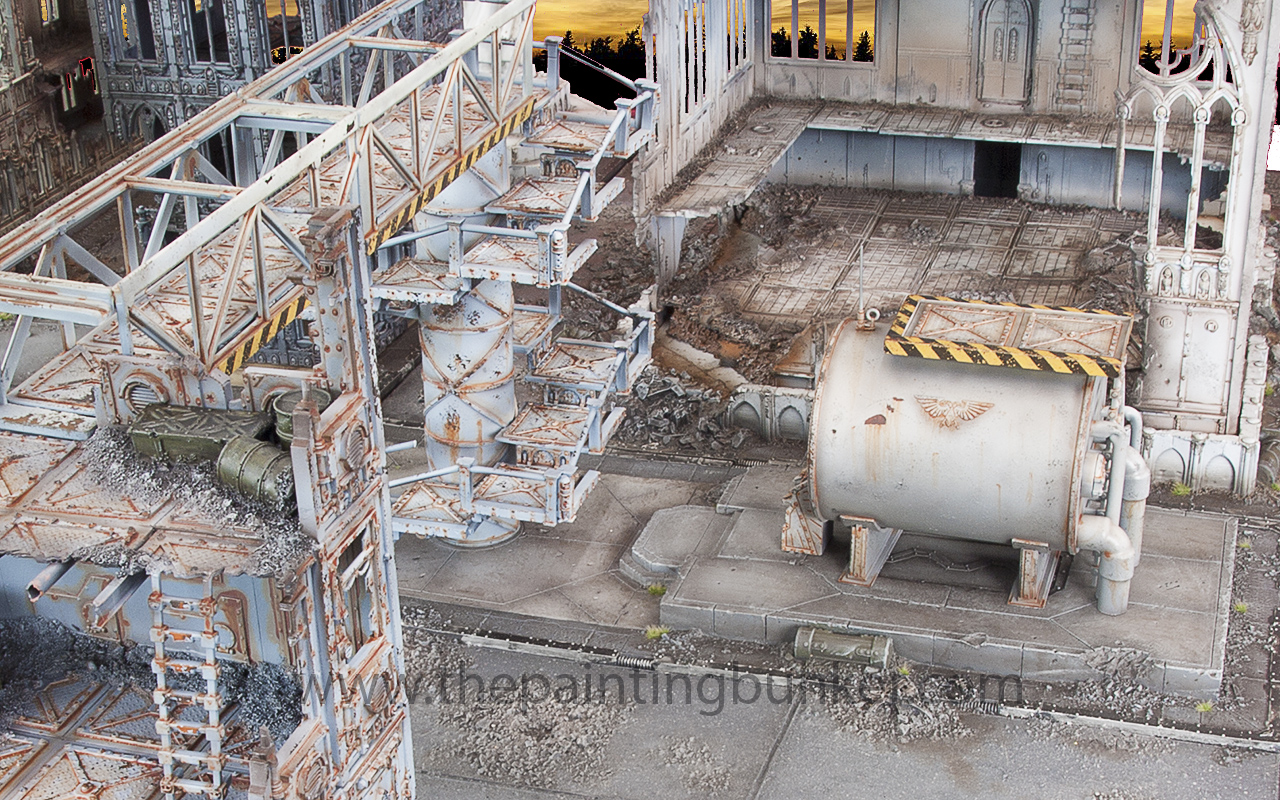
Enter the spiral stare case of despair. Wow did this test me. You can see in the working photos whats gone into it. It was a real challenge. But I have to say, it was an enjoyable one, at no time did I ever feel like throwing it against the wall and jumping on it.
Which is new for me.
The whole way I just would come up to another technical challenge and work out the solution… I did do a fair few sketches too of this piece before I assembled it, I knew the height I needed it to be, then it was a case of just doing some math and a bit of straight forward planning and then following that plan. However it was still challenging, and even with all my planning I wasn’t sure if it was going to go together when I finished it. 
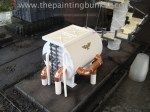
The final piece is the storage tank. I really like this piece most of it is actually scratch built too. It was great fun making it and looks awesome, remember when in doubt modelling add an Imperial Eagle, when in doubt painting add hazard stripes. 

Love this shot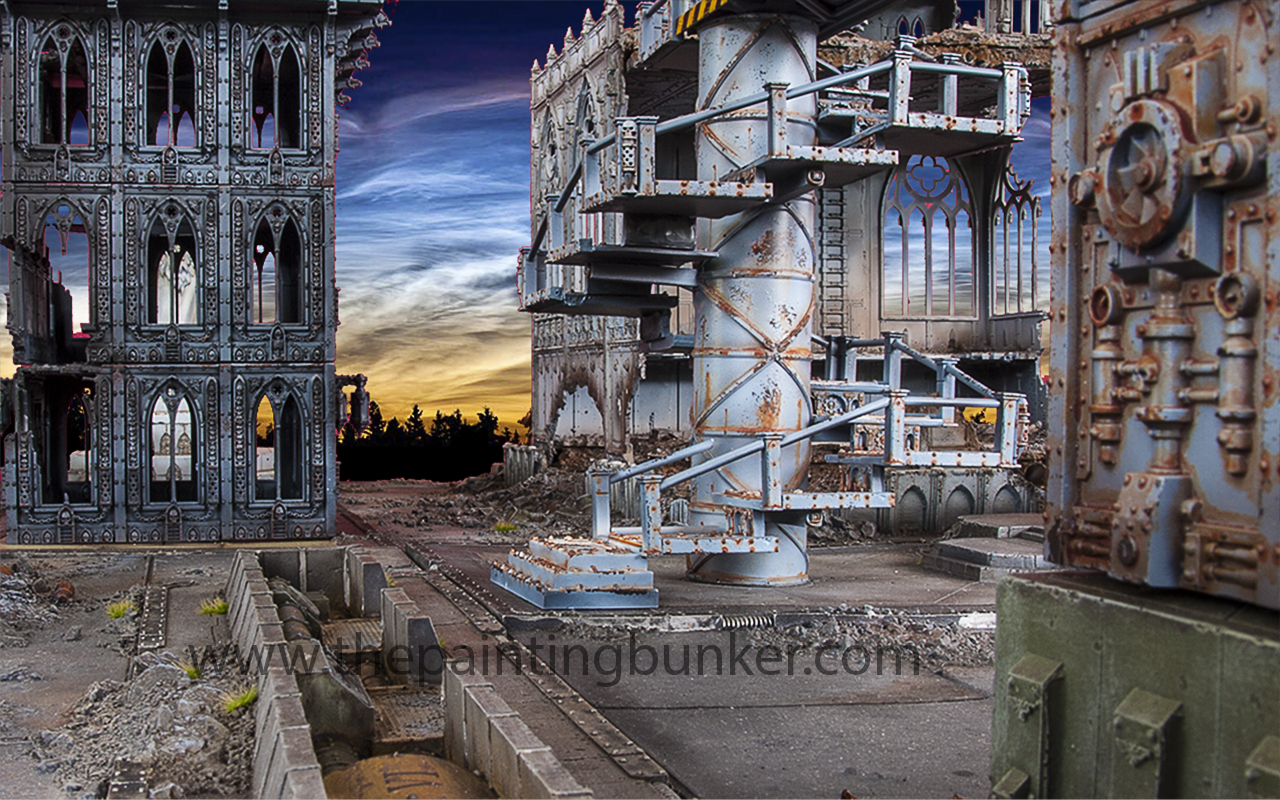

So there you go. I really hope you like the pieces and the new style of photos I’ve put up. I’d be interested in hearing your comments too if you feel the urge to share your thoughts.
Until next time
John


F#@k Johno this table would be an absolute joy to play on. The best Ive see, and I’m sure its even more impressive in the flesh. Where will this table reside at your home? you have a dedicated games room?
Thanks Paul. It lives in two steel chests I have down stairs in the Bunker. I’ve got a massive outdoor area thats covered to play in, or if the weather is bad I’ve got a massive living room where games can be held too. Glad you like the table, its looking pretty awesome
That is absolutely friggin awesome John!
Thanks Mel, I hope Bens getting some painting time in. I want a rematch!
I’m hoping so too haha! I’ll definitely be there to watch this rematch too!
🙂
Nice as always mate. Have you considered the printing of some big backgrounds to reduce time at the PC playing with Photoshop to bung em in the photos later?
That’s what I’ve been doing. However making ones that are the size I need to photograph the subjects I have the way I want mean they are just too big and expensive. With photoshop I just have a piece of big board painted bright pink behind the subject. PS can pick out that color and then just swap it out. Very easy.
I’m really enjoying the WIP photo collections at the bottom of each post. This is very helpful and inspirational to those of us that want to attempt something so neat. Love your work!
Thanks James, glad my work can be a source of inspiration for you.
I LOVE this terrain. The steps around the pole. Are those 3d printed? If they are, can you point me towards the stl? I’m in love with that set up and want to try to recreate it. Much love.