Archive for the ‘Titans’ Category

Well, today is a good day.

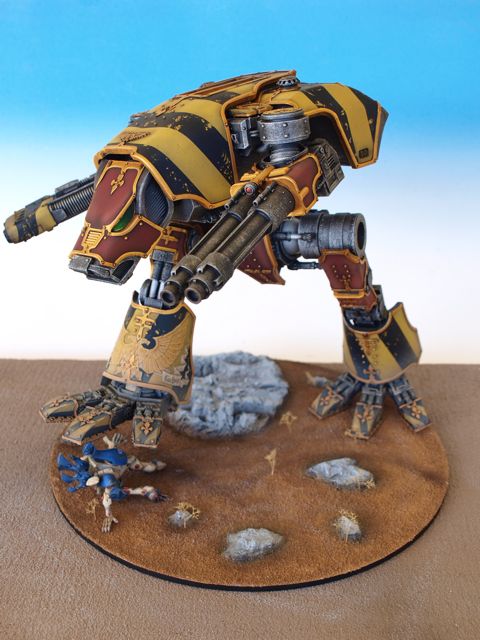
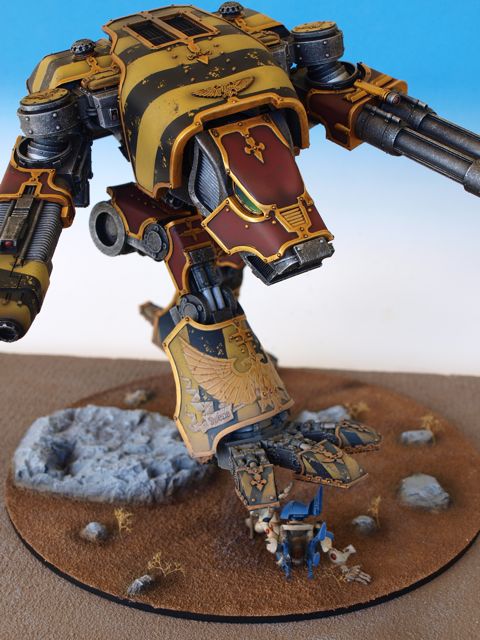
I’ve finally finished the Reaver Titan I started in September.  It’s been a massive project and I have to admit I’m grateful for the experience I gained from building the two Warhounds when I set out on this massive endeavour.  I pitty anyone who would attempt to build a Reaver without having first built a Warhound.  I thought the Warhounds were complicated, the Reaver makes them look like a lego man by comparison.  Anyways, I’ll cut to the pics so everyone can enjoy the massive!

Behold the God Machine!

Forge World Reaver Titan 1 via www.thepaintingbunker.com Forge World Reaver Titan 9 via www.thepaintingbunker.com Forge World Reaver Titan 8 via www.thepaintingbunker.com Forge World Reaver Titan 7 via www.thepaintingbunker.com Forge World Reaver Titan 6 via www.thepaintingbunker.com Forge World Reaver Titan 5 via www.thepaintingbunker.com Forge World Reaver Titan 4 via www.thepaintingbunker.com Forge World Reaver Titan 3 via www.thepaintingbunker.com Forge World Reaver Titan 2 via www.thepaintingbunker.com

I can’t wait til the final? book of the Forge World Horus Heresy book comes out that deals with the assault on the Imperial Palace on Terra.  The Fire Wasps take a big part in the defence.

Reaver WIP – kinda

Posted: October 30, 2012 in Titans

Hey everyone,

This post is coming to from my iPhone which should be interesting, if not brief cos typing on this tiny key pad blows.

So I really gave a lot of thought as to weather or not to put this post up as I was hoping that what it’s going to be about would have been about a great success, however it’s more about an idea I had for the Titan that didn’t work out so I’ve decided to abandon it. Sad face.

However after have a long chat with a mate of mine on Skype last night he urged me to post it so that maybe others can learn from my learn or possibly inspire someone to achieve a good result and advance the hobby.

So the idea is relatively simple. It involves stencils and adding some interest to the large flat areas of the Reavers carapace. Some of you may remember an Iron Hands Landraider I didn’t a few months ago where I added some scripting to the front of the hull? Well this is basically what I wanted to do for the Reaver, however instead of having the scripting in white, use the air brush to just create a monochromatic outline if the words instead. So that it would be a bit more subtle.

Problems began for this idea when I spoke to my stencil person about the idea. There was a big technical challenge that the letters couldn’t be made as small as I wanted them, around 2mm high. Instead the smallest they could be made was around 5mm. I decided to go ahead anyway as I thought it’d be worth experimenting as the possible upside of the result would far out weigh the downside of it not appearing exactly as it did in my minds eye.

The second technical challenge I faced, which I knew about was the stencil film taking paint off when I removed it. I had a similar problem with my digi cam on the Carcharodons display board. I thought I’d learnt enough from that experience to overcome this challenge. I gave the kit a very thorough washing before assembly and used a special Tamiya undercoat that is meant to bond with the resin before applying the black undercoat. I felt confident that these measures would overcome the lack of “low tac” that the stencil material has. The stencil film is not meant to be easily removed so its not low tac like most modeling masking tapes.

So lets look at some pics of how it all panned out.

20121030-084707.jpg

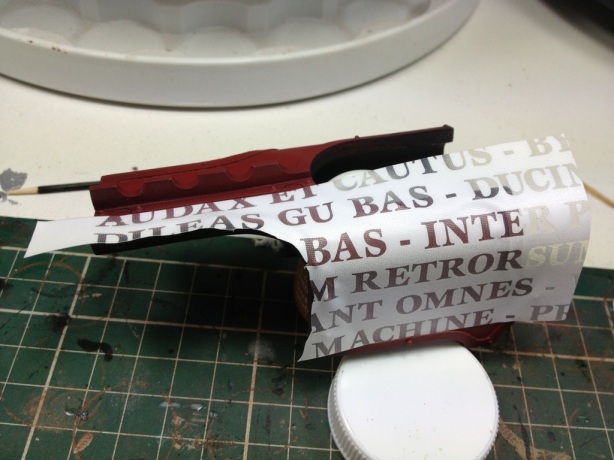
Here is the stencil cut to size ready for application.

20121030-084816.jpg

A rough application of the stencil. I used a heat gun to the stencil better conform to the contours of the carapace.

20121030-084943.jpg

The stencil applied and trimmed. Ready for air brushing.

20121030-085025.jpg

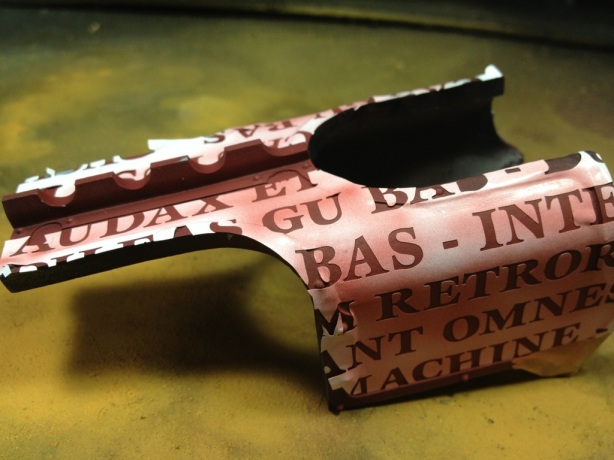
I begin outlining the stencil. All good so far.

20121030-085106.jpg

I’m feeling pretty pleased with myself at this stage. And despite the size of the letters I’m willing to make a concession as the effect will look awesome.

20121030-085250.jpg

And yeah. Very disappointed at this stage. The thought of this happening to the main areas of the carapace was too much to bear so I abandoned the idea. Back to the drawing board…. I feel that the size of the letters and the lifting of the base colour meant that I just wasn’t prepared to persevere with this idea.

I’ll give it another attempt in the future however for the time being I’m going to give it a rest.

On a brighter note. I got the Reaver and Manticore undercoat end yesterday and plan to apply their various base colours this afternoon.

Thanks for stopping in

John

The Painting Bunker is BACK!

Posted: October 28, 2012 in Titans
Tags: , , ,


Hello Everyone!

Well, its been a while since my last post… It’s been a bit of an epic journey for me lately.  As you may know I moved house, had a few demanding weeks socially and had my birthday, which was epic! (if you have the means I highly recommend the Surfers Paradise Hilton)

This weekend was the 1st weekend I’ve actually had to do with as I please and to be honest with the move and a few other things, I’d really lost my painting mojo.  However it returned with a vengeance yesterday afternoon and I’ve been on an epic painting bender ever since.  So strap yourself in for some hardcore O.G. ungreased man dolly ACTION!

So my focus has been firmly on the Reaver Titan.  I am actually aiming to have this bad boy finished in time for an 8000pt Apoc tourney at the end of November.  Up until yesterday I thought it was just a pipe dream, however after the weekends progress I am feeling confident that I may just reach that ambitious goal.  We’ll see.  I also have to paint several other things including… ahem… a Thunderhawk Gunship too… but hey, if you don’t aim high and all that….  Then I have the ADFWGA championships up in Townsville in early December too, which I’ll be taking my badest of badass Imperial Guard (seems appropriate) which I need to paint a Hydra, Manticore and several single minis for the army list I’ve prepared.  So I’ve got a lot of painting ahead of me in the next month so we’ll see if my painting mojo can stick around.  Lucky for me I got a coffee machine for my birthday, so I’m sure this will help….

So to the pics….

This post is really about masking of the Reaver in preparation to get all the iron work ready.  Being such a massive model, this has been a very time consuming process and also very masking tape consuming process too!  I’ve used the Tamiya 12mm tape on the Reaver as on the two warhounds I used 19mm, and I thought the 12mm would be a nice contrast for this model.

As you can see, there are lots of hazard stripes on this kit.  It was a huge job just getting this far.  Next came cutting in the black

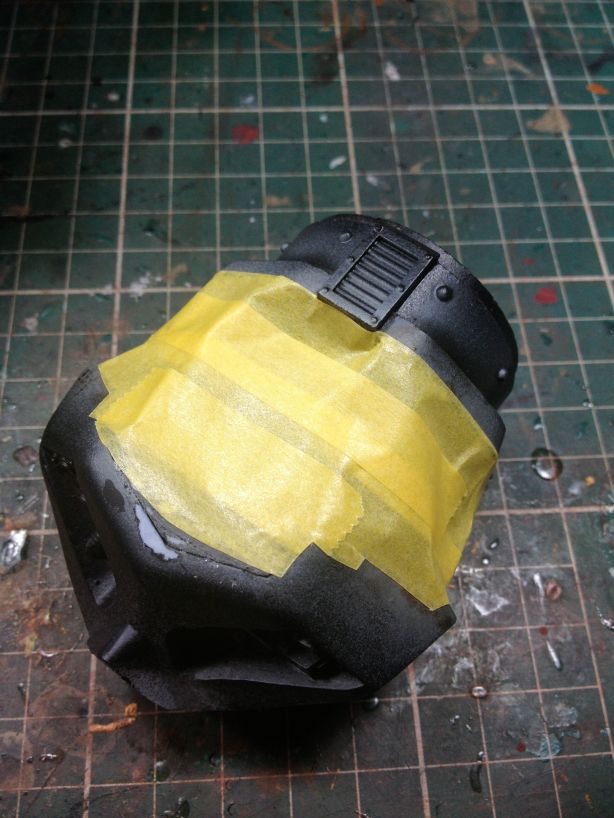
Also after I cut the black in I added a slight highlight along the seem line.  This looks quite effective once the masking tape is removed.  Once this was done I had to mask all it up, as well as all the red that is on the model too.  This was epic

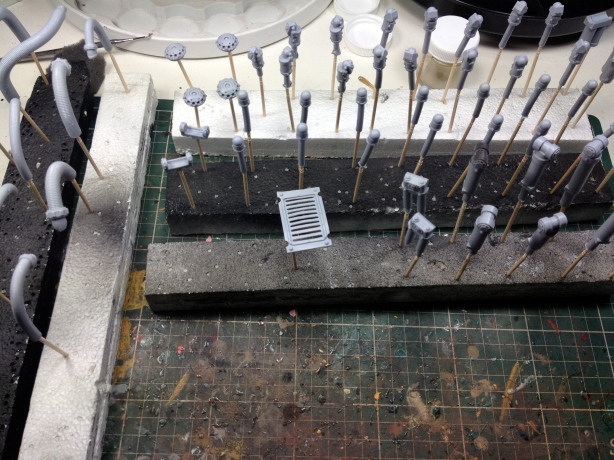
I also added all the pistons and hoses onto tooth picks ready for undercoating too.


Everything is now ready for undercoating.  I’ll knock that over tomorrow after work and if I’m really inspired get a start on the iron work too.  I expect to have quite a few posts coming up in the next few weeks.  Lets hope I can get everything painted I am too.  Its a big job, and painting all the gold trimming on the carapace is a HUGE job.  Probably the most time consuming aspect of the Titan, oh and the Imperial Eagle crest that is on the main carapace of this Titan.  So yeah, quite a bit to do.

BTW, the Thunderhawk has been ordered and I expect it in the next two weeks or so.  I am reasonably confident about getting this kit painted in time as I dont plan on painting the interior.  So it’s basically going to be a massive black model.  However I could be a little too ambitious as almost every person I’ve ever spoken to about this kit and every blog I’ve ever followed about this kit tells me that the assembly is a muther fucker.   So I may yet have to yet alter my apoc list.

Ok, thats me, I hope you’ve enjoyed this post.

See you all soon

John

Hello Everyone!

This will be a super quick post just to fill you all in on where I’m at on the Reaver Titan.  So after I finished putting the body together I moved onto masking it all up ready for paint.  This is always a fiddly aspect of a kit build and needs to be done very carefully and thoroughly using the right materials otherwise you’ll get over spray on your nicely painted work, or when you remove the mask the paint will come off with it.  So as tedious as it is, I spent a fair bit of time on this part of the build.  As you can see from the pics, there is a lot of work done here.

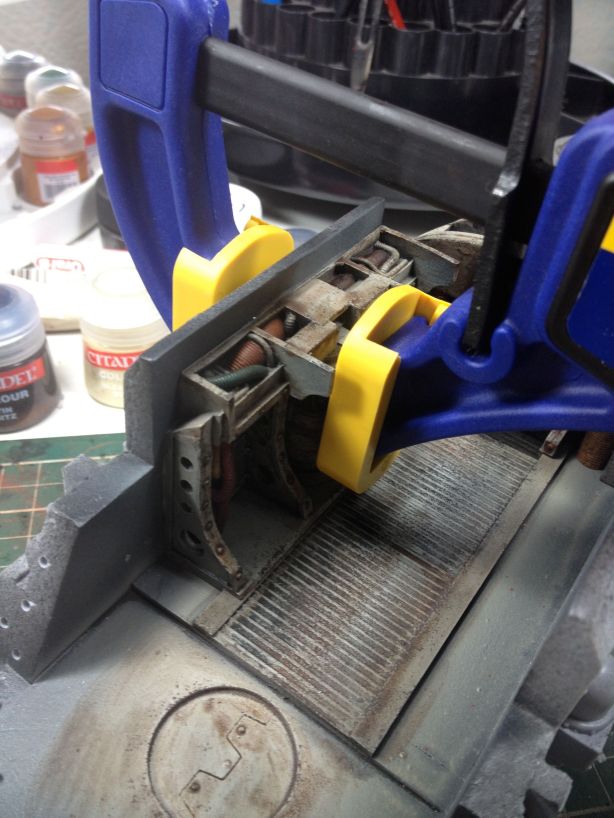
So now that most of the heavy lifting has been done in respect to the body, its now time to move onto assembling all of the main sub-assemblies for preparing to paint.  As will the body, structural integrity is a very important aspect of this build for me.  I take a lot of time considering how the kit will stand up when its complete and remain that way for a long time.  Thats why I use 2mm steel rod, 2 part epoxy resin and drill shallow holes in the male and female parts of a joint to increase surface tension and provide something for the glue to grab.  Finally, when I set the joints, I always use a large clamp to hold the parts together so that the bond is set firm with minimal gap between the two parts. As I’d already spent a fair bit of time getting the pose of the Titan correct, this process was mostly straight forward.  Just time consuming waiting for the epoxy resin to harden enough so that I could handle the parts…

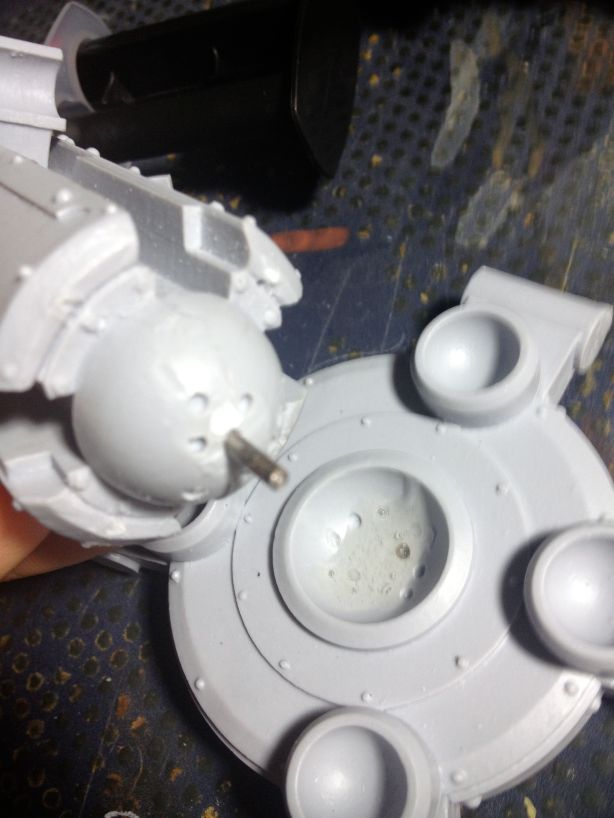
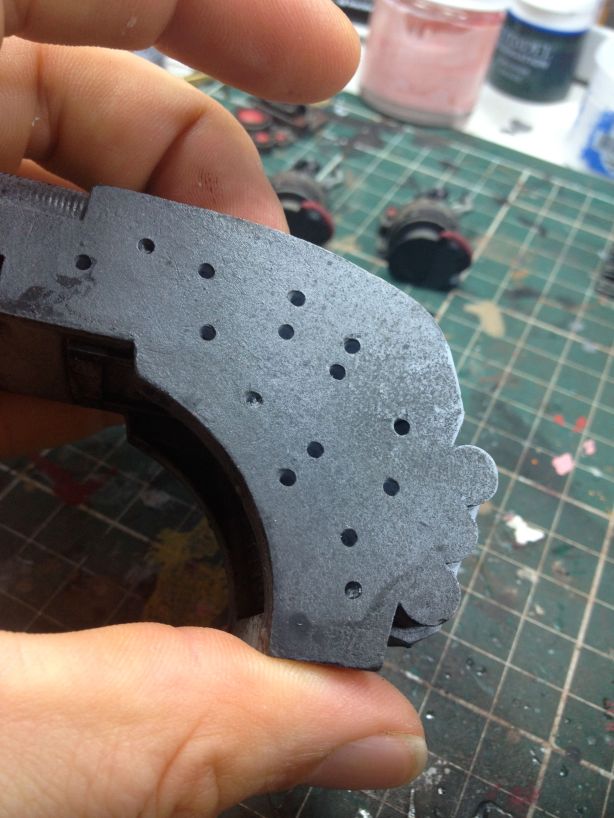
Although the toes are not structural I do want them to be firmly fixed to the foot.  So I still drilled 2 x 2mm holes in the male and female knuckle and also had a 1mm brass rod joiner.  You’ll see why in a minute.

To ensure the toes are flat I clamped down the foot while the resin was setting…  yes, thats my coffee table.  The grand final was on so I had to move locations so I could watch it…

The legs now fully assembled and standing on their own two feet.  So to speak..

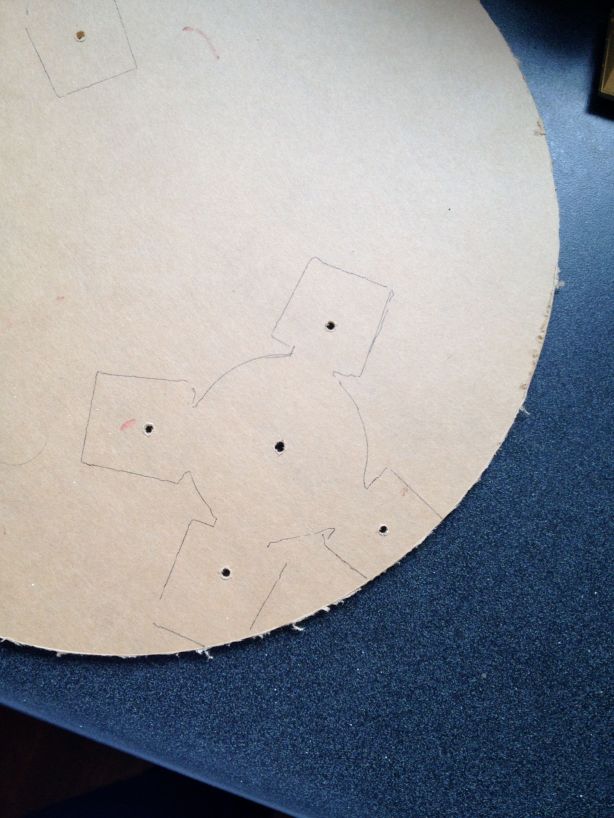
So lastly, I started with getting the base sorted out.  I wanted to get the positioning of the feet right before it was painted.

So I simply traced around each foot then marked out where I wanted each screw to be positioned then drilled a hole.  The base is a 300mm dia 3mm thick piece of clear acrylic.  The same size I used for the Warhounds.  I originally had a 450mm dia one made for the Reaver, however it turns out thats too big.  Perhaps I’ll save it for the Warlord….

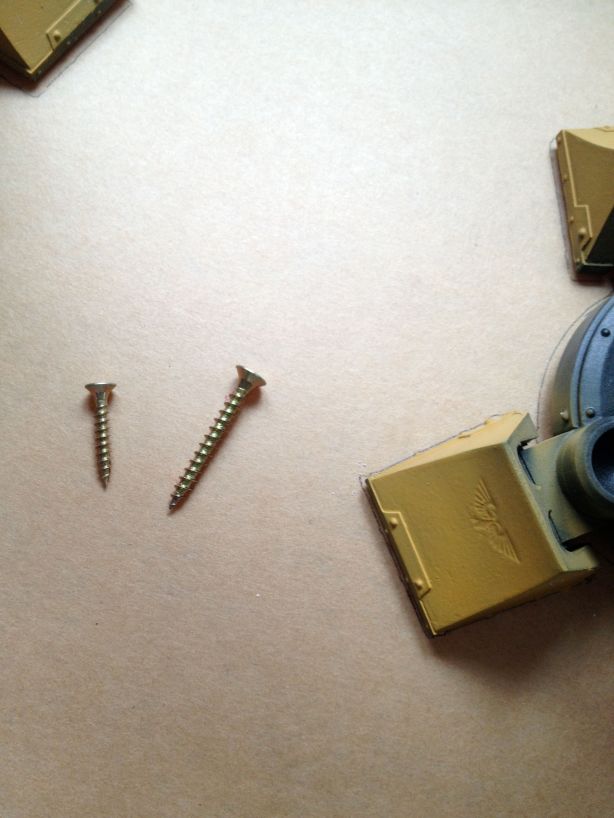
As you can see from the picture below, I am using 4 x 20mm screws for the toes, and 1 x 40mm screw for the foot.  This will ensure that the foot and ankle joint are joined even more.

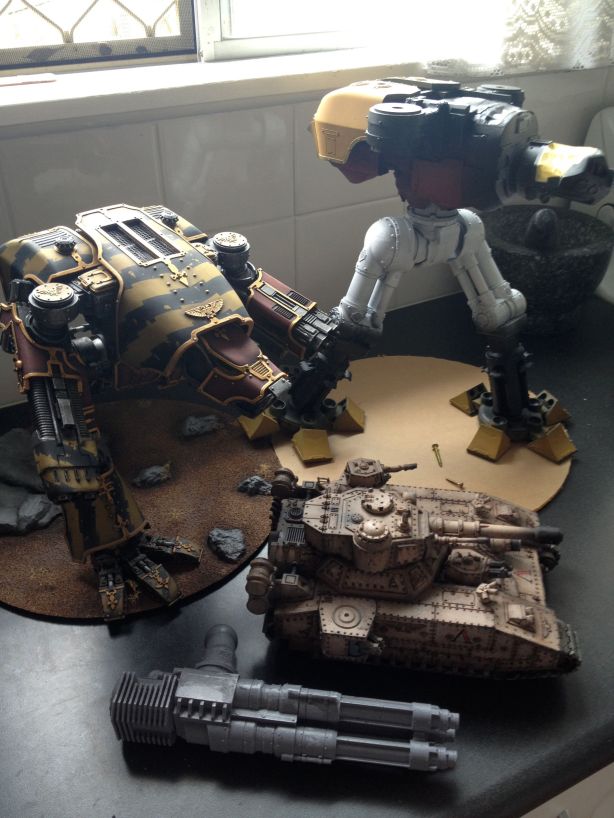
And this is a dodgy as photo just to give you an indication of the size of the Reaver.  Its massive.  That is a Baneblade super heavy tank and one of the Reaver’s weapon systems laying beside it…. Remember too that the Reaver has a carapace weapon mounted on it too…

Just to tie of this post, thanks to everyone who offered to get me some Iayden Darksun paint!  really appreciate everyones offers!  However much respect goes out to Cal who got me a nice new pot of it today.  So I’ll now be able to get on with business.  I also spoke to Tegan today from Maybe Jane about some stencils I’m getting made for this bad boy.  I’m not going to let on too much about what I’ve got planned here, but its going to be pretty awesome if I can get my idea to work.  It’ll be tricky but its worth trying so stay tuned for that one.  I should know in the next 48hrs or so if Tegan can produce what I’m after.

Ok, got packing to do now.

Comments always welcome, and thanks for looking.

John

Reaver Titan WIP

Posted: October 1, 2012 in Titans
Tags: , , ,

Hello everyone,

Its been a long weekend here and I’ve spent the last two days working on the Titan. I wanted to get as much as I can in this weekend, as next weekend I’m moving house and I still don’t know if I’ll be able to do as much painting as I’d like to in the new place as its not as big as my current one. Whatever, so I hit it pretty hard this weekend and made a pretty big dent in it until I ran out of Iayden Darksun and tried to get the new GW substitute and its a very poor match, so I’ve had to use the bro network to try and find a replacement, and until it arrives, there will be no more painting. Sad face.

As I spent most of Sunday (8am til about 11pm) painting and building, and most of Monday morning working on the Reaver, this is going to be a pretty big post, so go grab a coffee or something….

Ok to the pics!

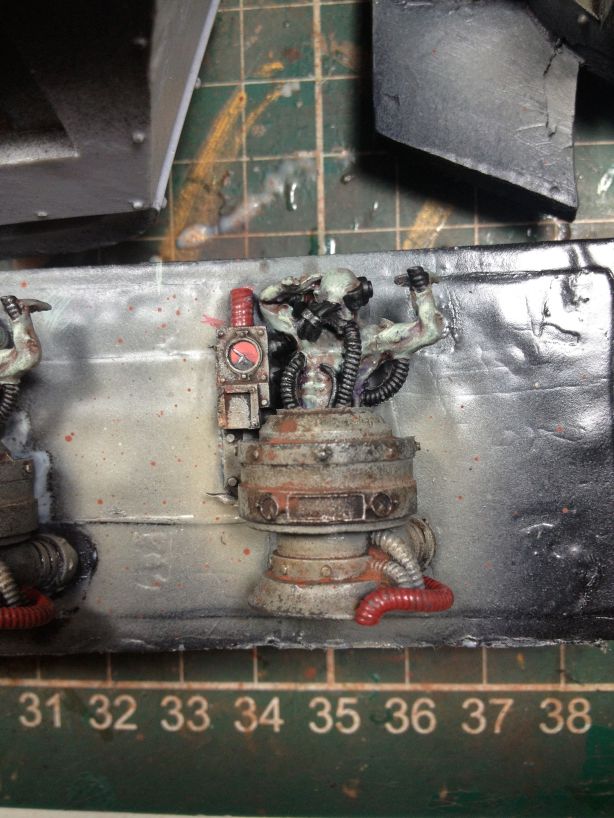
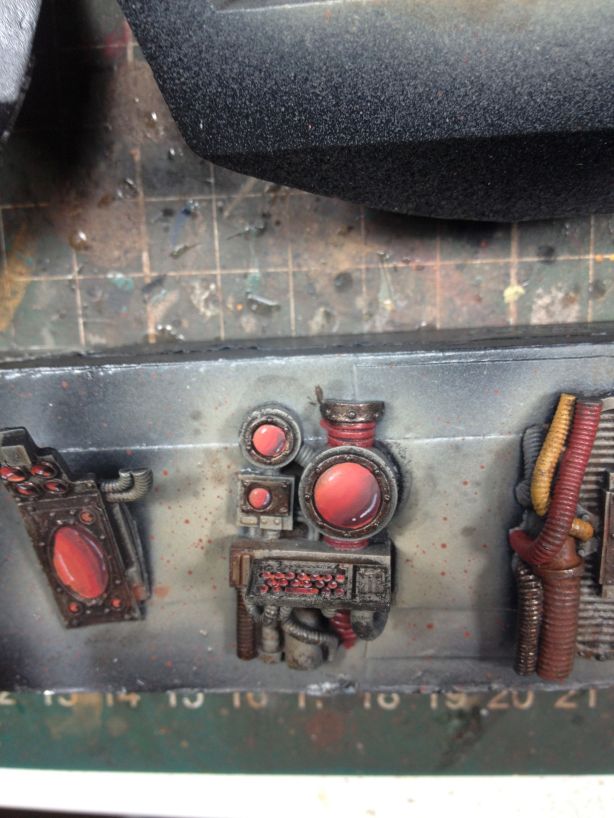
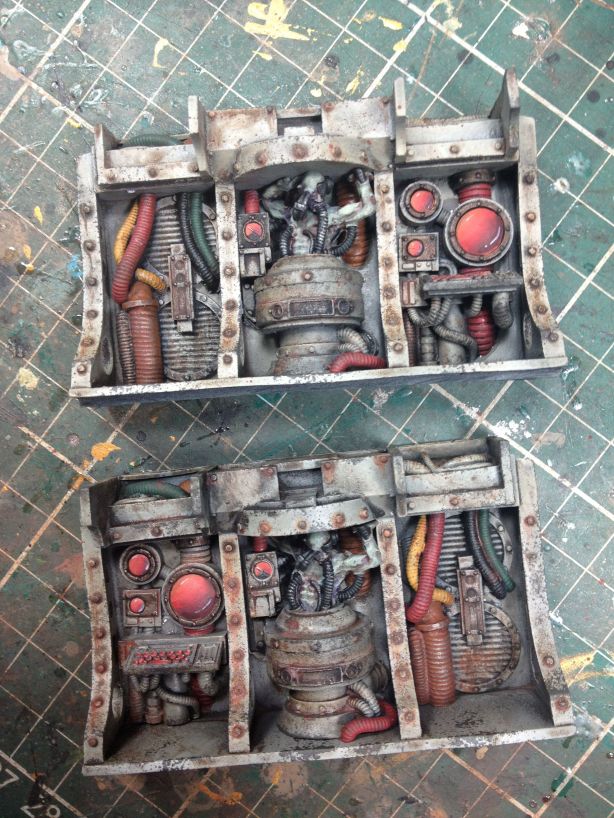
First up I had to get the interior finished before I could move onto any other area of the build. The interior of this kit is pretty amazing, so much detail. Sadly though, a lot of it is obscured from view. However its still important to me that attention is paid to it as its worth doing. So I began with under coating all the areas that were going to form the interior structure of the kit (previous post)

Then I started adding weathering to the kit. As most of these machines are ancient (particularly from this legion) I went pretty heavy on the weathering techniques.

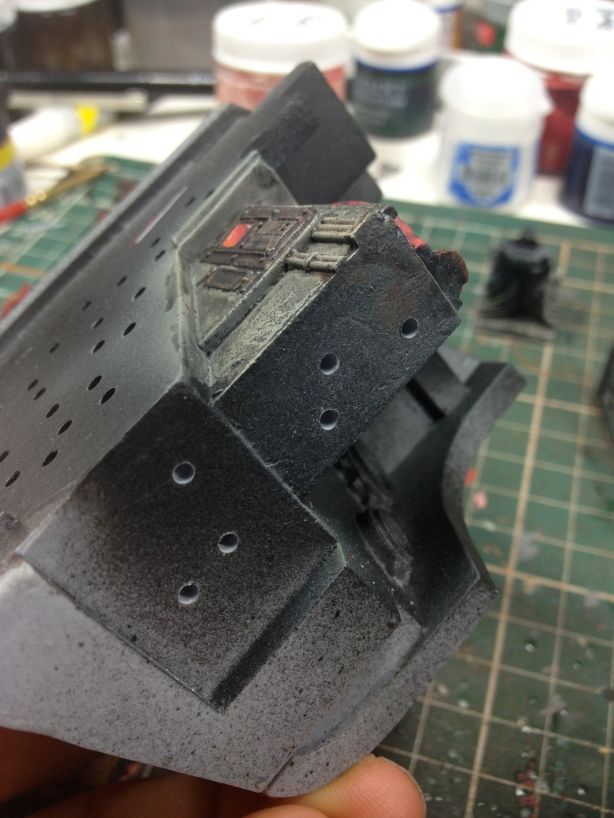
Next was assembling the body of the Reaver. This was going to be a massive job that needed to be done right. So I used a lot of clamps and drilling holes in the parts for the glue to grab. Note I used epoxy resin to glue this kit together, not super glue

To get the right bond with the parts for this build, I had to use clamps to hold the parts together while the resin was setting. This involved glueing one part together at a time. Very slow process, however it yields the best results as each part has been clamped together while the resin sets, creating a very firm bond.

Gluing the main bulkhead into the main body.

attaching the weapon system “controls” to the main body

attaching the reactor and other weapon control panel into place

Finally, adding the final part of the main body…

I think at this stage I’ll put this post up and have a part two cos this one is getting a bit out of hand and there is still a long way to go. In the next part I begin masking up all of the interior sections and then begin assembling the legs and begin painting. So until my next post, thanks for looking.

Comments welcome

John

Reaver Titan

Posted: September 20, 2012 in Titans
Tags: , , , ,

Well, I had some great news yesterday.  My Reaver Titan arrived in the mail, and holy quick delivery batman it arrived in no time at all.  I ordered it last Thursday night and it arrived Wednesday afternoon.  Amazing.  Anyways, this is a seriously massive kit.  By far the biggest I’ve ever seen for a wargaming miniature.  Weighing in at a hefty 5.2kg, this bad boy is an amazing sight to see.
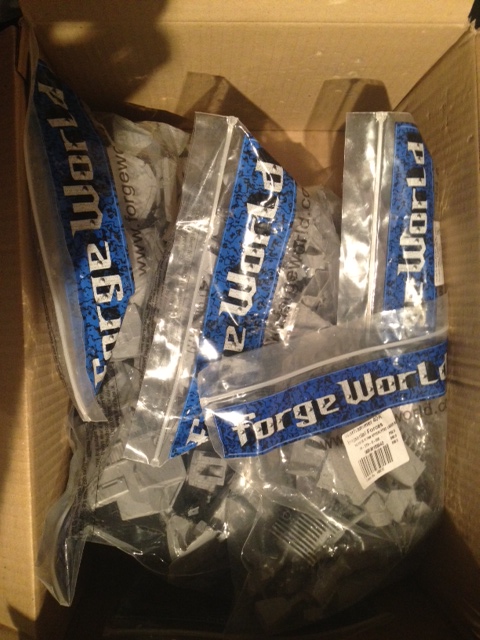
So I went with the Apoc missile launcher, the melta cannon and laser blaster weapon system load out.  As you can imagine I was pretty pumped to get a good look at it, however I didnt get home to late last night so I wasnt able to spend much time inspecting the pieces.  Did I mention there are shit loads of pieces?  Fuck me dead there are a shit tin of pieces!  Its astonishing.  So I took these photos last night just to illustrate the detail of the kit and the quality of the cast.  I’m very impressed.
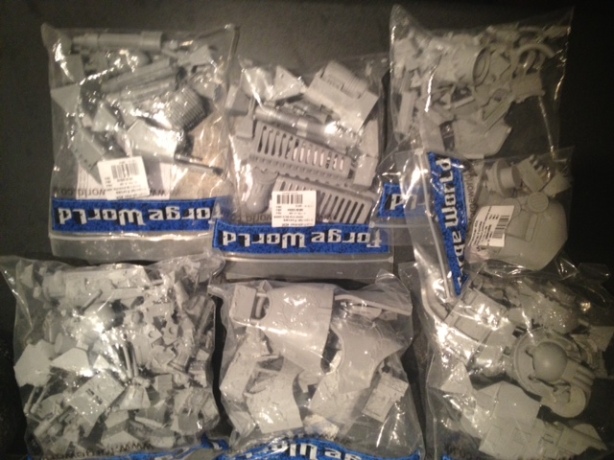
The bag on the bottom left corner is the biggest and contains all of the leg parts.  By far the most complicated aspect of the model.
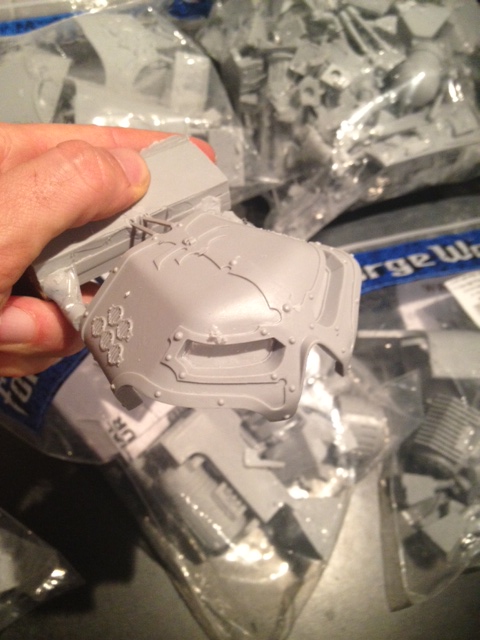
aaaahhhh we all know what that is, the very distinctive head of the Reaver.  This kit has an enormous amount of cleaning up to do.  Every piece, especially the larger pieces, have massive pour points attached to them.  I estimate that 1/4 of the weight of the box has gone  just in these pour points.
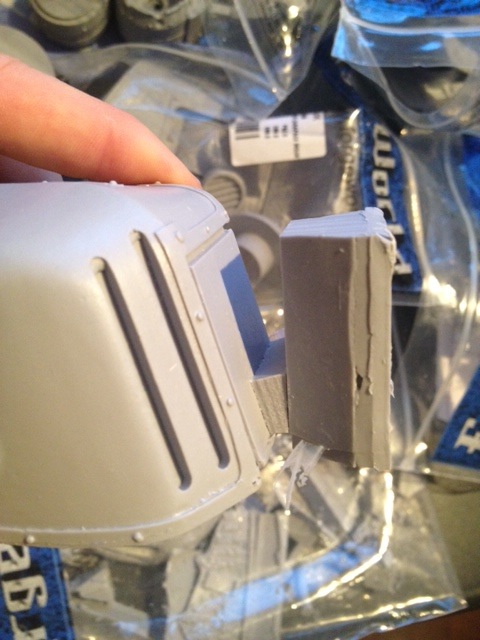
This is the Tech Priest crew member that dwells in the body of the model.  As usual Forge Worlds minis are correctly scaled, well cast and realistic.  It does have some extremely fine pieces tho and you must be careful not to loose them.
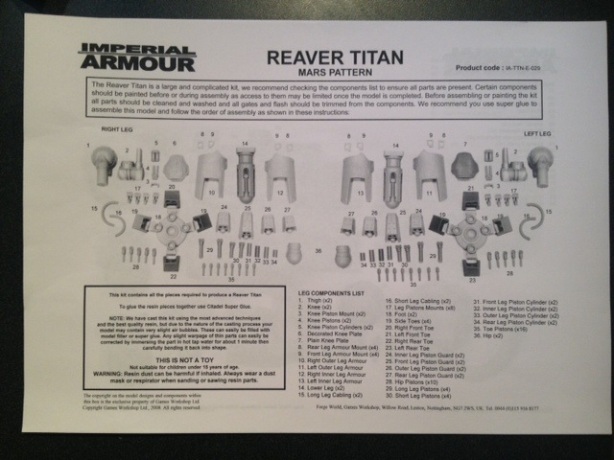
The instructions are much better than I expected and given the audience who’d buy this type of model, well laid out and thorough.

No shit


So today I went out and laid all the parts out to inspect them for any obvious casting errors and ensure that everything was present.  With such a large kit discovering that a part is missing could take many weeks or months if you are not thorough in the beginning.

 As I mentioned, the legs are by far the most complicated aspect of this model.  I was however pleased (and even more so after some further inspection) that the kit is quite posable.  I was concerned that I’d have to settle for a less than dynamic pose for this model as all the pictures I’ve ever seen of it project it as being quite ridged.  This isn’t the case, and in keeping with my other two Warhound Titans, I plan on making this kit in a rather dynamic pose too (as dynamic as you can get for a 470 tone walking city block)
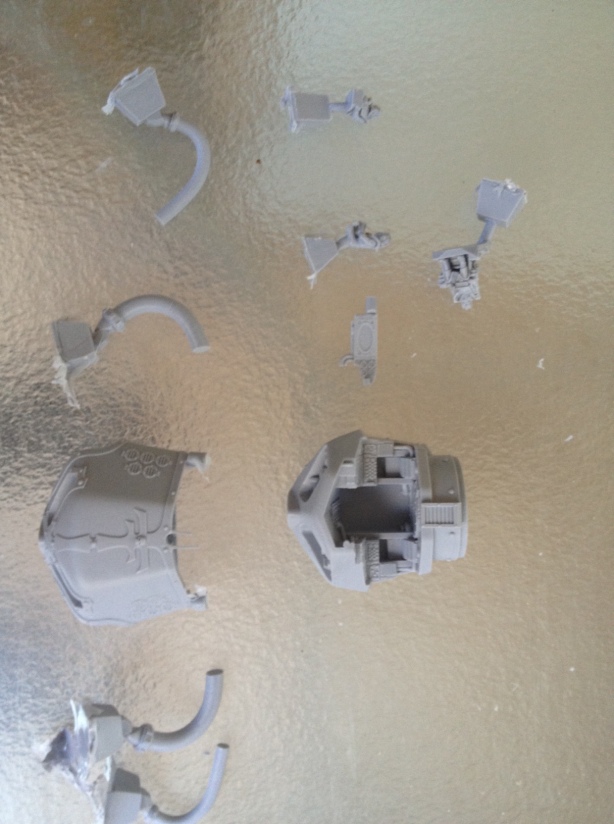
Yep, the head.  I have to say at this point, I was disappointed that this kit unlike the Warhound, doesnt come with the option to have the crew in or out of the cockpit area.  Further to that, I was under the impression that the Titan came with foot crew as well.  I’ll have to order them next time.

 This is the body and its beautifully detailed.  I’ve got some great ideas (in my head anyways) of how I’m going to paint this area.  If what I’m thinking comes out the way I see it in my minds eye, its going to be the illest Reaver Titan around

This is the chassis that goes under the body carapace.  I was really impressed with the way the hip area works on this model.  Again, allaying my fears of it having only limited posing ability.

Cool little bits of detail that you can add on to the kit to personalise it more.  Interestingly, the Warhound has these extras too, however they are different moulds.
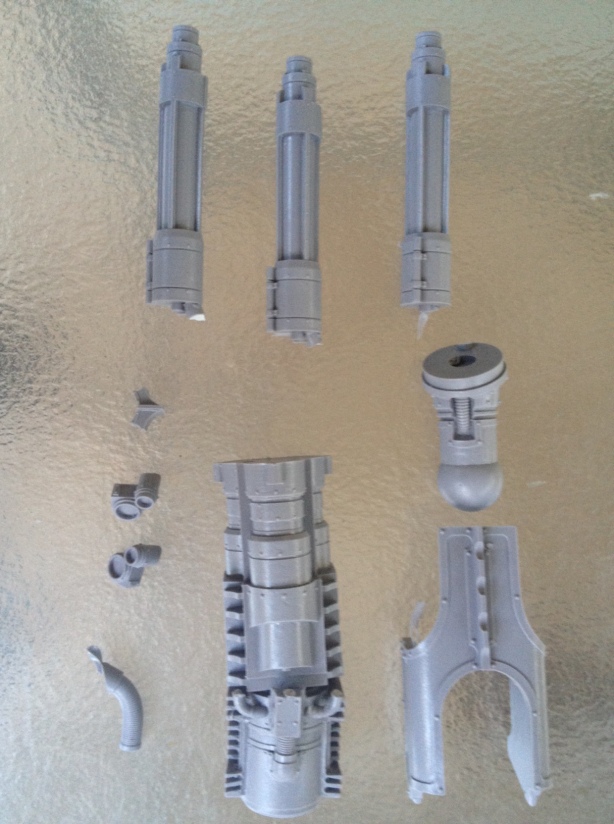
The 1st of the Reaver Titans weapon systems.  The Laser Blaster.  Nice

Again, much more impressed with this now that I’ve been able to see it unassembled and unpainted.  A lot more detail that I was expecting.
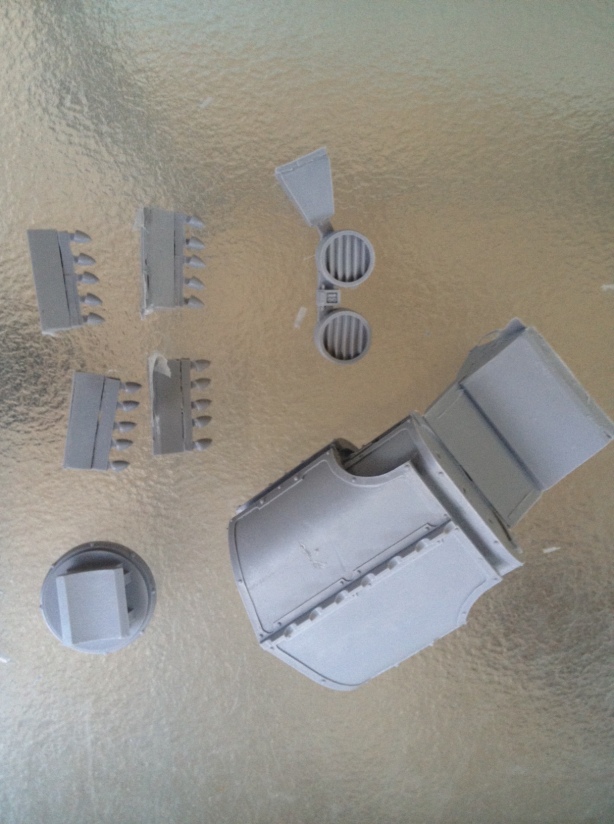
Last but not least, the Apoc missile launcher.  This is one solid piece of resin.  Insane.  It weighs a shit load.

Ok, so I am extremely pleased with this kit.  My level of enthusiasm  to work on it is very high and expect to see a lot of rapid development in the coming weeks.  I have Titans of War on this weekend so I wont be able to do much work on it, but come next week I’ll be hitting it hard.  Firstly cleaning it all up with my trusty Dremmel and then test fitting to get the pose right.  It looks like I’m going to have to paint it in lots of pieces to get the level of finish I want on the paint job.  Much like when I painted the Warhounds, however there is much more detail here and the level of complexity is far greater.

I hope you’re looking forward to this journey as much as I am, I’ve been thinking about out how I’m going to do this kit for some time and I have high expectations on how its going to look completed.

John

Warhound Titan Finished!

Posted: July 22, 2012 in Titans
Tags: , , ,

Good Morning Fine People,

Well, late yesterday afternoon after a massive painting bender on Friday afternoon/night, and most of Saturday afternoon, I finished the 2nd Warhound Titan.  Ok enough chit chat, lets get to the pics…


Ok thats it.  Its been an epic journey and I’m now 2/3’s of the way there, with just a Reaver left to go.  Then my Titan painting days are over.  These projects are MASSIVE.  So many parts, and such complicated models.  But truly remarkable.

So being Mars pattern Titans, from the Fire Wasp Legion (Legio Ignatum) its only fitting to name them after two famous Warhound Titans from that Legion.  Jure Divenu (Devine Law) & Defensor Fidei (Defender of the Faith).  The inscription on Defensor Fidei’s lower leg is Dileas gu bas (Faithful unto Death).

I hope you enjoy the pics.  Its been a pleasure painting these two great models, as much as it has been at time a test of my patience.  But I am very pleased with how they have both come out, and the presence they will have on any battlefield I take them too.

Anyways, hope this has made your Sunday a little bit more enjoyable.

Comments always welcome.

John


Titan WIP – Update

Posted: July 18, 2012 in Titans
Tags: , ,

Hello fine people,

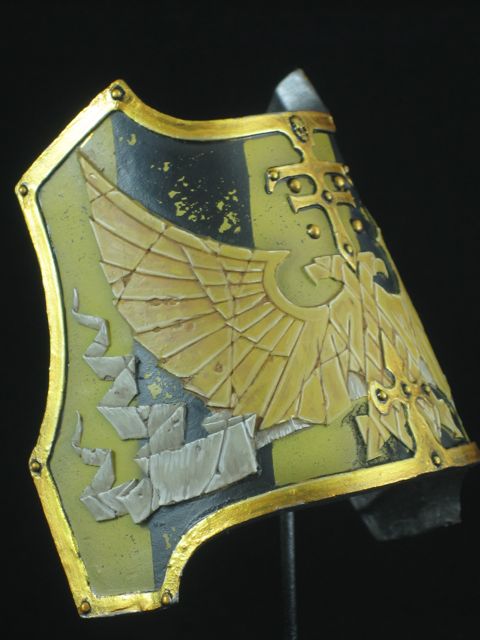
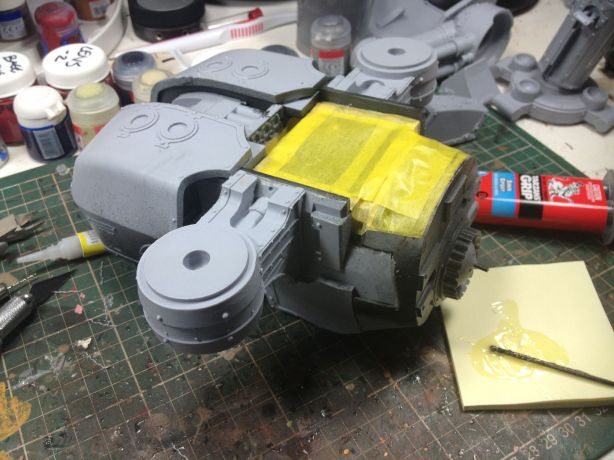
A work in progress shot of the Titan.  This is the lower armour of the right leg.  I worked on the whole Titan today, but this is just the part which I thought I’d post up.  Providing something doesn’t come up on the weekend, I’ll be hitting the Titan pretty hard.  Hope you enjoy!

Comments always welcome

John

Hello fine people,

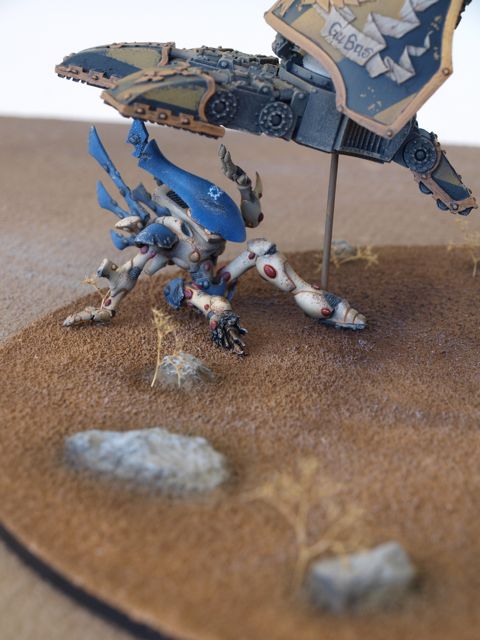
Just a very quick update.  I have just about finished the crippled Eldar Wraithlord for the base of my 2nd Warhound Titan.  Here is a work in progress shot for you

I know that some of you might not know what I’m going on about here, so this is a pic to help contextualise whats going on

 So its starting to look pretty good.  I was a bit worried about how the Wraithlord would come out, particularly given how most Eldar’s paint schemes are typically portrayed.  However, I am quite pleased with how its ended up.  I’ve given myself til the 26th of July to get this Titan finished.  Personally I think I’ll piss it in, but we’ll see.

Ok, I’m off to bed, comments always welcome

Regards

John

This is the link to my 4th WargamerAU diary, Deus ex Machina (God Machine)  This is the smallest of the 40k scale Titans, and its still massive.  This is easily the most complicated resin model I’ve ever assembled and painted.  I made it even more difficult for myself because of the pose I wanted it to have.  I wanted it to be mid stride as if it was running.  I’ve never seen a Warhound or any other Imperial Titan for that matter in a running pose.  They are usually just standing there… pretty boring.
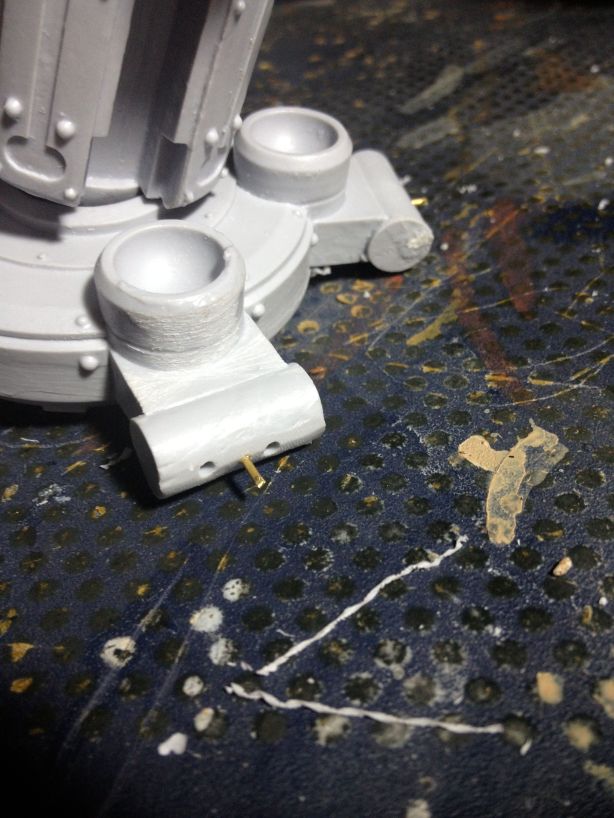
This was a seriously fun project though, I have to admit.  The final result is very pleasing too…  I liked it so much I’m painting another, and another class of Titan called a Reaver.  So keep a look out for it.

I’ve only used it once in a game, and it was heaps of fun.  It really owns the board, and as I said, its the smallest of the Titans, so I’m looking forward to seeing how the Reaver goes.