Good afternoon everyone,
Today is a great day, I’ve finally finished a project I’ve wanted to do for the longest time and it’s the second of three posts I promised you before I return to studies. A Zone Mortalis board. This blog is festooned with some pretty ambitious scenery/table making projects. Many of you probably don’t know, but I sold, yes sold, all of my boards late in 2014. Fear not, they’ve gone to a very good home, and I routinely see pictures of them being put to good use. Why did I sell them? Well, by taking terrain making to such an extreme (by that I mean a dude tooling around in his garage, not a professional design studio) I learnt some very good lessons.
The lessons boil down into striking a balance between three competing, inter-related issues. I’ll call them the dark triad. Playability, robustness & storage.
Playability. One of the main reasons I wanted to make some awesome terrain in the first place, many years ago, is because we spend so much time and energy on our armies. Then we go and play games on a piece of MDF with a few (poorly) painted pieces of styrofoam, aquarium plants and a hill here and there thrown on it (if we’re lucky). Gaming is a social, visual and intellectual pursuit. It’s a noble hobby and for me, having terrain that matches the time we put into the miniatures we game with is just as important. However gaming is an abstraction of reality. Therefore, boundaries need to be easily and identifiably established between say where a road ends, and a crater begins. What this boils down to is drawing a line between making a massive diorama to play on, versus a wargaming table. A wargaming table needs zones that can be segregated physically and visually as clearly as possible to conform to the rules system that is being used. This means making a compromise between a board that looks amazing (a massive diorama) but is difficult to establish where a road ends and a crater begins and a board that can be played on without confusion over where a piece of terrain starts and ends (a wargaming table). After making boards previously that were a little too close to the diorama side of the house, I now can see that keeping an eye on playability is an important factor when designing and constructing a wargaming table. Which leads me to my next point.
Robustness. In a sentence, the cityscape boards I made were not robust. Yes they looked good, yes there were tones of fun to play on, yes I loved making them (some of the best modelling experiences I’ve had actually). But they were very fragile (even though I tried to make them durable). This lead to breaks, and worst of all, friends were worried that when they played on them they might damage something. This lead to trepidation and a reluctance to put miniatures in certain positions because they were difficult to get access/retrieve said miniature. It also meant that packing up the board and moving it was a massive logistical exercise. Particularly because I couldn’t just place all the scenery in a storage box and leave it at that. It had to go in a certain way, which isn’t a very economical use of space, and even then, breakages were abound. So, yes a spiral stair case looks badass, was a great modelling challenge, but totally impractical because it was very fragile due to all of the hand rails and putting miniatures on it was a massive pain in the ass. So again, making a compromise between having a nice looking piece of terrain, and one that can stand up to the rigors and demands of being used during gaming, moved from one location to another for a game is critical. That balance that needs to be struck is again in favour of being first and foremost a robust piece of scenery, then a good looking one after that.
Storage. Lets face it, we all have lots of stuff these days. Just our armies alone can take up a considerable amount of space. Now imagine the storage space needed for 6, 2′ x 2′ tiles plus the terrain that goes on them. Unless you’re fortunate enough to have a permanent gaming room with a table and shelving set up, storing the board tiles and scenery is challenging. This is compounded when you want to transport it all from one location to another.
So, this has lead me to the conclusion that wargaming scenery needs to be visually appealing, but not over the top so that it compromises its robustness, playable and finally, easy to store when not in use or being transported. I intend on making one or two more boards (an epic scale 30k board, think Istvaan III, Choral City post fire storm and a ruined/abandoned/city of death style board for 30k). When designing and constructing these boards, striking a balance between the dark triad, with more weight being placed on playability, robustness and storage will be the order of the day.
Well, with that said, here is the first board I’ve produced in a long time. This scenery ticks all of the boxes. It’s very playable, no confusion where something starts and ends, plus it looks amazing. It’s robust, seriously, this stuff (whatever resin FW uses) is strong. As a side note, I suspected that the more recent castings of these tiles has more resin in it than older ones. A few weekends ago, I took a new board piece along to a tournament I was playing in with a small set of scales, knowing that it would have a Zone Mortalis table. Anyway, the old piece of the same design tile weighed in at 720g, while the new piece weighed in at 980g. Thats a significant difference. It is also apparent in FW’s larger Realm of Battle tiles. If you recall from previous posts, there were significant warpage issues with the older tiles. Well, not any more. As a part of this purchase, I also got one of the new Industrial Complex tiles because I liked the detail on them and wanted to use it as scatter terrain for the board. Anyway, it is seriously heavy (and very well packed too). So good work to FW for improving their products. These things are tough.
They’re also easy to store, I can fit the entire 4’x6′ board in two 500mm cardboard boxes. Nice. This has gotten me thinking about other board systems that use a 12″x12″ tiles, as opposed to FW’s 24″x24″ system (Secret Weapon I’m looking at you). It seems to be a lot more transportable and easier to use and manage.
So on to the pics. As you know, I really like my boards to tell a story. This is meant to be a flight deck of sorts on the Conqueror. I took inspiration from FW’s amazing display board they did a few years back on a similar theme. 


All World Eater’s ships need a dueling arena don’t they? Plus it just looks cool stencilled onto a tile. I plan on making a frame for this one tile, so that it resembles a pit when not being used on a ZM board. For Primarch/named character fights that have become fashionable at clubs and tournaments recently. Two men go in, one man comes out, n’that… 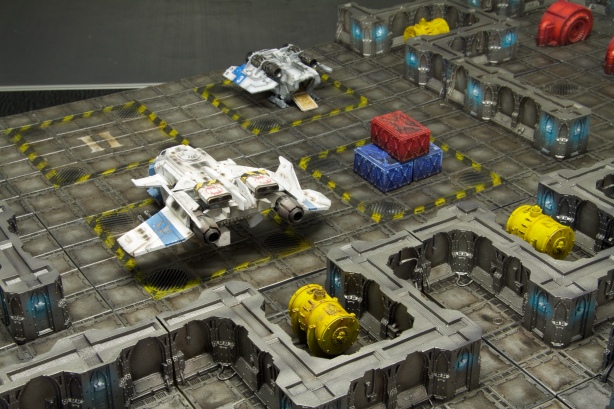
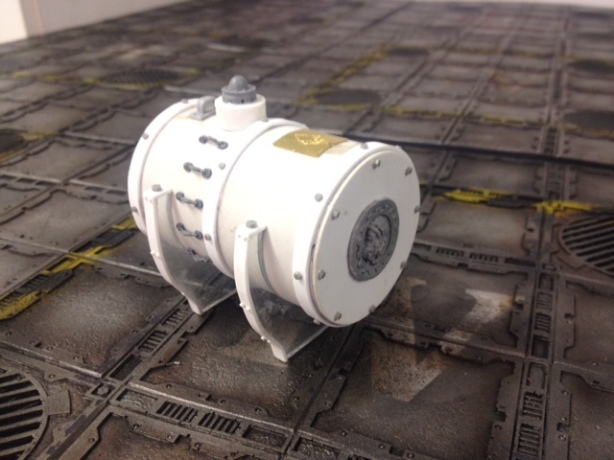
I actually made those fuel pods myself. If you cast your mind back a few years, FW actually made a similar one. I tried getting hold of one from eBay, but it sold for $250AUD!!!. So I thought, just make one… it’ll be fun, and a lot less expensive. So I did. Here is what the original looked like. I think the piece of PVC pipe was the most expensive bit ($2). Moral of the story, buy FW terrain, it’s a good investment.
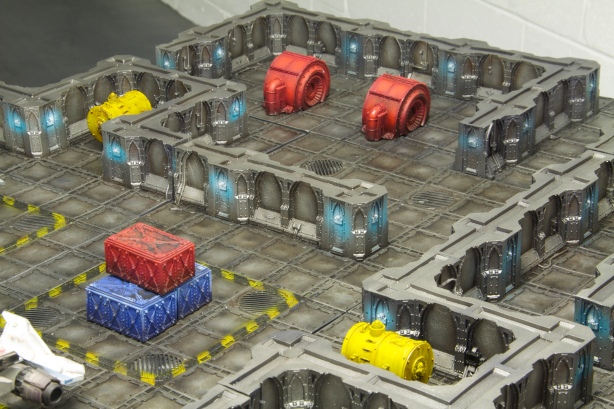
As I mentioned, I cut off some random bits of detail from a FW tile to have as scatter terrain (see those generator things?) I also made up some containers from old Necromunda bulkheads. Good times.
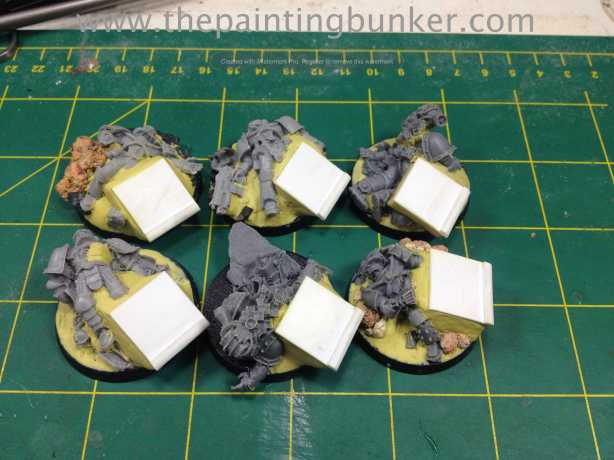
Ok, thats me for the time being. My next project is on the bench and under coated. Want to see it?
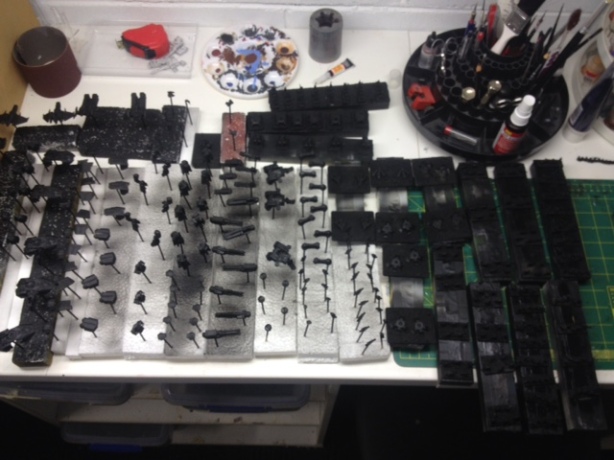
What could it be?

So next weekend I’m off to Canberra for CanCon to play in an Epic Armageddon comp. It should be interesting. I’ll do a short post on it with some pics.
Until then, take care
John
 As you can see, its been faithfully reproduced.


