Hello everyone!
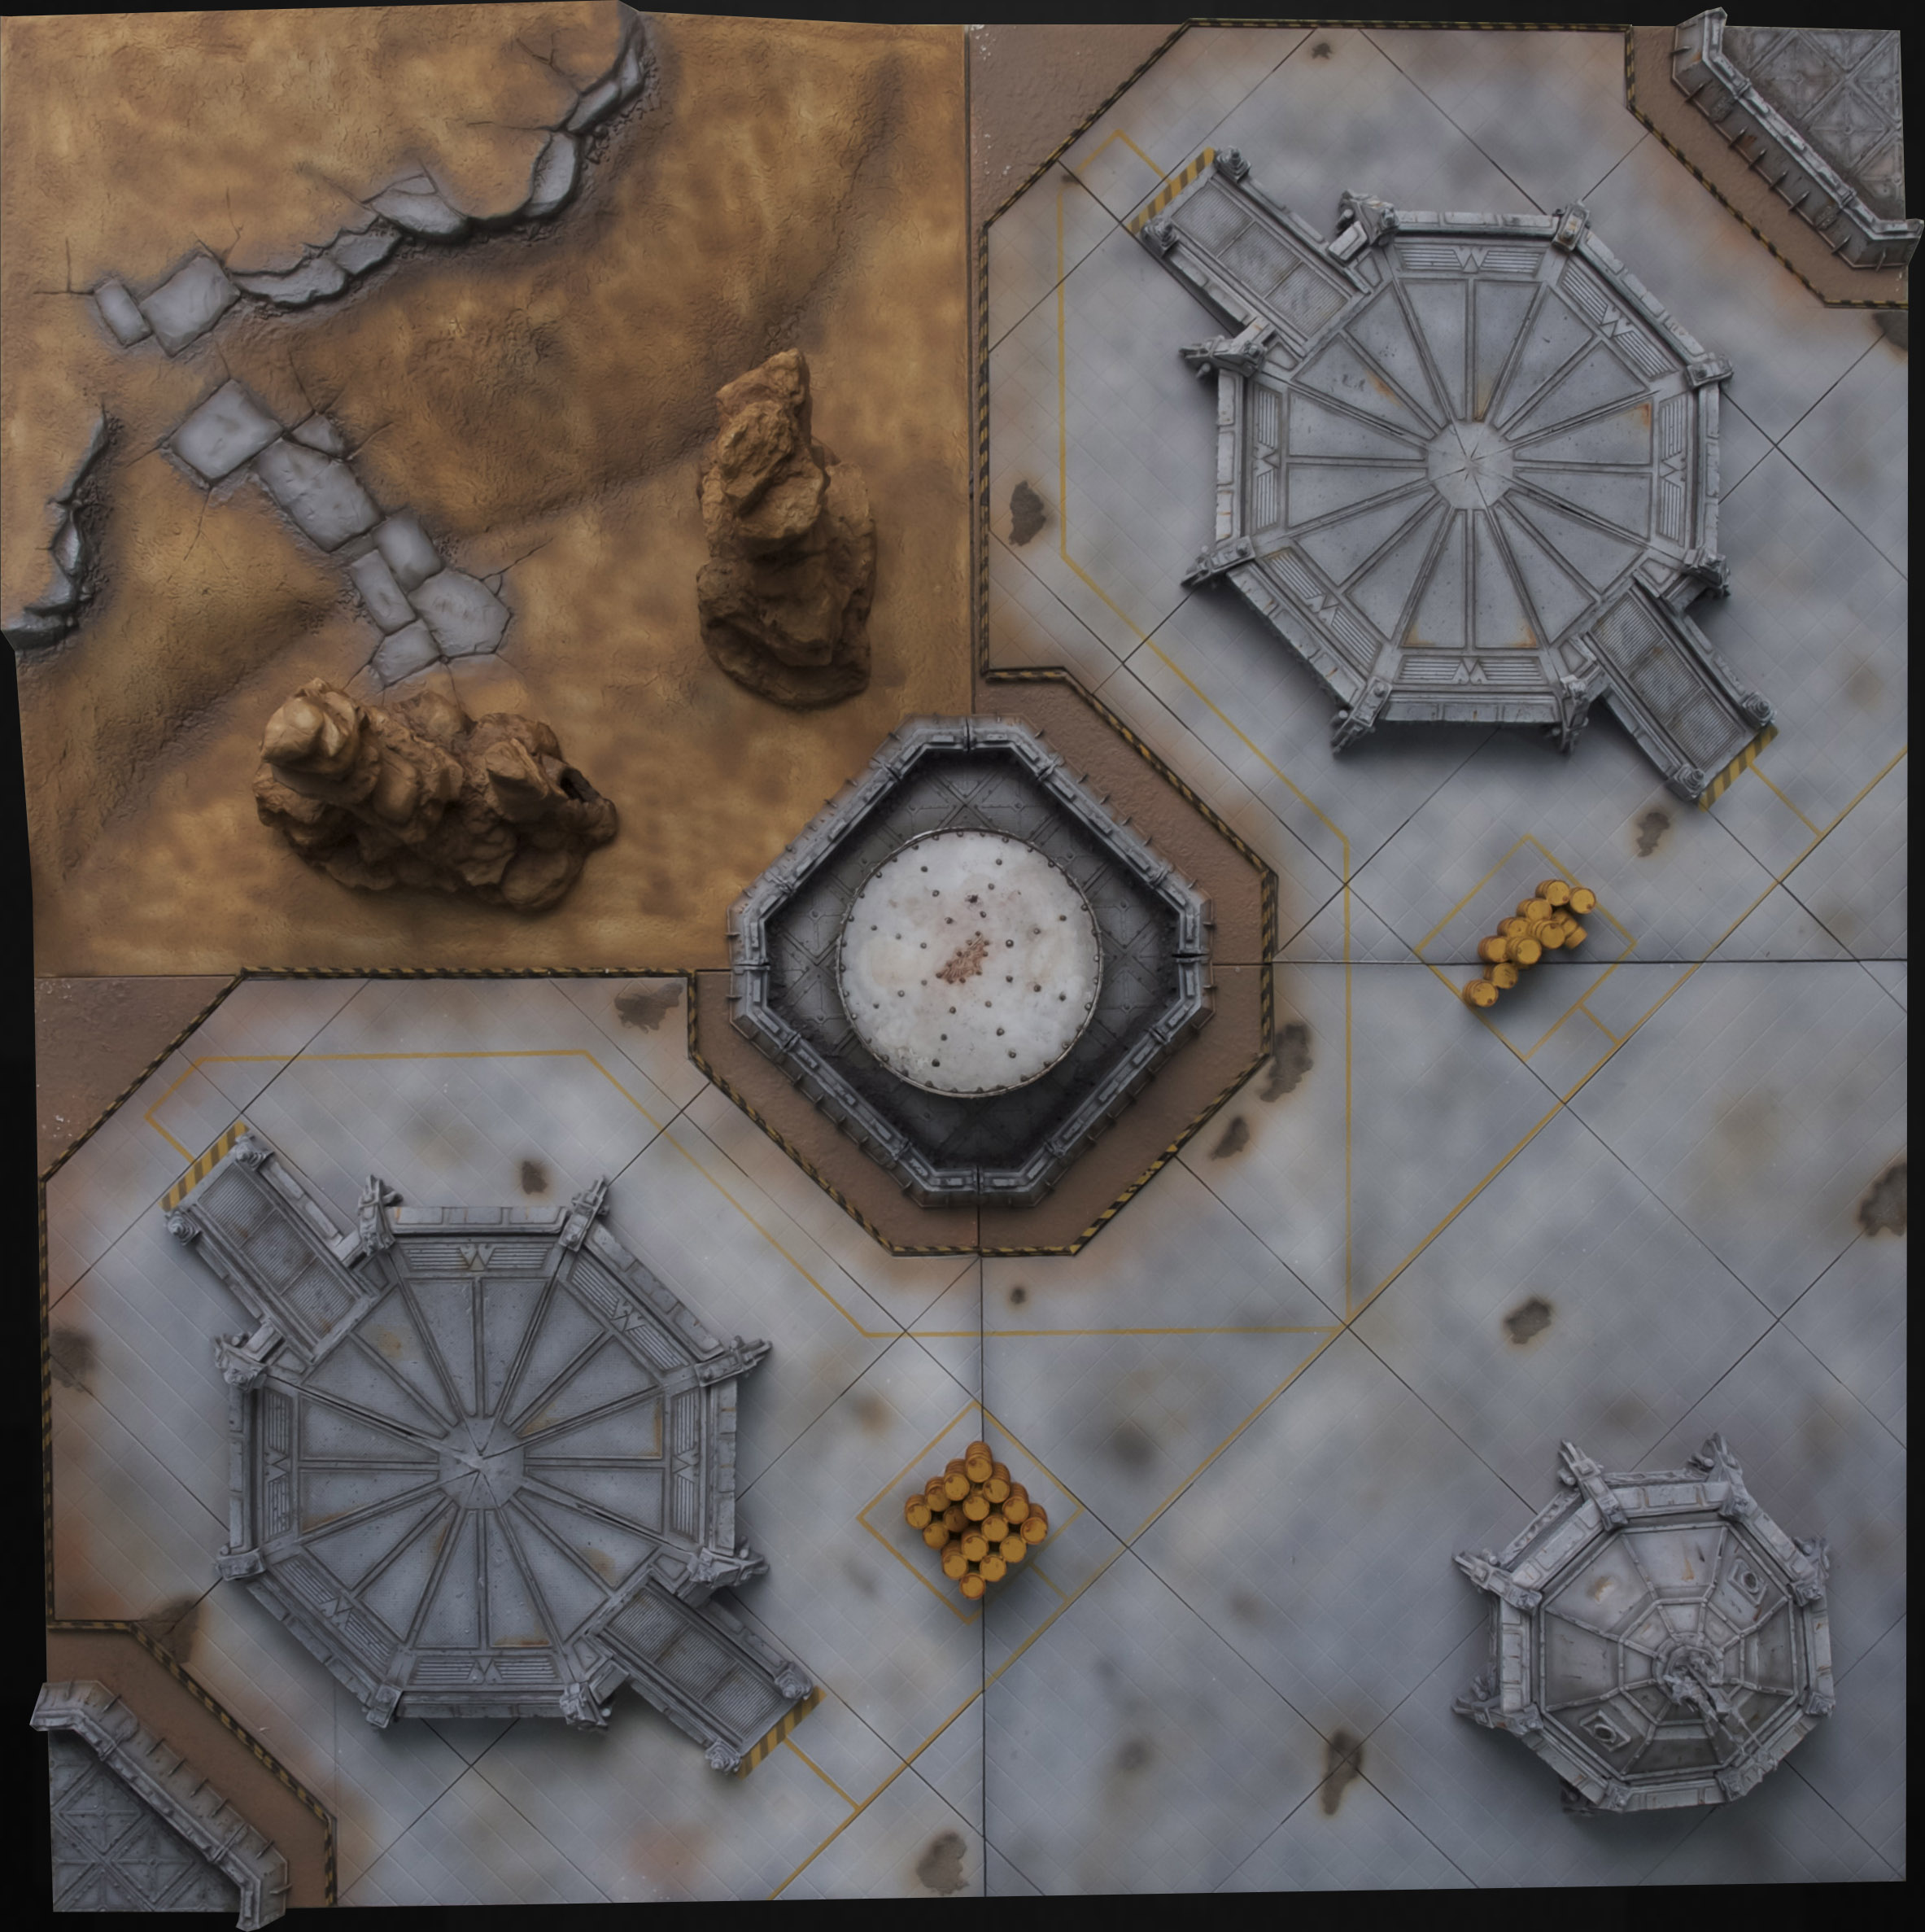
Well, as you can probably tell from the flavour of my last few posts I’ve not been doing much mini painting… Instead I’ve been making scenery. This is all in preparation for the tournament I’m running shortly. I wanted to have five 4 x 4 tables for the tournament. I had four done. The two 4 x 4 Forge World Realm of Battle boards I did some time ago. I admit I only did a 6 x 4 board, however I did have 8 2 x 2 tiles. I finished off the last two tiles recently, just haven’t taken any pics of them… soz. The Anhpelion Base, and a Zone Mortalis.
I needed a fifth.
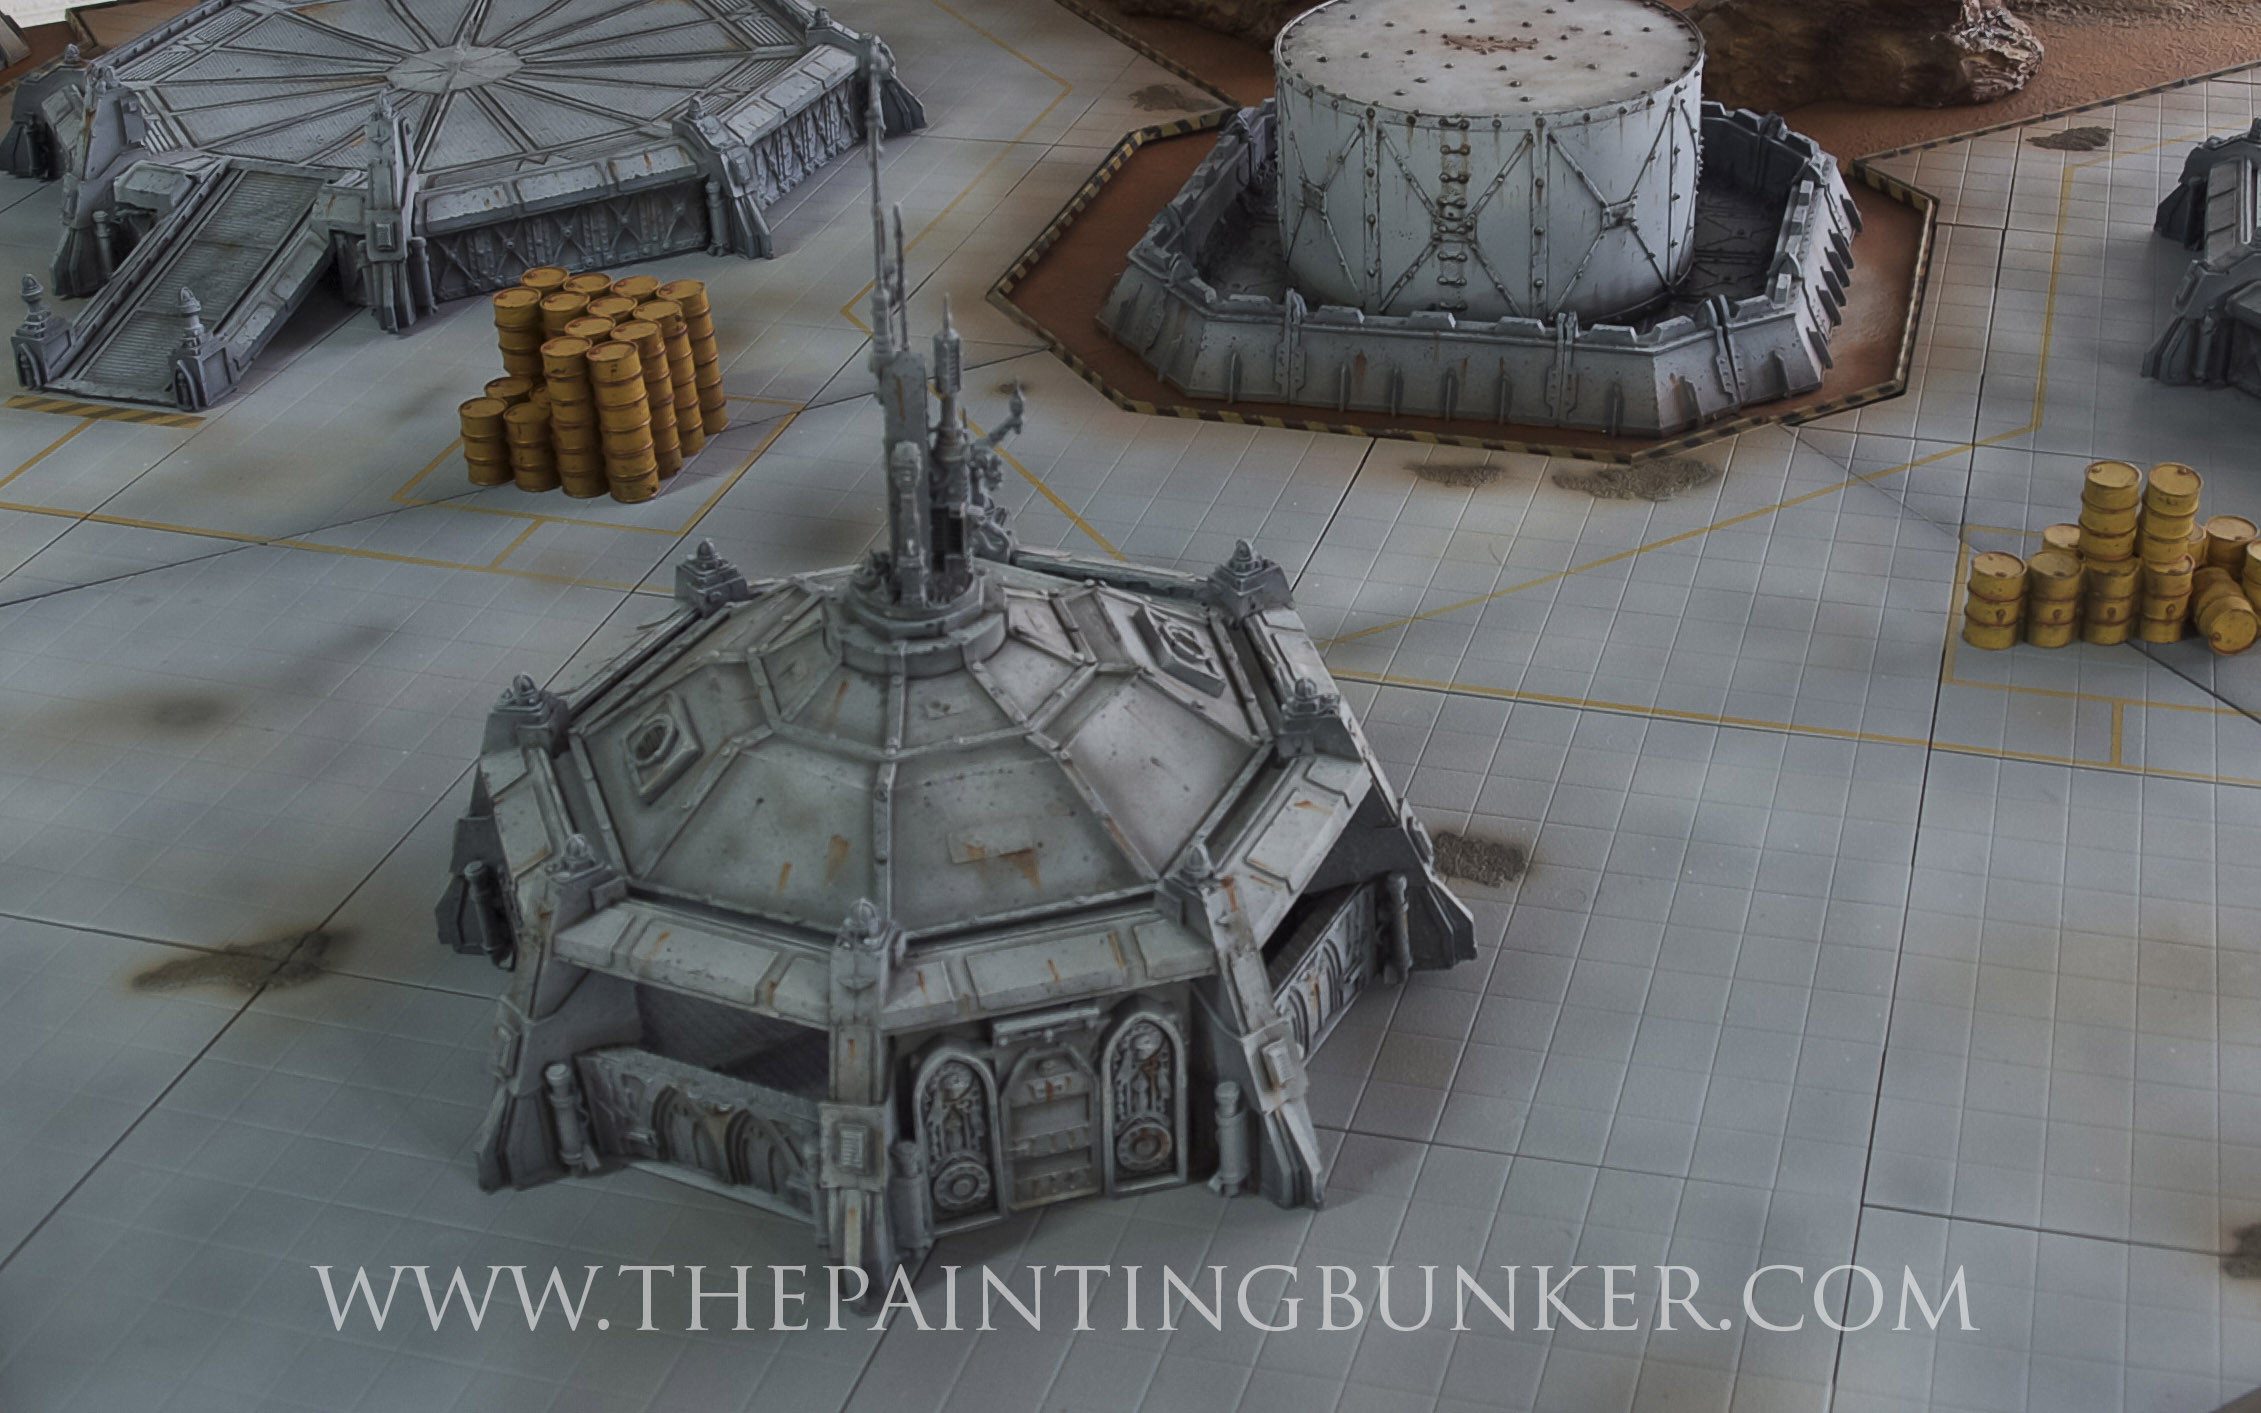
Going with my theme of buildings rather than ruins, I decided to make an Air Strip. Remember the Forge World Aeronautica Imperialis Air Field they did for Master Class 1 ( I think)?

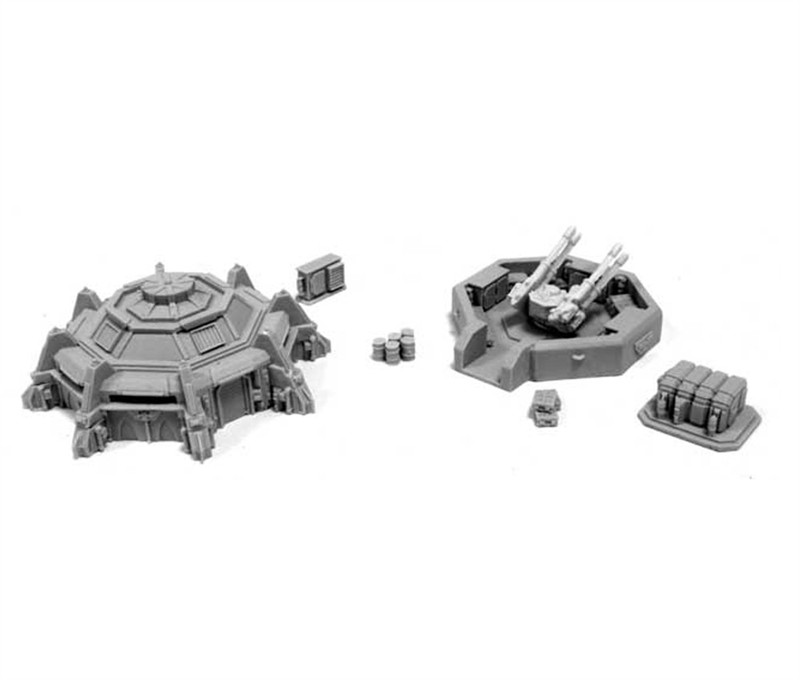
Well, I sort of wanted to do something like that but on a 40k scale. Seeing as I had some left over bits from my Anphelion Base I decided to go with that. Something I was really anxious to try out was to make a 40k scale one of these… I think its a Forge World bunker of sorts for Epic scale. You can see it in the picture above too.

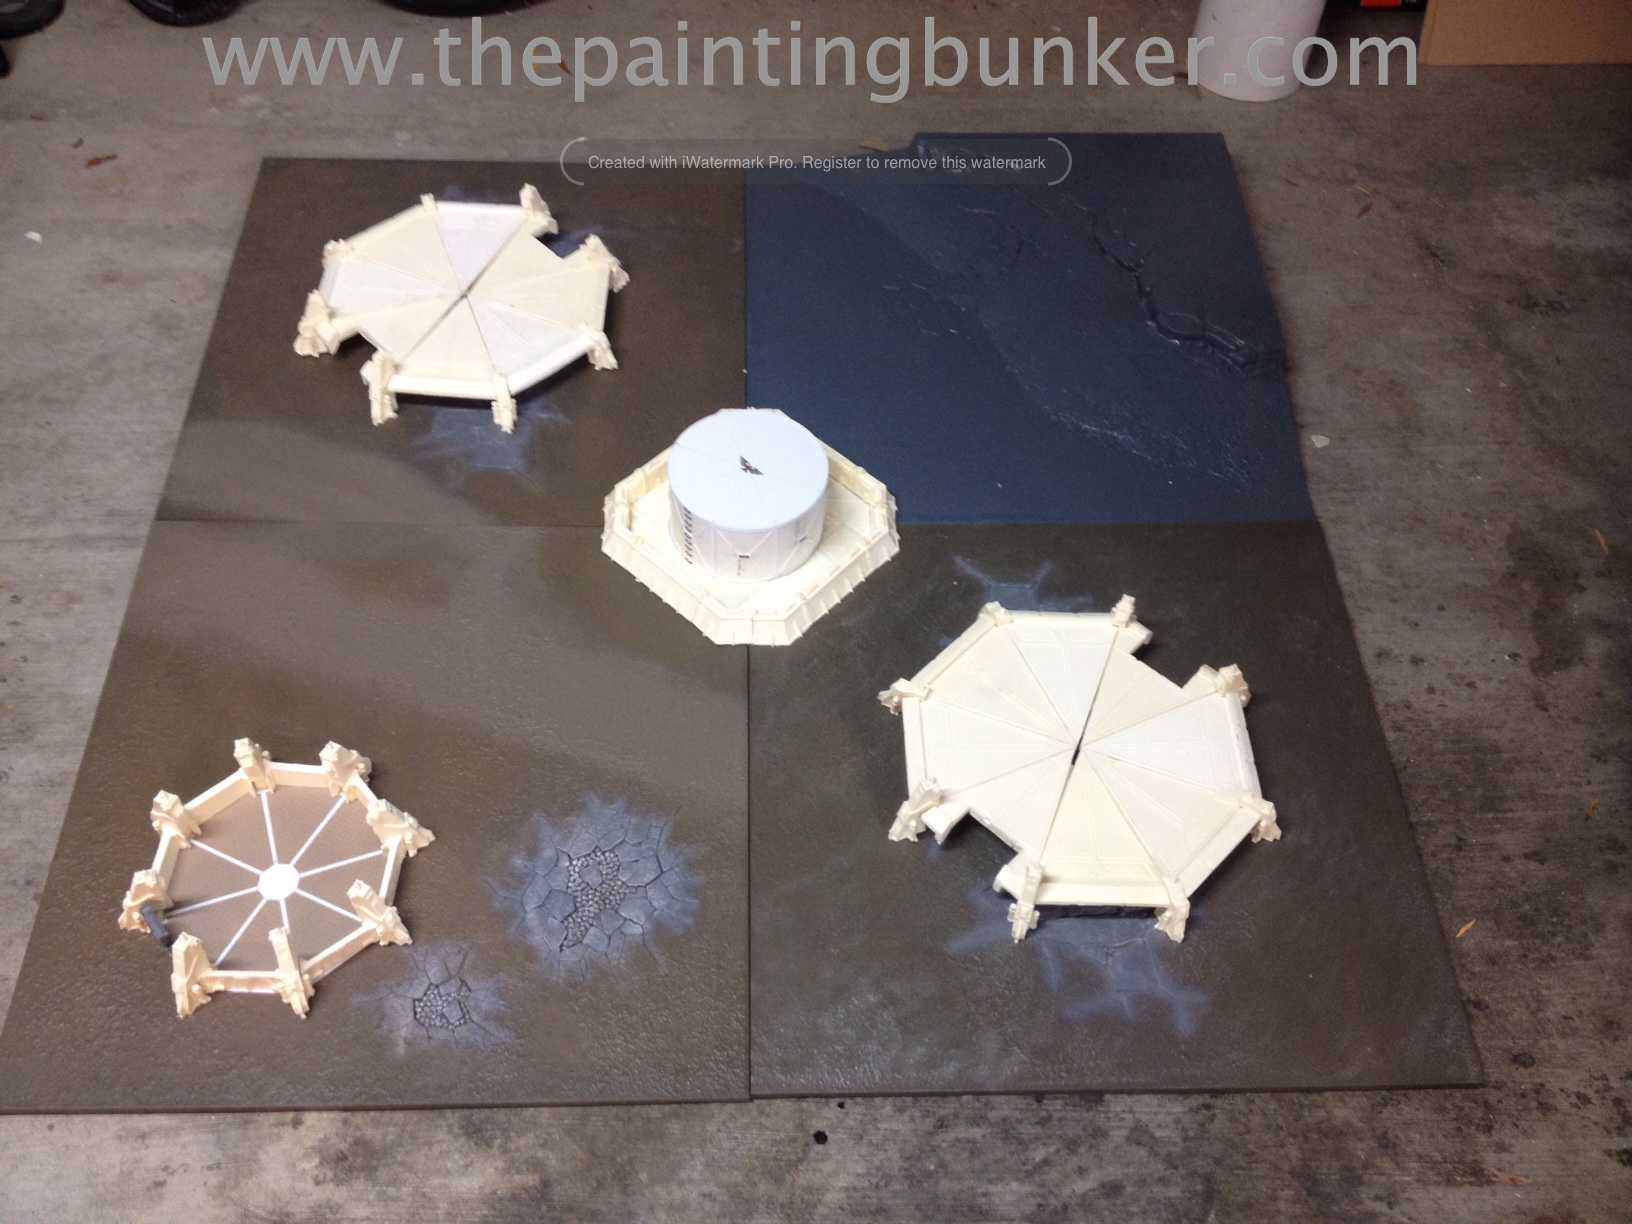
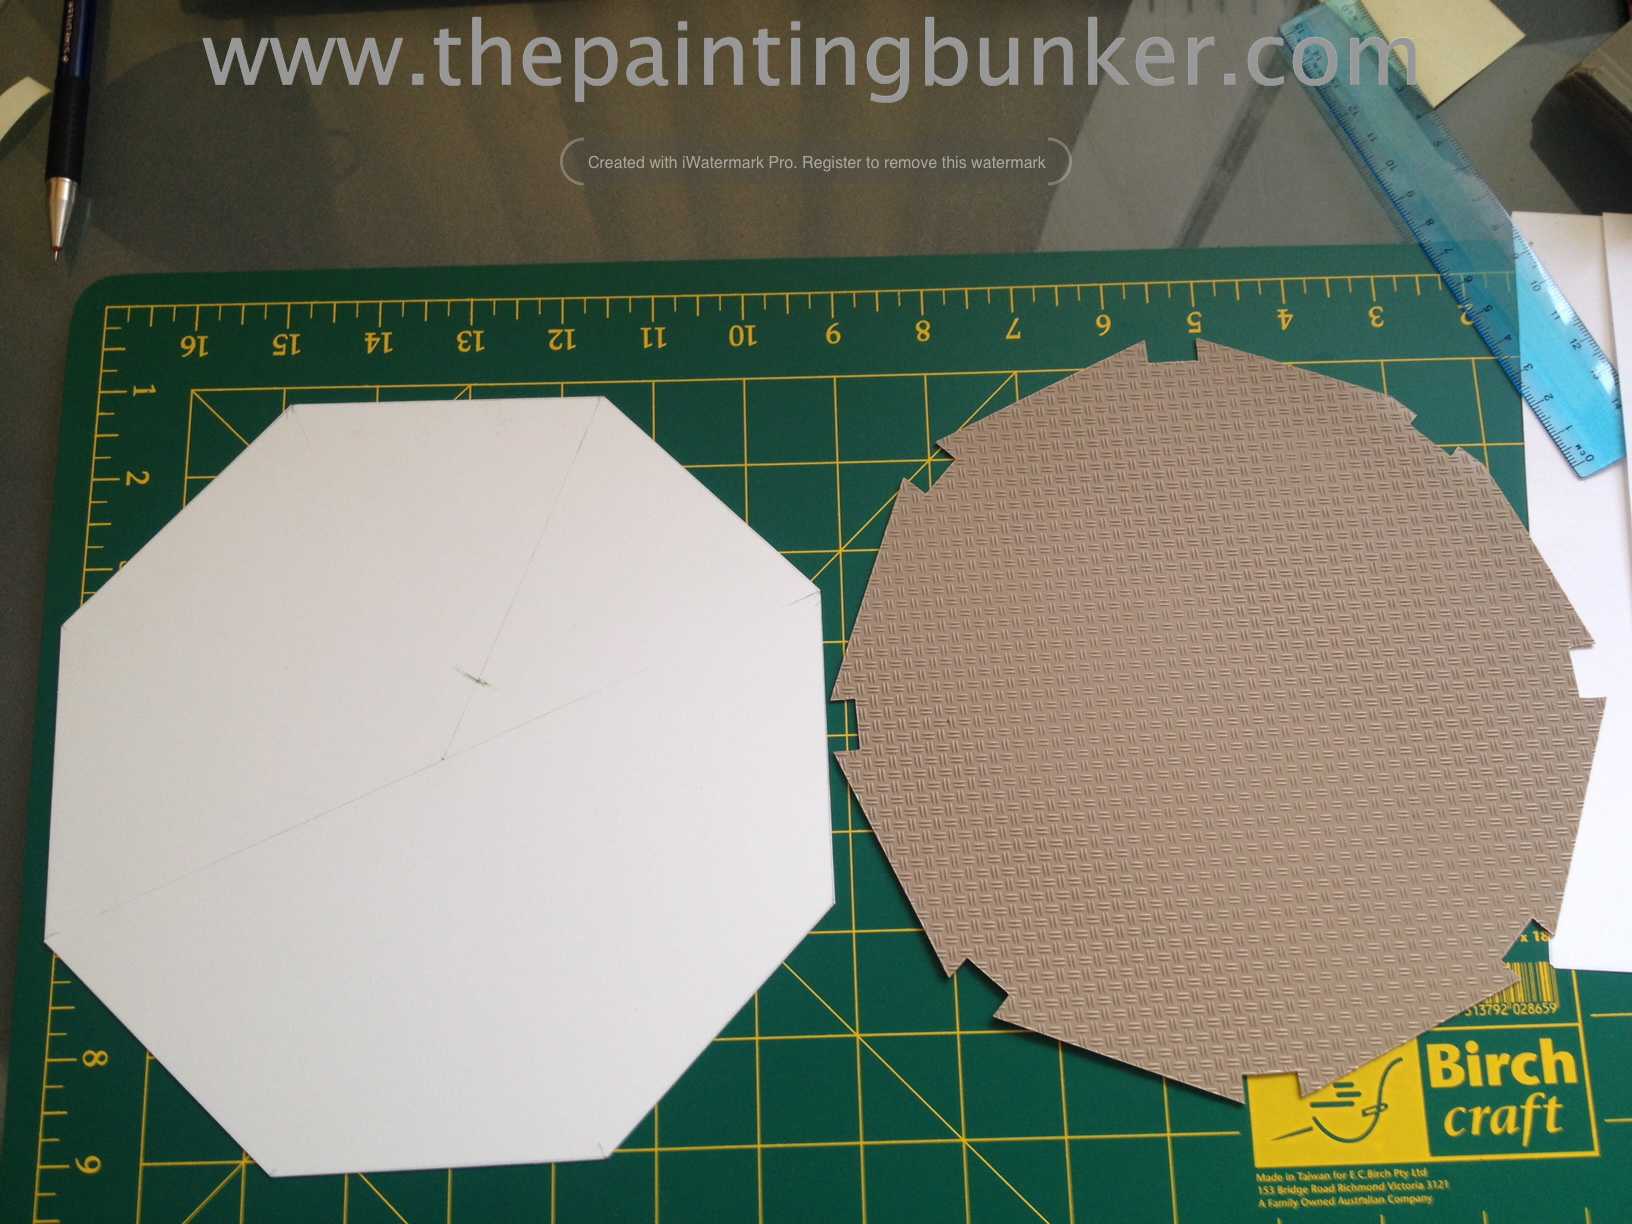
Its the thing on the left hand side. The first thing I did was got out the old drafting kit from way back in the day and draw out a scale version of what I wanted to make, and then cut out the base plate. I wanted the inside to be made out of tread plate, so I cut two bases. One in the actual tread plate, and the other in just 1mm thick plastic card. To give it stability.

Here you can see the two bottom plates. Next I glued them together.

The bottom one is slightly larger to accommodate the exterior walls.

Not being happy with just a nice tread plate interior floor, I decided to add some detail. I don’t know what you’d call the detail that I added, but it looks cool…


Next up came the roof. Now, I see this as a control tower of sorts. So instead of having the top of the roof just end, like the Epic scale model. I wanted to have antenna etc sticking out of the top. So I modified a Rhino Razorback weapon mount to accommodate the antenna. The centre piece is a 40mm piece of PVC plumbing pipe (I think).

Just adding the roof panels. Very tedious…


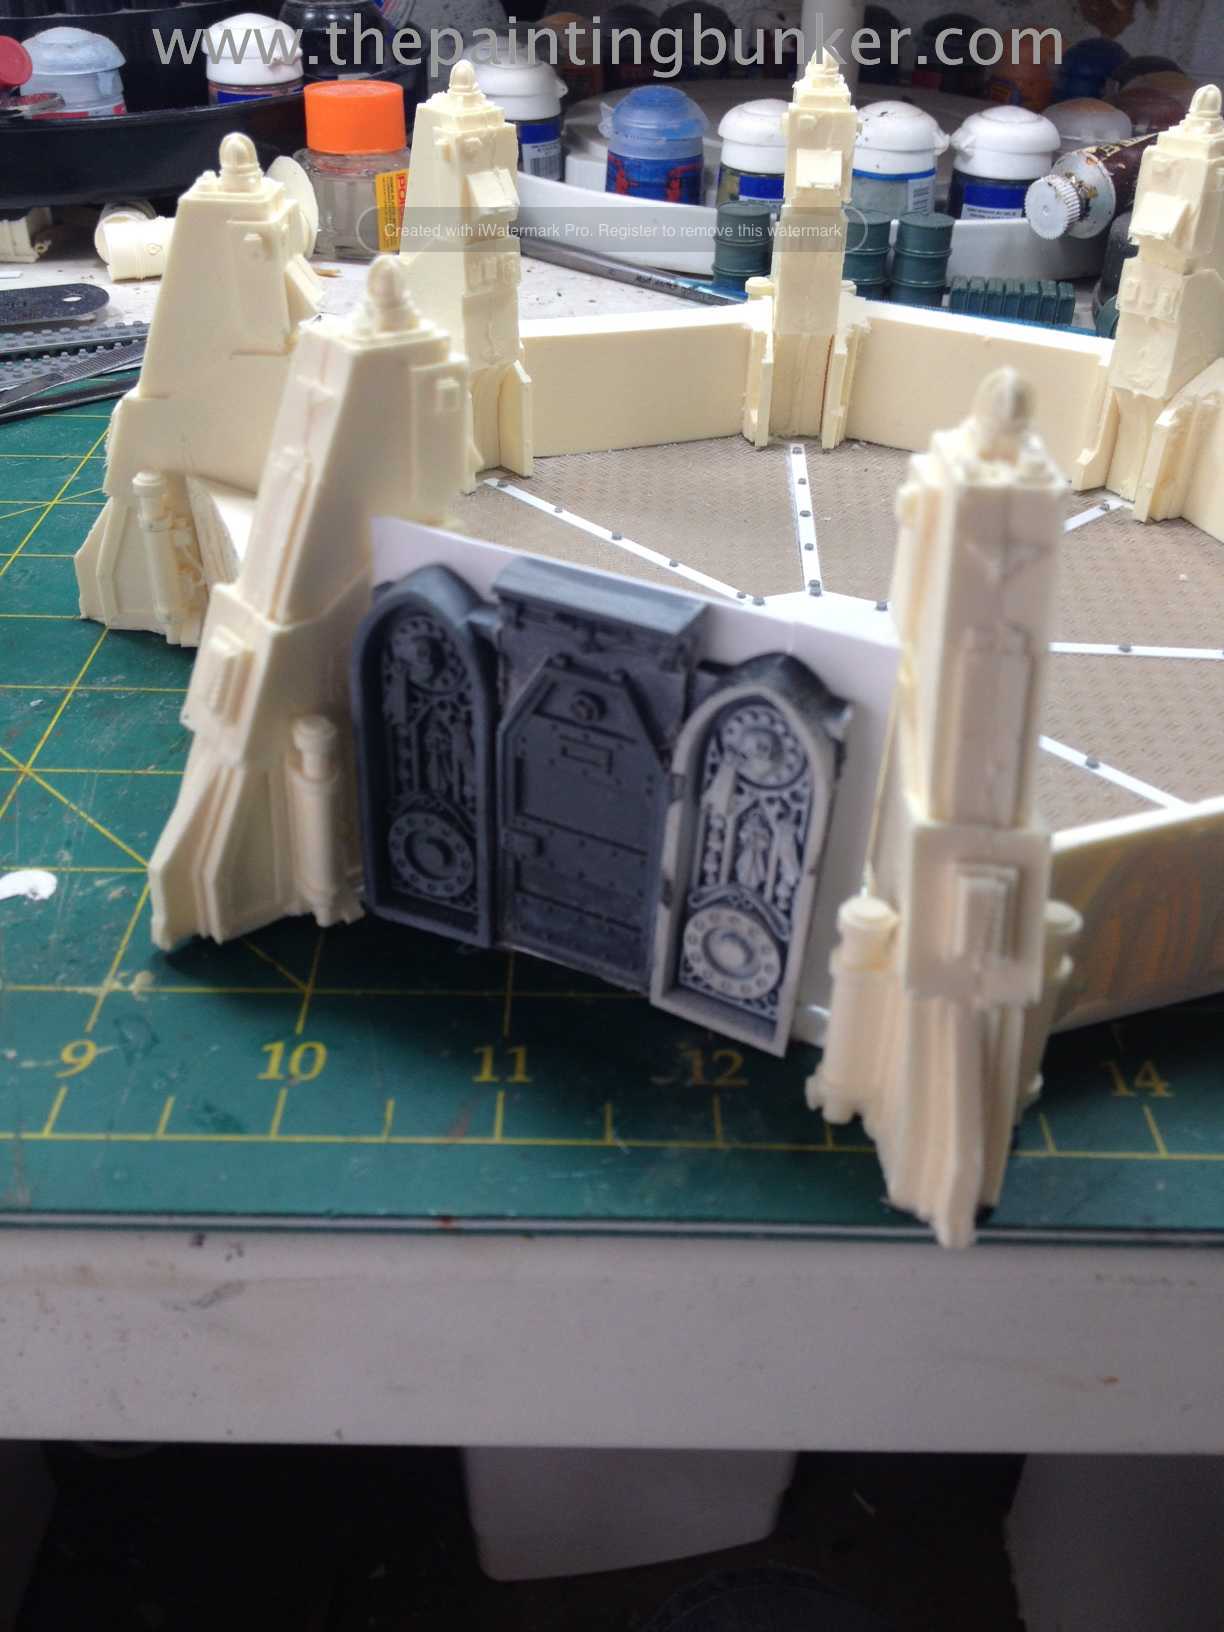
The door. The parts are from the engine of the Baneblade and a door from the Imperial Bastion fortification.

Its starting to look like an actual building now. I wanted the roof to come off to make putting models inside a lot easier. I did detail up the interior panels, however I forgot the take photos of them. You’ll see what it looks like inside when I do the final shots.

There you have it! You’ll notice the small grey rivets. They’re actually a military modelling detail kit I found while wandering aimlessly through a hobby store a few months ago. They are nuts and bolts that come on a strip and you just cut them off and glue them on. It’s a nice touch.
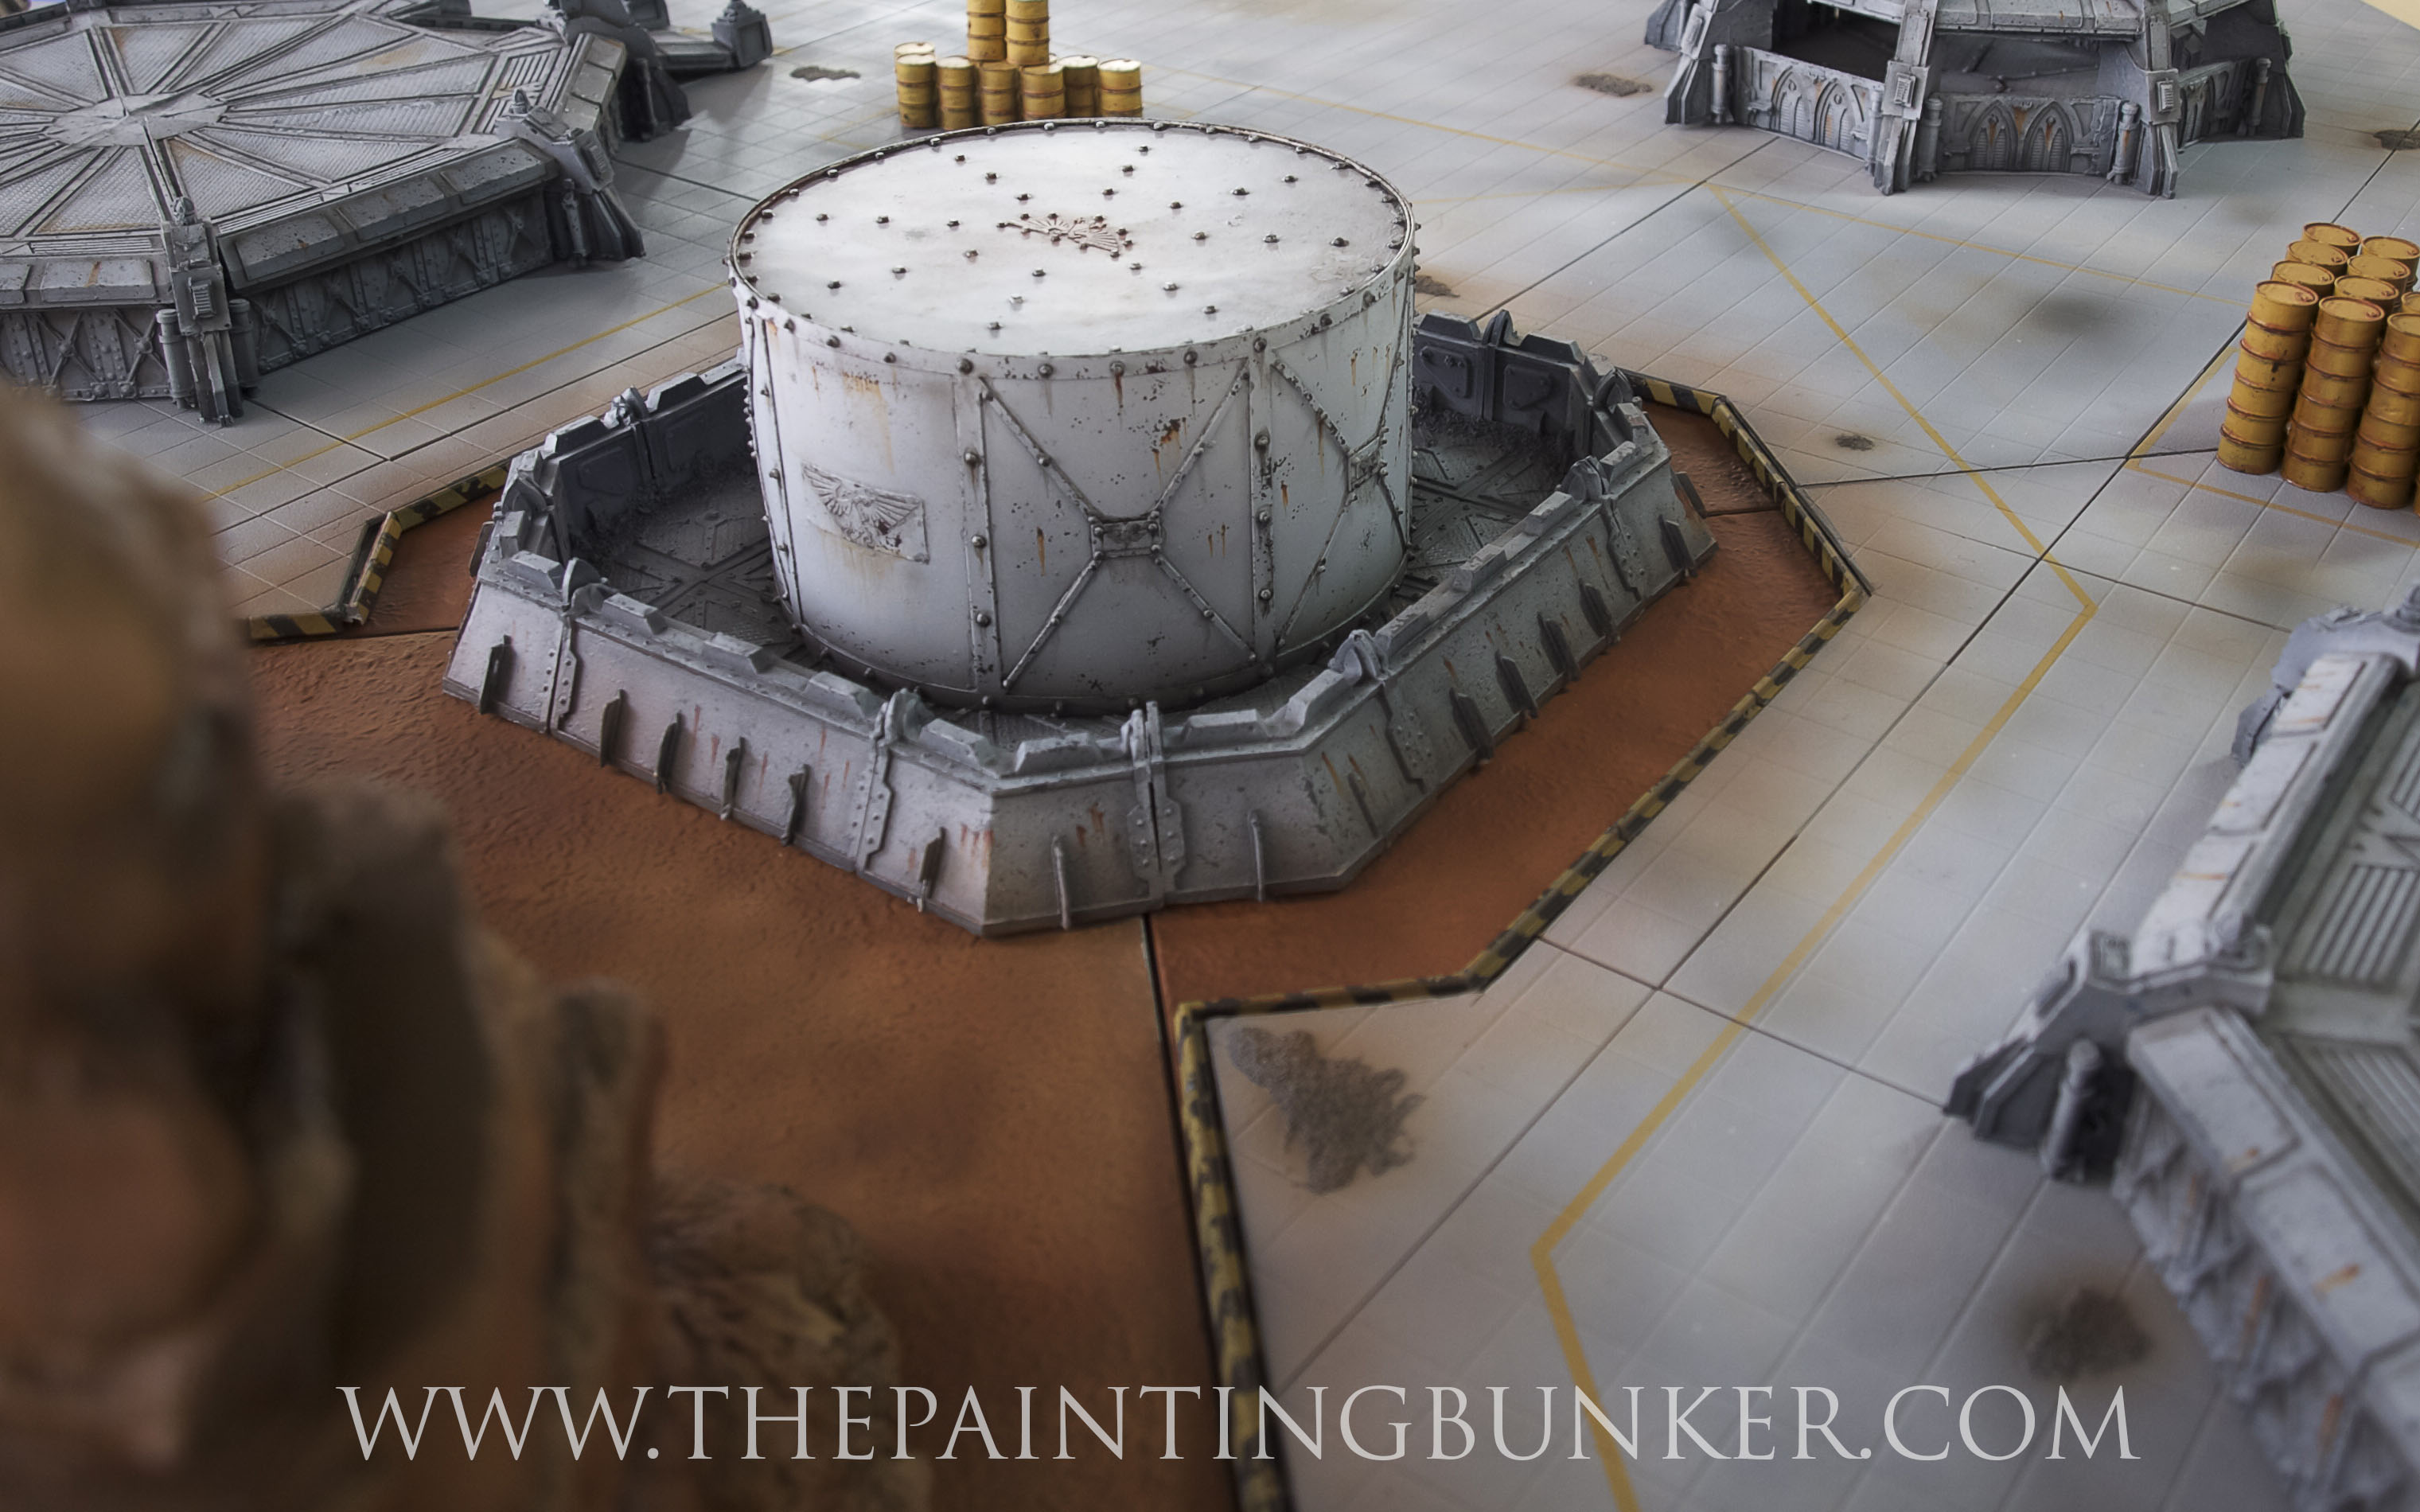
So there you have it. Building one complete. Well, mostly. Next up I’ll show you how I made the bulk fuel storage container. (think 150mm diameter piece of PVC pipe covered in rivets)
I’ve actually finished painting this board however I’ve just gotten my act together to show you what I’ve been upto. So I don’t intend on drawing this out into 6ish posts, probably just 2-3. I don’t want to overwhelm you, you see…
Until next time, thanks for dropping in!
Comments welcome!
John


")