Posts Tagged ‘40k’

Hello Folks !

Its been a while between post…  It’s not through being idle I can assure you.  I’ve had a pretty packed last few months with study and quite a bit of travel, which has meant something had to give… Writing posts for the Bunker was one of them.  So, I’ve just finished making drafts off all the posts I’ve got to catch up on and this is the first one of thirteen.  The plan is to write them all this afternoon and then release one every second day or so.

So over the next 2-3 weeks you’ll be seeing quite a few posts.  Some of the topics are very interesting indeed…  You’ll see the results of some comps I’ve entered models in, progress on the the World Eaters (of course) a new gaming table I’m working on (cough *Anphelion Base* cough) and maybe even a battle report (or two)

So lets get started with the first post…  This years Queensland Model Hobby Expo.  As usual, it was quite an interesting event.  With the best modellers from all over Queensland entering in one of the 30 something categories.  This year I entered models in two categories and won prizes in both.  In fact, in one of the categories I entered, I won all three places.  They liked the models I entered so much, they even awarded me a two silvers in the same category!

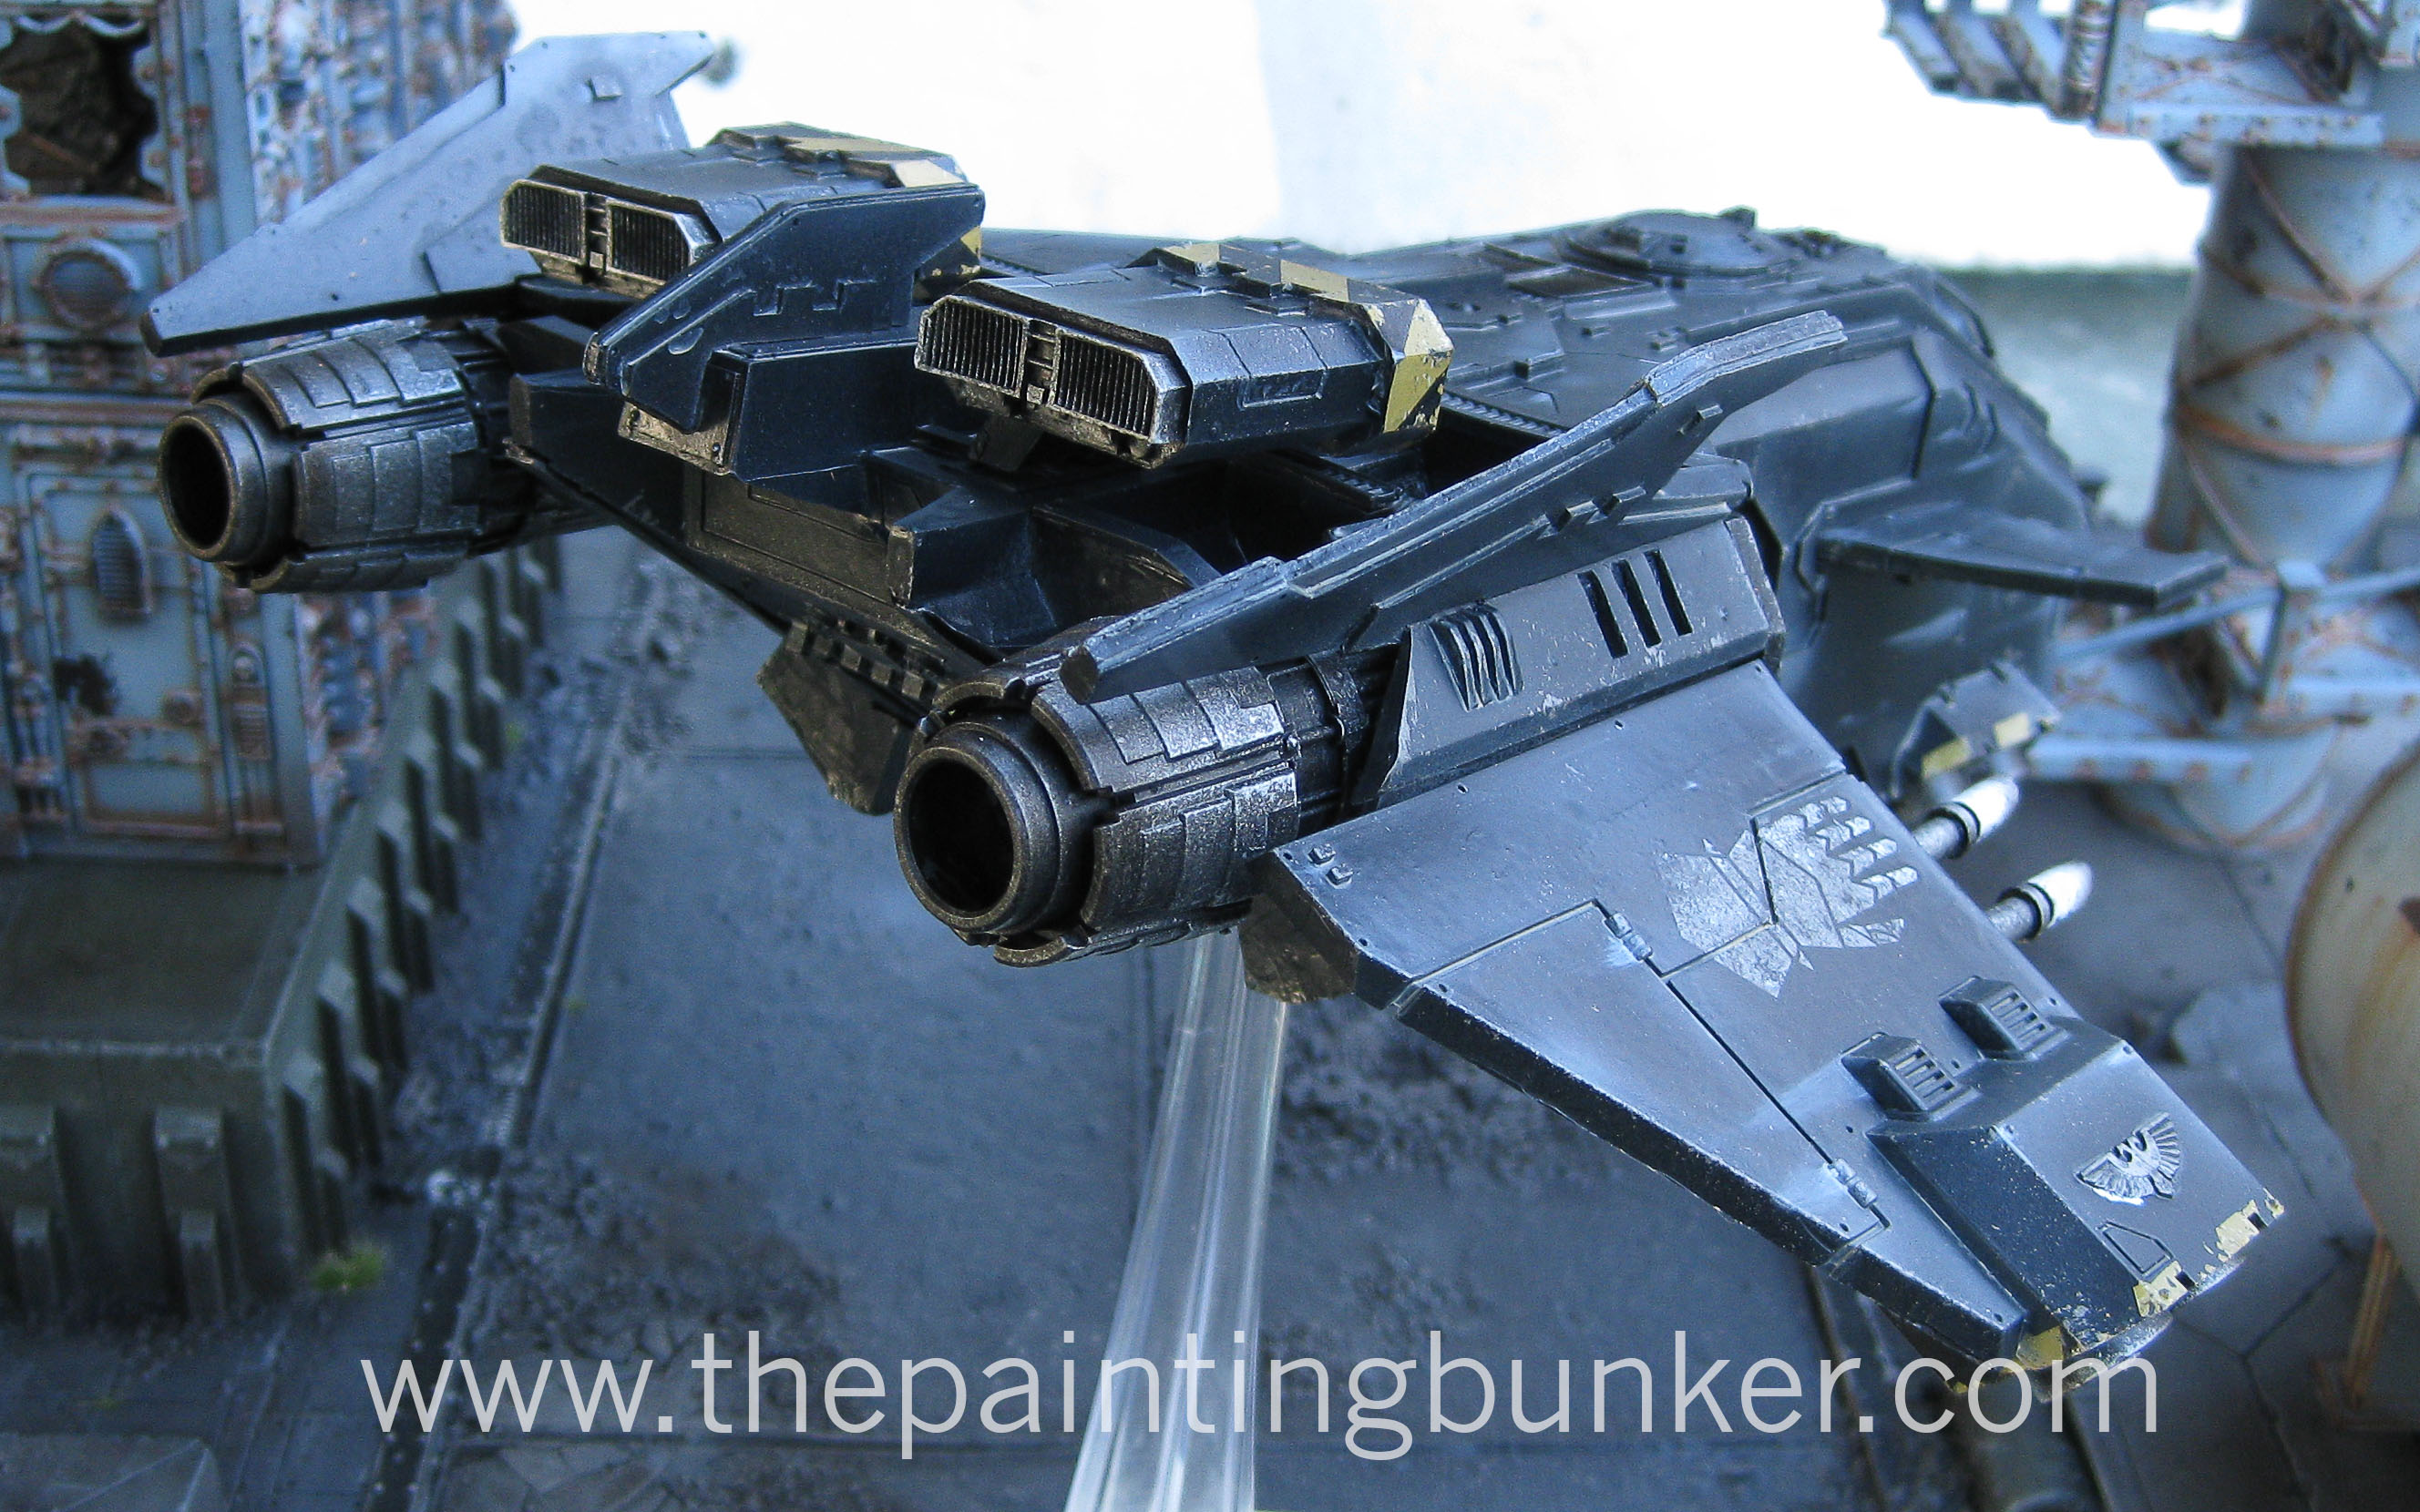
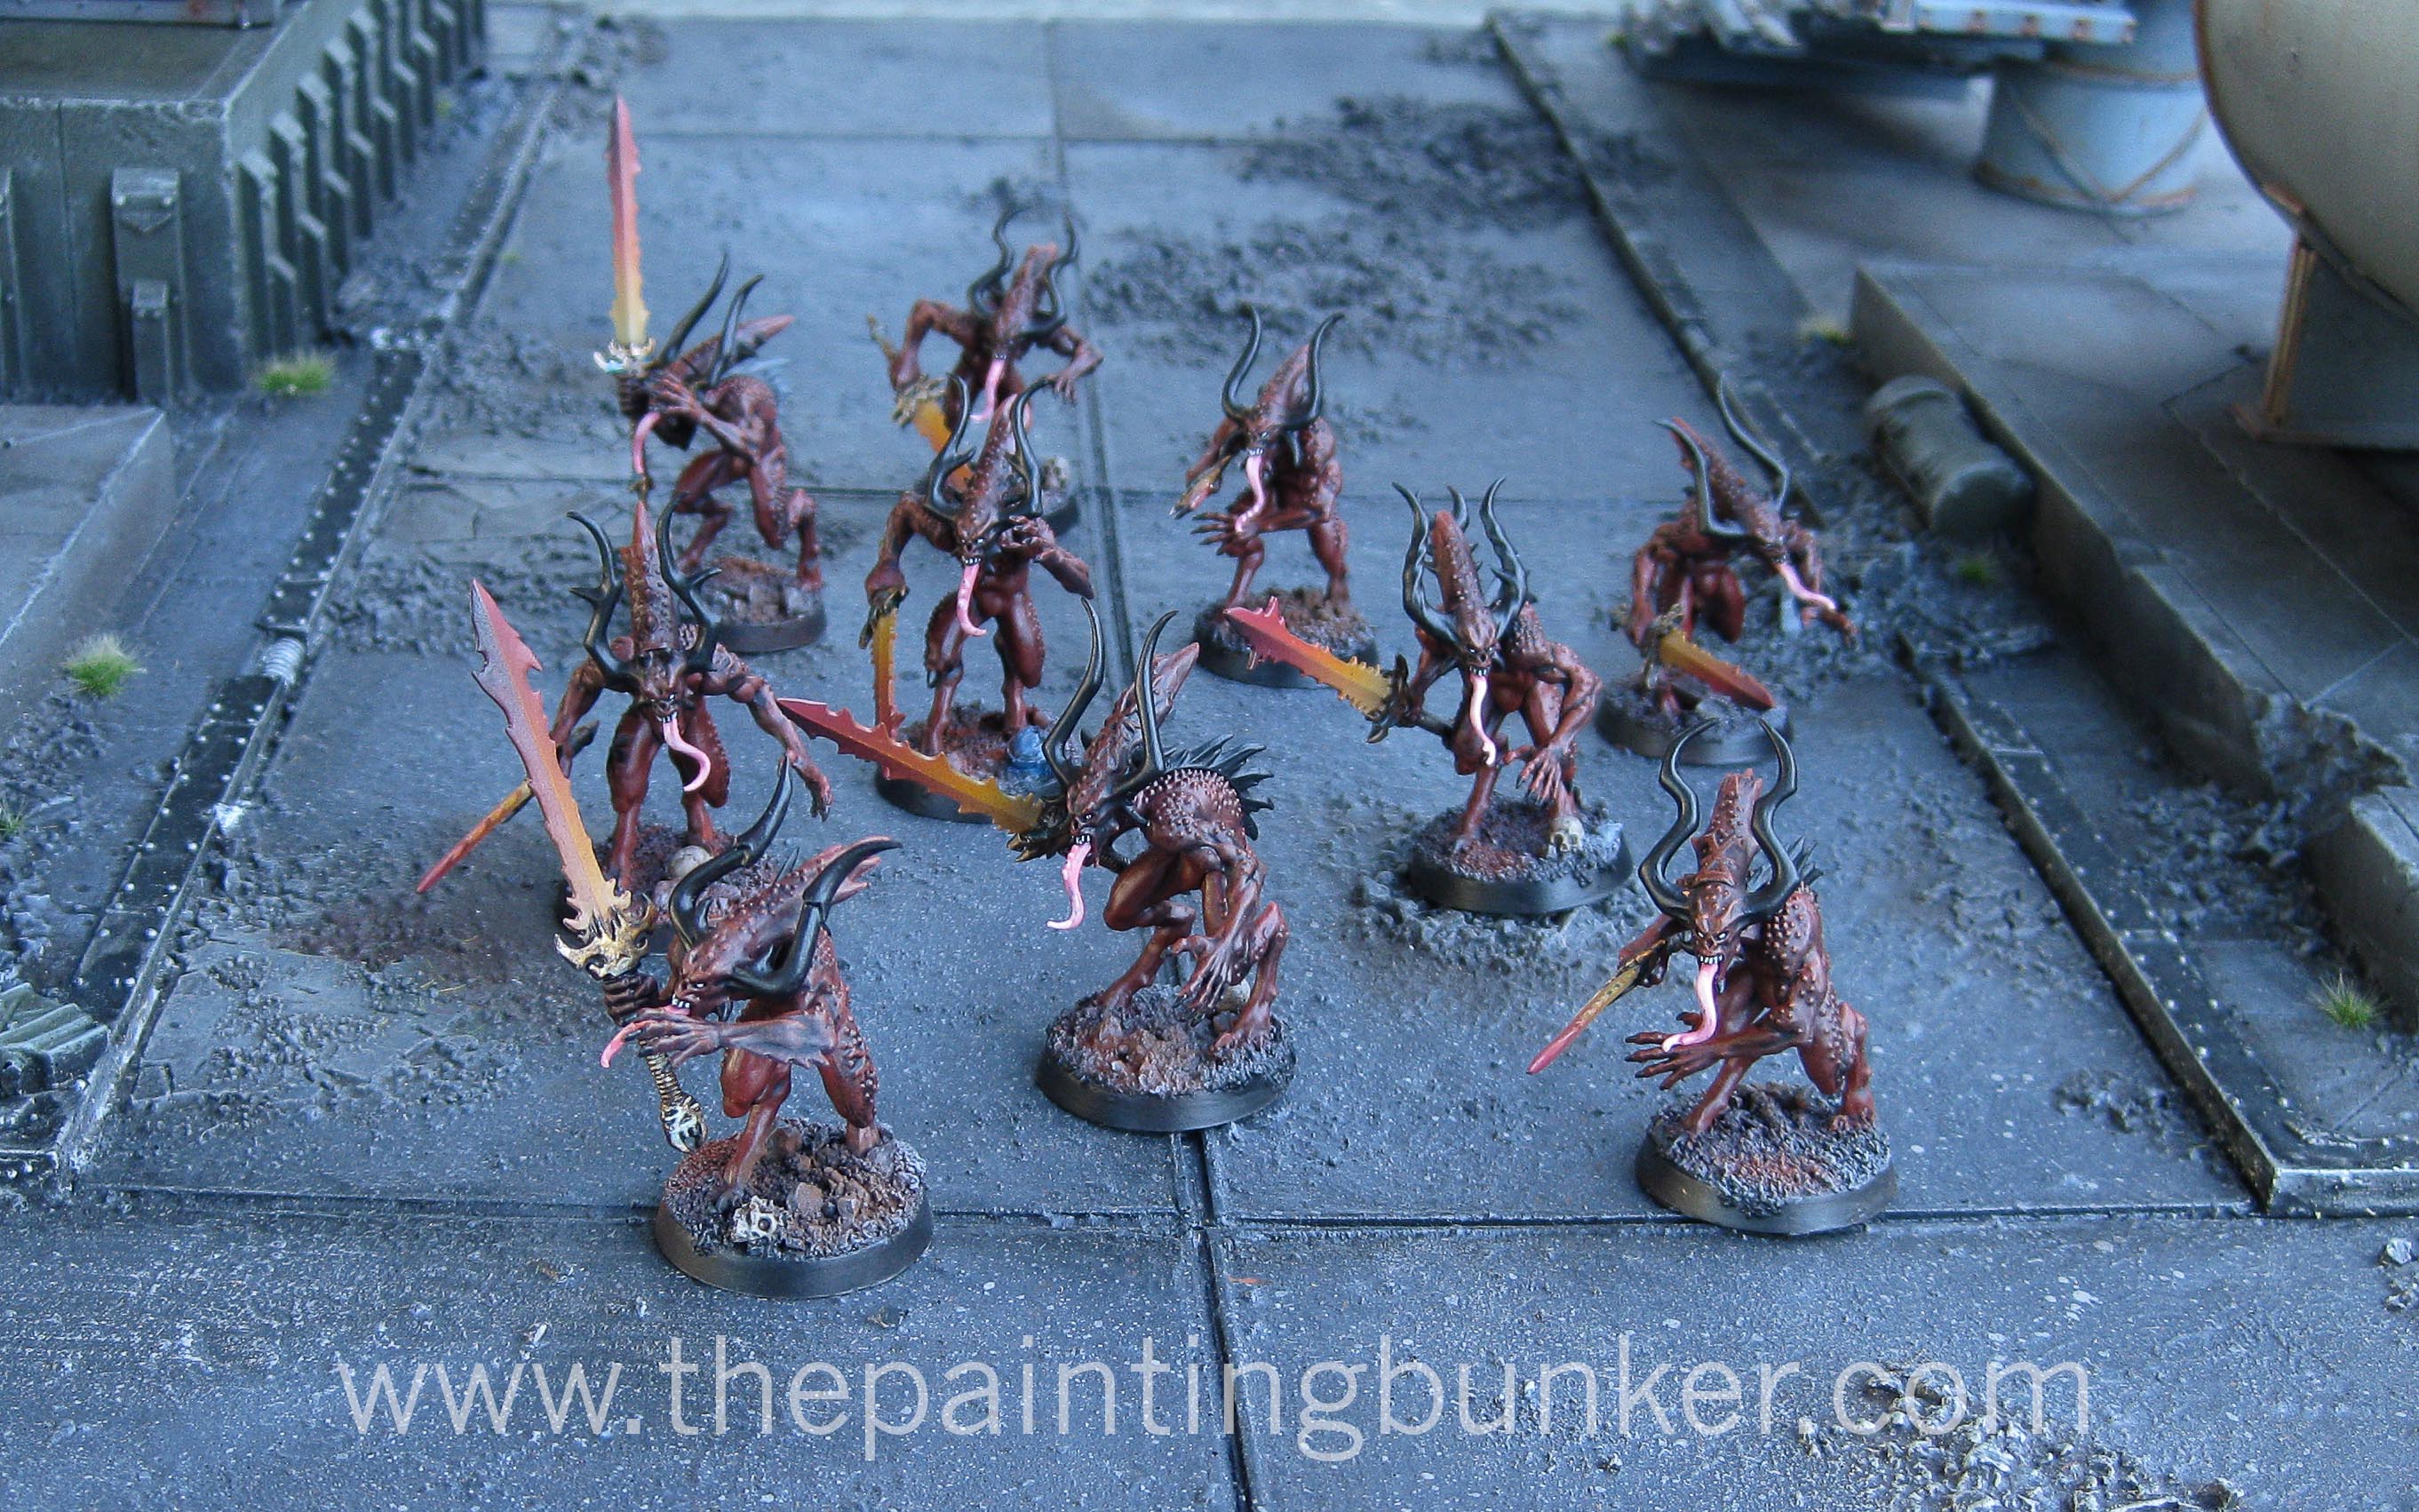
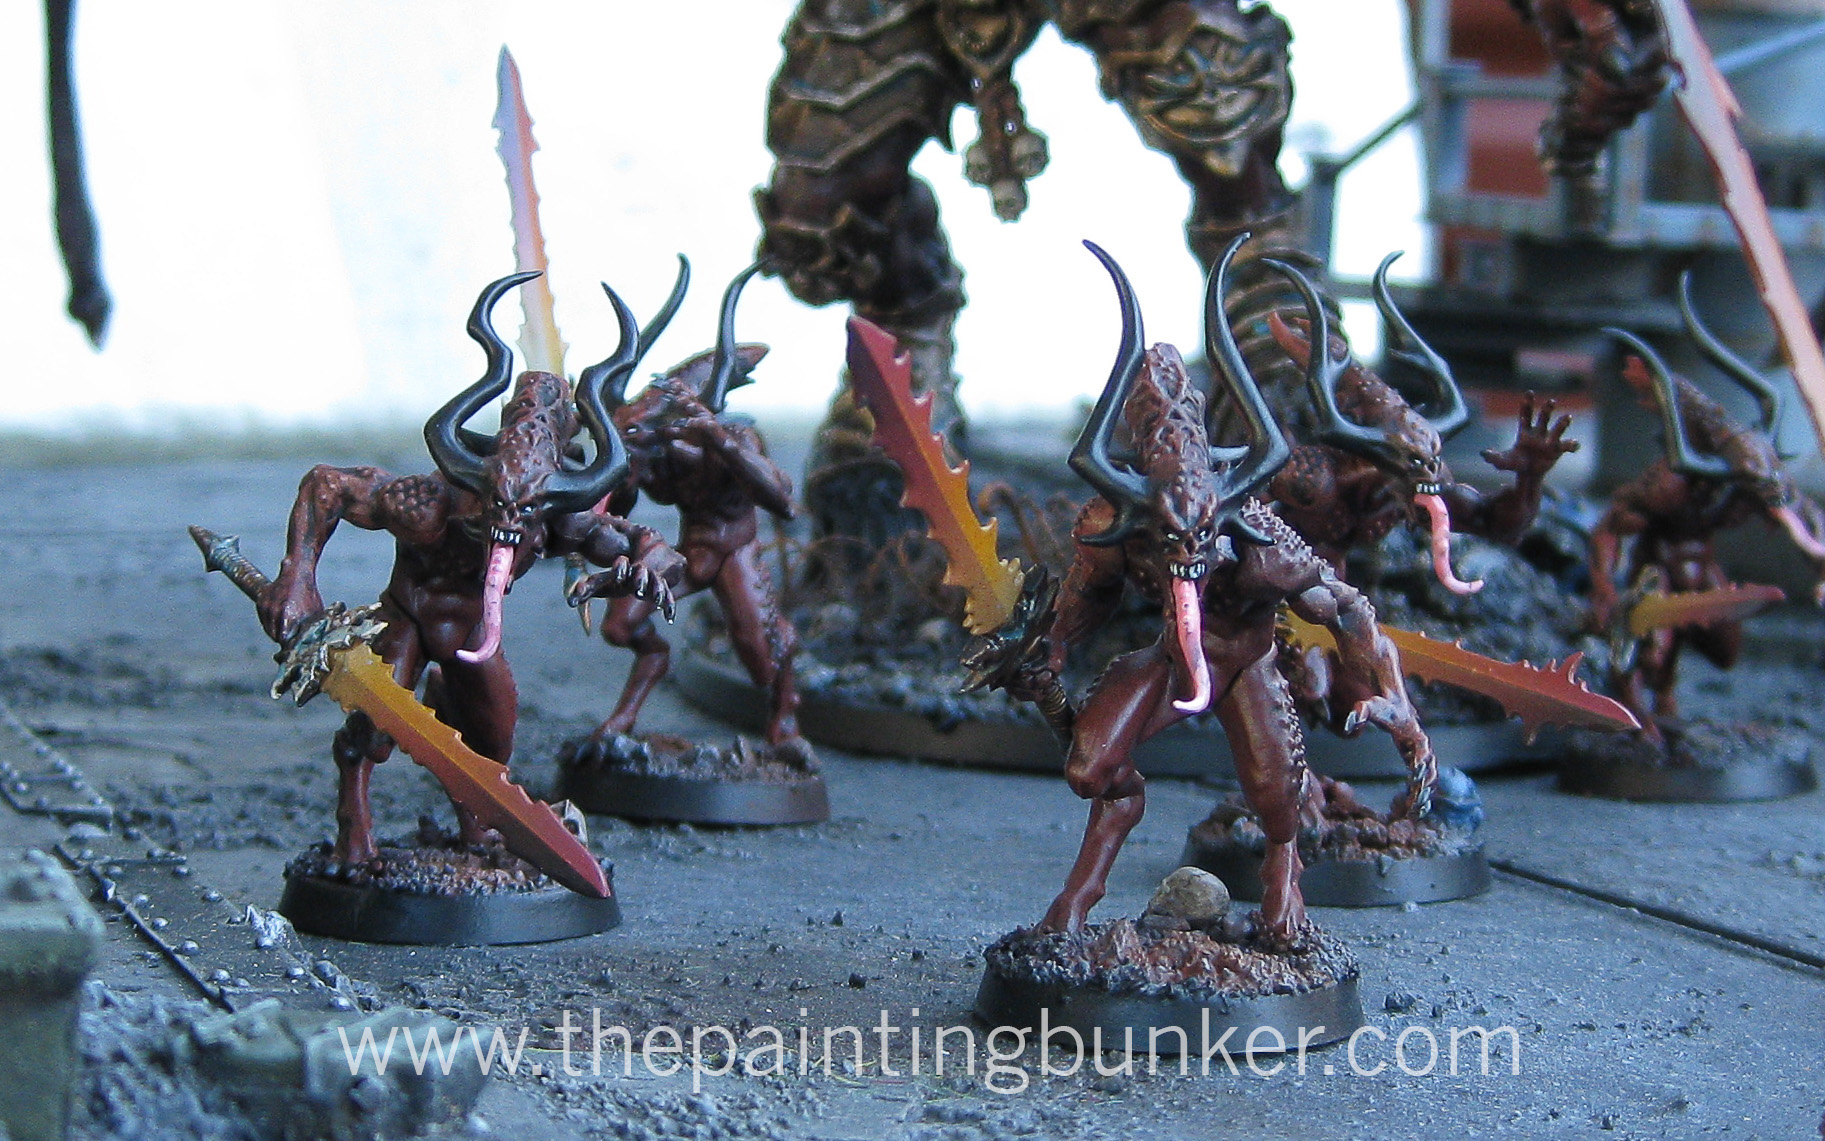
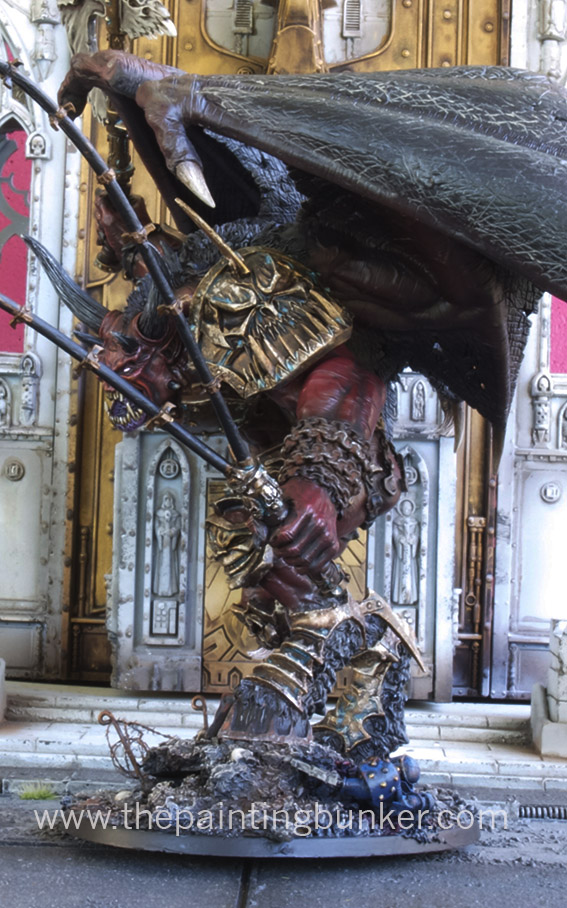
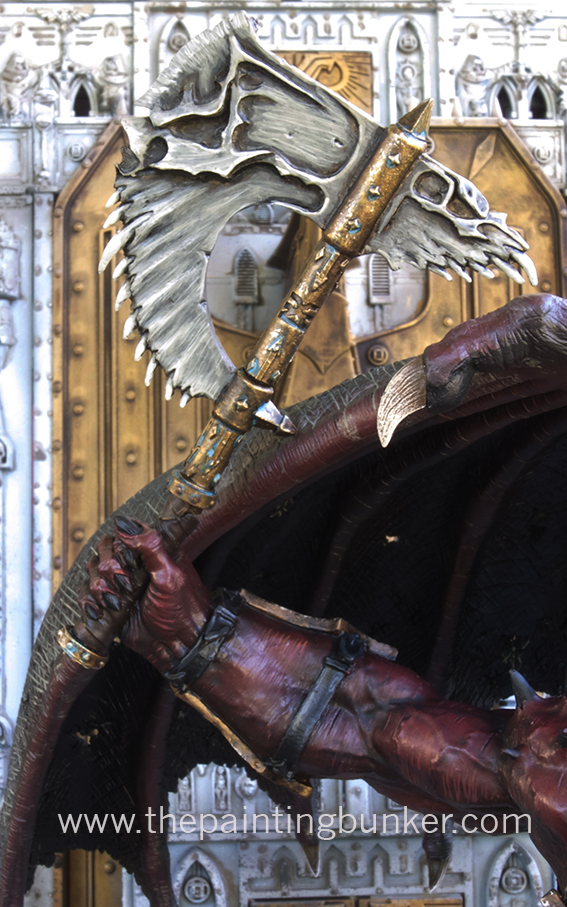
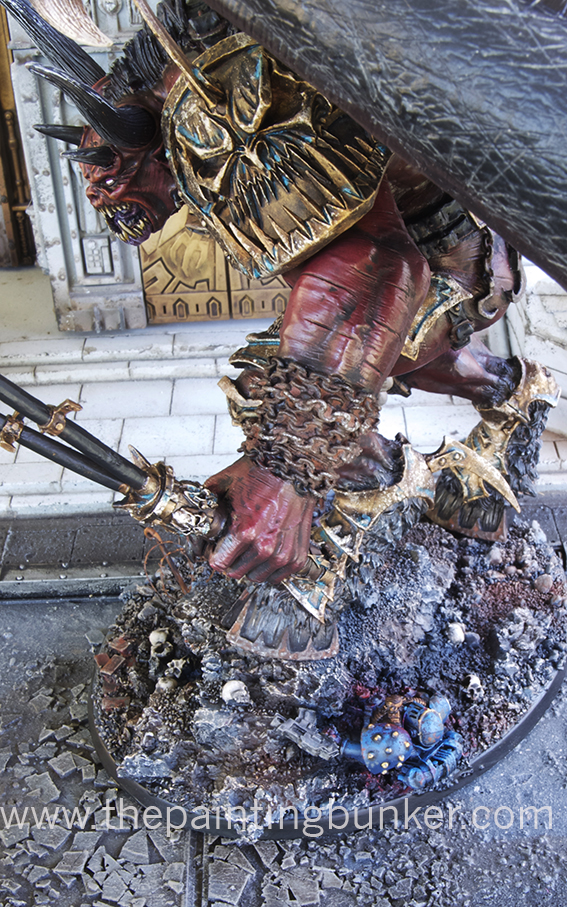
It was my World Eaters that stole the show.  The Spartan, Contemptor Dreadnought and Storm Eagle (no post yet) cleaned up, and my Reaver Titan also got a place.  I actually got approached by the editor of Australia’s only? local modelling magazine, ModelArt Australia to write an article on my Reaver.

IMG_34301

So these are the awards I picked up.  I was a little disappointed I didn’t do as well in the Single Figure Open category.  However the man the took the Gold was a good friend of mine who is a very accomplished modeller and being beaten by him isn’t such a bad thing.  The Silver medal missing the plaque is the second Silver that they just ‘invented’ for the category I owned…  I guess they stole it from somewhere else and removed the plaque.
IMG_294002One of the things I really enjoy about going to these types of events is seeing how other modellers do business.  You can learn a lot from other modellers.
IMG_294103 IMG_294204 IMG_294305The classic scene from the classic movie Mad Max.  The film that launched Mel Gibsons’ career.  If you haven’t seen it, go a do it now.  Then watch part two.  Don’t worry about part three…
IMG_294406 IMG_294707Some pretty amazing scratch building

IMG_294808 IMG_294909 Nice IMG_295010 Couldn’t resist taking a photo of this classic.  This was produced by ArmorCast back in the 90’s when they had the licence from Games Workshop to produce some of the models that they didn’t make in 40k scale.  The Titans for Eldar and Adeptus Mechanicus (Titans) were some of these models.  This Eldar Phantom was just a blown up to 40k scale version of its Epic scale counter part.  The paint job on this one was even faithfully reproduced from the Games Workshop Eavy Metal studio paint job of the time.  IMG_295111 IMG_295212 IMG_295313 IMG_295514This rusting train really stole the show.  The modeller that produced this took home basically all the awards that can be won at the Expo.  People choice, best in show, the list goes on.  He deserved it too!  It was an amazing build and tremendous attention to detail paid to even the most subtlest aspect of the weathering.  Simple amazing, and a real source of inspiration.
IMG_295615 IMG_2959163D printers are starting to make their presence felt in the modelling community.  This is a very inexpensive kit that was for sale.
IMG_296417Me getting one of my awards…  I’ve been told that I need to have more photos of me on my blog…

Ok, so overall, it was a great event.  Its basically a staple of the Brisbane modelling scene.  Very well run, and very high quality models on display.  I would like to put a few more models in other categories next year, and of course take out a few more places…

Until the next post…

John

Just another very quick post of a recently finished project that I’ve not had the time to photograph properly.  I really like this model, and its also great in the game too, however it has been taken down by a few very lucky shots in the few games that I have used it….

This model is often criticised for being difficult to assemble. I didn’t really have any dramas putting it together personally it just takes a little patience and a heat gun on hand as you are gluing it together.  I’ve now assembled two of these and I’m very happy with how they’ve both turned out.

I’m anxiously awaiting the release of the next book from Forge World detailing the Istvaan V Massacre…

Iron Hands Stome Eagle 1 Iron Hands Stome Eagle 2 Iron Hands Stome Eagle 3 Iron Hands Stome Eagle 4


This is just a quick post of the Blood Letters of Khorne I finished some time ago but because of a few things (crappy weather mostly) I haven’t had the opportunity to photograph them properly.  I did these to accompany my Blood Thirster, Greater Daemon of Khorne for when I feel like running my 30k World Eaters as Chaos Space Marines.  Over all I’m very pleased with how these models have turned out.  What I like most about them, apart from being plastic, is that they hark back to the original Slaves to Darkness Blood Letters from 1st edition 40k.  I never liked the pump up gym junkie looking Blood Letters that came out circa 3rd ed.  Its astonishing to think these are plastic as the detail and “organic” look to them is very impressive.
Blood Letters of Khorne 1

Blood Letters of Khorne 2

Blood Letters of Khorne 3

Blood Letters of Khorne 4Thanks for dropping in.  Comments welcome

John


So yesterday I went on a bit of a painting bender and finished this bad boy off, the Forge World Greater Daemon of Khorne.  I am very pleased with the final results.  As I’ve mentioned in previous posts, its an amazing miniature and was a real pleasure to paint.  It also stretched me as a painter which I enjoyed.  Painting Space Marines all the time can become a little tedious and cause your style to stagnate somewhat.  So anyway, enough yakidy yak

Behold!

An’Ggrath the Unbound
Blood Thrister 1 Blood Thrister 2 Blood Thrister 4 Blood Thrister 5 Blood Thrister 6 Blood Thrister 8 Blood Thrister 9 Blood Thrister 10Was that as good for you as it was for me?

Thanks for dropping in…

Next up something for my Iron Hands I think…

Comments always welcome

John


Hey there, been a while between posts these days however I keep forging ahead spending what spare time I have at the moment on chipping away at my current project, the Forge World Bloodthirster Greater Daemon of Khorne.  What a magnificent miniature it is too, I don’t know about you but I find that my appreciation of a mini deepens when I begin to paint it, I find that I really start to look at a mini properly as I’m painting it and the more time I spend painting this mini, the more I really recognise just what an amazing figure this is.

Daniel Cockersell, in the unlikely event you are reading this post, thank you for giving us such an amazing model.  This Bloodthirster Greater Daemon really captures the violence, blind rage, power and brutality of this Chaos Power.

So the WIP pictures.  First up is the base.  Forge World Bloodthirster of Khorne 1

I’m very pleased with how the base has turned out.  This base is really a test pilot for how I intend on doing the bases for my up coming 30k World Eaters army.  Indeed, this Greater Daemon of Khorne along with about 20 plastic Blood Letters are going to be an allied contingent for when I use the 30k World Eaters for games of 40k, when they of course will be Chaos Space Marines.   Forge World Bloodthirster of Khorne 2

The mangled up Ultra Marine.  I sort of saw this guy as having been flicked aside by the Bloodthirster and then crushed beneath a massive piece of masonry or something as the Bloodthirster advances.Forge World Bloodthirster of Khorne 3

A better shot.  I was a bit reluctant to put blood on the model, as I’ve often felt that it cheapens the look of a mini because its such a hard effect to reproduce in scale.  However I gave it a shot using various oil paints and I’m pretty happy with the final effect.  Forge World Bloodthirster of Khorne 4Who’s that handsome devil?  The skin is going to take a long time on this model to get looking right.  I spent probably 3hrs on this face yesterday and its still going.  Overall I’m happy with how it looks but there are still some small areas that I want to revisit.  For those interested I’ve used oils, acrylics, inks and washes on this guy so far.  Also, the finish hasn’t been sealed yet either, so thats why it looks a little shiny.

The wings have also been finished too however they are not that interesting so I didn’t bother photographing them, suffice to say though they are massive and when this model is complete its going to be gigantic.

Ok, thats it for me now.  I’ve got a bit of time off coming up in a few weeks where I intend on hitting this pretty hard, then moving on to the World Eaters.  I’m going to be doing a separate post on the World Eaters shortly, I actually had the 5000pt army rock up on my door step a week or two ago.  I wanted to take a photo of me swimming in all the resin crack for you all, however my good sense got the better of me.  So you’ll be seeing a far more measured diary starting up for my World Eaters shortly.

As usual comments are always welcome and thanks for dropping in.

Until next time,

John

I haven’t really done that many posts on this blog that are actually a work in progress post.  Since moving from forums to my own blog I’ve mostly just brought you either finished projects or tutorials.  So I thought I’d mix things up a bit and bring you a series of posts around my new Forge World Greater Daemon of Khorne.  If you read my previous post you’d know that a good friend of mine actually gave me this model after he’d had if for a year or two and didn’t think he’d ever get to painting it.  Obviously I accepted his extreme generosity and ever since have been thinking through various ways I might approach painting this epic bad guy.  And a bad ass he is, make no mistake.  This is one seriously amazing sculpt and its a real pleasure studying the detail on it.  I really admire the talent and years of honing skill that it would take to produce something like this.

So lets get into it shall we?

As with any model this size (or indeed any model for that matter) preparation and having a plan are essential.  In terms of preparation ensure that the model is going to fit together properly, be sturdy and have no gaps etc.  In terms of a plan, how is it going to be painted?, whats the base going to look like?, are you going to paint it in pieces or as an assembled model?  Many of these questions need to be considered and answered clearly before you embark on a project.

For this model, I actually plan on using it in my upcoming World Eaters army for when I feel like running them as CSM, so it seems appropriate to have a Greater Daemon and also a few Blood Letters for good measure.

Apart from that, preparation is the next aspect to be considered.  Being such a massive model (its huge) I want to ensure that I’m not relying on simply super glue to keep the model together nor the simple joints that Forge World have created for the model.  Having strong bonds along key stress points is an important consideration with models like this.

Forgeworld Greater Daemon of Khorn WIP 1


So for all of the main joints on this kit, which are the left hip, both wrist joints, hips and wings, I have used 2mm spring steel to add that extra degree of support that I know I’ll be grateful for after I’ve used that bad ass in a few games.  Forgeworld Greater Daemon of Khorn WIP 2

No to rely totally on the strength of the steel, I also like to drill additional “key” holes.  What this does is allows the epoxy resin that I use to bond the pieces together to seep into the holes and assist with strengthening the mechanical bond of the pieces.  Forgeworld Greater Daemon of Khorn WIP 3

For this model I’m actually magnetising it to its base.  Why you ask?  Well its for two reasons, the first is to facilitate with painting and the second is a secret that you’ll just have to wait and see.  One aspect of this model that I’m not entirely happy with is the models attention to something thats in its immediate foreground.  Its so stooped over that its almost looking at its feet.  As I’ve mentioned before, I suspect but don’t know for certain that this model was sculpted to be posed with Hector Rex.  Hence why its appears to have its attention focused on something about man sized more or less at its feet.  I wanted to overcome this to a degree so that someone looking at the model can get a better look at the detail of the models front.  So I used cork floor tiles to “jack up” the front left foot, while keeping the back foot at normal base level.  It’s just a subtle thing, but as you’ll see it makes a massive difference in how the model now interacts with its audience.
Forgeworld Greater Daemon of Khorn WIP 4

Just getting the pose right.  Forgeworld Greater Daemon of Khorn WIP 5

So detail of the base.  I want it to look like a hellish battle field.  Only the most nightmarish of battle fields would enable a daemon of this stature be summoned.  Note the crushed Space MarineForgeworld Greater Daemon of Khorn WIP 6

A better view of the base.  I used a lot of different materials on this base, cork floor tiles, train set ballast, skulls and ceramic bricks from Secret Weapon Miniatures and as you’ll see in other pictures, Forge World brass etched barbed wire and an Imperial Eagle.

Forgeworld Greater Daemon of Khorn WIP 7

When it comes to glueing this pieces together I like to use small cramps to ensure that a strong bond it made.  Its a bit of an involved process but the results speak for themselves.Forgeworld Greater Daemon of Khorn WIP 8

Yeah, complicated.  Forgeworld Greater Daemon of Khorn WIP 9

Some of the base detail, almost complete.Forgeworld Greater Daemon of Khorn WIP 10

Just another detail shot.Forgeworld Greater Daemon of Khorn WIP 11

The base now with added barbed wire and the Greater Daemon stepping on a damaged Imperial EagleForgeworld Greater Daemon of Khorn WIP 12

A clearing image of the finished baseForgeworld Greater Daemon of Khorn WIP 13

This shot was taken just prior to undercoating.  As I mentioned there were a few pieces missing from the model so I had to make a few molds of those pieces today and then cast them up, if you look very closely you can see where they are as they’re white resin.  Forgeworld Greater Daemon of Khorn WIP 14Ok, thats me for the time being.  Hope you enjoyed this WIP post.  I think I might make it a bit more of a habit in the future.

Comments always welcome, and thanks for dropping in

John


This weekend at RAAF Base Amberly will see the annual Anzac Cup hosted by WW40k being held.  Its a 1950pt Warhammer 40,000 6th Ed tournament,  more details can be found here.  I’m playing with my Carcharodons and I’m looking forward to participating as the team who ran the ADFWGA Championships are behind this event, and if their last tournament was anything to go by it should be an awesome weekend.

The organiser of the event has asked me to bring along my Forge World Realm of Battle Cityscape board to have set up for display as well as some of my other models, including my Titans and a few others pieces from my collection.  So if you are able to drop in on the Saturday or Sunday and have a look it would be great to have your company.  As usual there will be a strong fund raising focus for Legacy over the weekend so if you can a small donation would be greatly appreciated by families of serving and past Defence Force Personnel.

Entry is free and there will surly be some amazingly painted armies battling it out over arguably the best tournament scenery in Australia for the Anzac Cup.  I’m sure its going to be a great weekend.

If you click on this LINK it will take you to the Google map for RAAF Base Amberly’s location if you are not familiar with the area.  Also below is a picture of where the event is being held on the Base.  The good thing is that you won’t need a Military ID to get in as the tournament isn’t being held in the secure area, so there will be no hassles for you coming along.  The only stipulation is that you cant wear thongs (flip flops for my American readers, incase you think Aussies walk around wearing G-Strings everywhere)

563593_10151377024397219_407639634_n

So it’d be great to see you along over the weekend and I’m sure you’ll be impressed with what you’ll see.  If you are not able to make it along, you’ll be able to live vicariously through my post tournament review that will surly follow next week sometime.

Hope to see you then, thanks for dropping in

John

So ever since I did the post on How to paint World Eater Space Marines I have a lot of positive feed back, in fact its been a very popular post.  One question that I’ve continually had was “how did you paint the face?” So I thought I’d do a quick tutorial on how to paint faces to a good table top standard.  Believe it or not, its not that hard and with a little patience and practice you’ll dramatically improve the presentiment of any miniature where flesh tones are present.

So lets take a look at the process.

OLYMPUS DIGITAL CAMERA

Step 1.

For the tutorial I’ll be using the old Citadel range of paints.  I do like the new range, however I’m buying to replace them with the new ones as I go so I’ve still got a fair few of the old range on hand.  But if you use the Citadel conversion chart if you don’t have any of the old paints you should be golden.

The paints & materials I’ve used are

  • Abaddon Black – Undercoat and detail
  • Tallarn Flesh – Base coat and component for highlights
  • Dwarf Flesh – For highlighting
  • Red Gore – A component colour for the lips
  • Ogryn Flesh – Base coat wash
  • Devlen Mud – Shading
  • White Scar – Eyes etc
  • W & N No 1 Brush
  • Marines Head – I like mounting pieces on tooth pics for ease of handling

OLYMPUS DIGITAL CAMERA

Step 2.  Undercoat

I’ve used Abaddon Black applied with an Air Brush, or use a spray can.  This is important and many of the small details on the face can be erased or compromised if you don’t apply the paint thinly enough.  I’m not saying it can’t be done with a brush, but it just makes your job harder if you do.

OLYMPUS DIGITAL CAMERA

Step 3.  Base coat

Again I’ve applied Tallarn Flesh with an air brush for the same reason that I applied Abaddon Black with an air brush, so as not to compromise any of the fine detail on the face.

OLYMPUS DIGITAL CAMERA

Step 4.  Wash

Using my W & N no 1 brush I applied a liberal amount of wash.  Don’t be scared to do this as you’ll find that when the medium dries (evaporates) all that will be left is the pigment in the recesses.  You want that to create definition.
How to paint Space Marine Faces 5

Step 5.  Re-apply the base coat

This is where you need to be mindful of a few things.  The first one is paint viscosity, and the second one is your brush condition.  Let me explain.  Where a lot of people fall down when painting flesh is that the paint has already started to dry when its being applied.  This makes the paint lumpy and has an inconsistent appearance in its application.  In some climates where the air is dry (< 30% humidity) you may need to use a wet pallet.  Or just do what I do and take a blob of paint out of the bottle (I live in a humid climate), put it on my pallet and mix in a bit of paint thinner.  This is really important, especially for skin tones, the reason is that our skin is sort of translucent and when we paint it to re-create that effect, we need to simulate this and the best way to do that is to make the paint thin.  I’ll get into more detail on this later, but for now, just make sure that your paint it thinned down a little so it flows better.

The second point you need to be aware of is your brush condition.  There are two aspects of this, the first is that your brush is set up to facilitate capillary action, and the second one is that the tip of the brush is the right shape.  Many painters don’t use their brush the way its meant to be used, and that is having a nice amount of paint on the whole brush (bristles) and then shape the brush tip so that it makes a nice fine point for painting.  A lot of guys I see dip the tip of their brush in the paint and use only that part.  This seriously limits the full capability of the brush and you are doing yourself a big disservice.  To help your brush facilitate capillary action, just make sure that before you dip it in paint (thinned down I hope) that you first dip your paint brush in some clean paint thinners first.  Remove the excess with a tissue or something then dip the paint brush in your thinned paint, using the same tissue shape the bristles so that you have a nice point.

You can now pick out the raised areas of the face with the Tallarn Flesh.  Before you do this take a few moments to consider where you’d like the paint to go by studying the face and its contours.  By having a plan of where you’d like the paint to do will dramatically improve your results.

OLYMPUS DIGITAL CAMERA

Step 6.  First Highlight

Mixing about 70% Tallarn Flesh with 30% Dwarf Flesh, begin highlighting the areas of the face that would naturally catch the light.  So areas like the ears, nose, chin, cheeks, brow.  Again, make sure you follow the points I make in Step 5 about paint viscosity and having your brush set up properly.  Paint viscosity is important for the next three stages.  As I mentioned before, skin is sort of translucent, so when you paint flesh tones, try and make your paint go on in very thin layers so that the edge of each layer of paint isn’t too contrasted against the previous one, and allows its colour to be blended with the previous colour that was applied.

How to paint Space Marine Faces 7

Step 7.  Second Highlight

Mixing about 30% Tallarn Flesh with 70% Dwarf Flesh, begin refining the highlighting of the previous areas of the face that you worked on in Step 6. Again, make sure you follow the points I make in Step 5 about paint viscosity and having your brush set up properly.

OLYMPUS DIGITAL CAMERA

Step 8.  Final Highlight

With straight Dwarf Flesh go and pick out the final areas where you want attention to be drawn to.  Tip of the nose, ears, brow and top of the cheeks.

How to paint Space Marine Faces 9

Step 9.  Lips

With a a mixture of about 60% Tallarn Flesh, and 40% Red Gore, apply a small amount to the lower lip.  This is very subtle but crucial to achieving a more realistic effect.

OLYMPUS DIGITAL CAMERA

Step 10.  Eye Shading

Place a small amount of Devlan Mud in each of the eye areas and a small amount under the bottom lip.  Again a subtle but crucial step.

OLYMPUS DIGITAL CAMERA

Step 11.  Pick out Details

Paint the actual eyes black in readiness for the white to be applied, paint around the collar, neck brace etc and the small stud on his forehead.  Highlight the collar etc as you would normally.
OLYMPUS DIGITAL CAMERA

Step 12.  Finished

Paint in the eyes with white, followed by a small dot of back.  This may take several attempts to get right.  Pick out the service stud with your choice of silver and finish up any other details you’d like attention paid to.
OLYMPUS DIGITAL CAMERAOLYMPUS DIGITAL CAMERA

So there you have it.  It’s doubtful that you’ll win a Golden Daemon trophy with this scheme, but it will with any luck improve the quality of your table top miniatures.

A few points to remember about painting flesh.  The first is no matter what tone of flesh you are wanting to achieve, always start with a warm flesh tone.  For example, if you look at the picture below of my Iron Hands Librarian, you’ll see he’s quite pale.  I still used Tallarn Flesh as the base colour, I just used a mixture of grey and bone to dull down the warmth of Tallarn Flesh.  This is a convention to be mindful of when painting flesh tones.  It seems that our eye is programmed to see flesh tones in a certain way and we accept simulations of flesh tones better when they have a warm base to start with.

Iron Hands Librarian

Thats me for now.  Hope you’ve found this helpful, and until next time chat later.

John Sutton, Brisbane, Qld

So I knocked this out this morning in a spurt of painting enthusiasm.  The truth be told, he’s been sitting on my painting table (we’ll in a dust proof box on a shelf next to my painting table) for close to 18 months now.  I’ve had this idea for how I wanted him to look for some time as his original purpose was to be apart of the “Death Knell” Apoc 40k formation for Space Marines.  Basically it consists of 5 x 5 man squads of TH/SS Terminators with a Lysander proxy, a Contemptor Dreadnought in a Lucious droppod and a Librarian in Terminator Armour with a Storm Shield.  It’s a pretty bad ass formation and really puts a dampener on your opponents day when it rocks up.  (To announce its arrival you use a orbital bombardment to “clear” the area where all the Terminators arrive)

For some reason I just never got around to painting him, and then when I finished my new storm shield after re-tooling the pattern from the original I did close to two years ago I got inspired to finish it off.  To be honest, I’m glad I did because its come out much better than I’d expected.  I even tried my hand at doing NMN with an airbrush on the Librarians Force Sword.

As you can see, I removed the models force stave? and replaced it with a massive force sword from the Grey Knight plastic kit I think, and I exchanged his “talk to the hand” hand with a storm shield.  In game terms this seems to be the most popular load out for this type of character when he’s rolling in his Terminator armour.  The pose actually looks quite good, better than I was expecting.

The pictures are not to a standard that I’m completely happy with because I’m having trouble with my camera at the moment and need to sit down and figure out whats going on but I haven’t been bothered to.  So I’ll have to look into it in the next week or so because its really getting on my nerves.  Pro tip, don’t let people fool around with your camera.

OLYMPUS DIGITAL CAMERA OLYMPUS DIGITAL CAMERA Librarian in Terminator Armour 3 OLYMPUS DIGITAL CAMERAOk, thats it for me now.  It’s coming up to Easter and over the holidays myself and Aaron from Forlorn Hope will be getting together for some hardcore, ungreased, man dollie action and taking the Cityscape board out for its madien voyage.  The plan is to have a 1950 point game on it with my Carcharodons V his Tyranids or Death Korps of Krieg (or both on separate occasions)  So my intention is to bring you a full battle report detailing blow by blow action with pictures accompanying that will melt your brain.  I’m really looking forward to this and it should be a lot of fun.

Until then, thanks for dropping in

John


Thats right, you read it correctly, I’m selling something.  We’ll trying to anyways…

Its an idea I’ve been toying with for some time now so I thought I’d put it out there and see what happens.

This is an alternate version of the Space Marine Terminator Storm Shield that I made some time ago for my Iron Hands army as I was really unhappy with the ones that come with the plastic kit, so I went about making my own.  I wanted them to still use the same “design language” that the Space Marine range uses so they would fit in but wanted it to look a bit more creditable and solid looking rather than the current one.

So to test the waters I’ve listed 10 packs of 5 on eBay for $12.95AUD each that includes FREE postage within Australia for the first 10 packs sold.

The Games Workshop Terminator model is shown for scale purposes only and isn’t included.

OLYMPUS DIGITAL CAMERA OLYMPUS DIGITAL CAMERA OLYMPUS DIGITAL CAMERA OLYMPUS DIGITAL CAMERAThis is what they look like when they come out of the mold.

So what you get in a pack is 5 unpainted, unassembled polyurethane resin storm shields.  As you can see, some cleaning will be required.

Did I mention FREE POSTAGE for the first 10 sold?

I’ve got a few other ideas for after market accessories in my head, and depending on the success of these will depend on whether or not they see the light of day.  So fingers crossed.

So go to my eBay account and buy a couple so I can pay for my tertiary education and not eat 2 minute noodles all week…

Thanks for dropping in

John