Posts Tagged ‘Warhammer 40000’

Hello Everyone,

About that rather long title…  So much win to report.  So what was accomplished over the weekend?  The most important thing, lots of hardcore hobby & wargaming action and over $10,000 raised by ADFWGA for Legacy.  This is a massive achievement!  I really tip my hat of to Ty C. & Dave H. for making this happen.  Its also a huge improvement on last years effort too, where $4,000-ish was raised.

It was also BY FAR the best tournament I’ve every played in.  In terms of thoroughness of organisation, venue, quality of tables & scenery, quality of presentation of the armies competing, quality of opponent, prize pool, extra curricular activities that were fun and helped raise funds for Legacy and just overall awesomeness.  Any metric that you can think of to determine the success of a wargaming tournament, the ADFWGA Championships exceeded them all.  As far as I’m concerned this tournament is the one that all others are now judged from.  Its the yardstick.

IMG_1472

Friday afternoon and all the tables are ready to go

IMG_1502

The massive amount of awards that were up for grabs across the three wargames on offer over the weekend.  40k, WHFB & Flames of War.

IMG_1505

A nice touch.  A measuring template and commemorative coin that were available for participants at the Championships

IMG_1504

Some of the prizes that were donated for auction to raise funds for Legacy.

IMG_1495

Some of the small details that add up to greater than the sum of their parts and contributed to a great weekend of wargaming.  Each table had useful sections of the 40k rule book reproduced so to facilitate smoother running games.

IMG_1496

Each table also had the tables terrain defined, along with references in the rule book and a very hand sequence of events.  Nice

Lets break the weekend down blow by blow.

Friday

So our group arrived from Brisbane at Townsville a short while after lunch on Friday.  My main concern was running the painting tutorial for the 10 hobbyist who’d signed up and delivering value and good quality practical and technical advice.  Having never taught anyone how to paint something before this was a new venture for me, however I did try and plan for a much as I could.  If you’d read my previous post, you’d know that the aim of this tutorial was to take the participants step-by-step through how to paint a Leman Russ tank side.  Although we all painted the same thing, what I was wanting to impart was principals and techniques that could be taken away and applied to their own armies at a later date.  The tutorial went much long that I expected, going for over 6hrs…  however to everyones credit, the enthusiasm showed and we motored on after dinner to finish the project.  Everyone that participated was thrilled with their efforts and I’m sure in the next few months we are going to see some fantastic looking armies emerge.   Thanks again to Battle Station Ipswich and Hobbyrama for their assistance in putting this together

IMG_1497

Right at the start of the tutorial.

IMG_1499

A few of the guys talking smack during the painting tutorial.

Overall, I was really pleased with the success of the painting tutorial, not only did we raise $400 for Legacy, but we’ve also raised the standard of hobby by imparting new skills that the participants can use to better their armies.  Awesome.

So… the games

Saturday went like this

1st game.  Carcharodon’s V Tryanids.

I have to say from the start that this tournament didn’t allow Imperial Armour at all (thats now been fixed for future events, score one for common sense)  So my Carcharodon’s were actually a Space Wolf army in disguise.  Space Wolf Sharks?  Nevermind.  The Tyranid army was really well painted, and had quite a few monstrous creatures (funny that) but thanks to my Ruin Priest and Jaws of the World Wolf psychic power (what a jack!) I managed to dispatch this army with little to no causalities.  It would be remiss of me though not to include some pictures of this Army as its really well painted, has a strong 2nd Ed vibe to it…

IMG_1473

IMG_1475IMG_1474

My next game was against a Blood Angel Army.

This is the game that I should have won, and have been reprimanding myself ever since.   I made a few very small, but tactically costly mistakes that meant I lost by the narrowest of margins.  The final move of the game that made me want to scream was my “Wolf Lord”, Ruin Priest and a squad of “Grey Hunters” charging a squad of tactical marines for victory.  I needed a 6″ roll to get into close combat.  I made the roll.  The tactical marines with a plasma gun overwatch fired.  The plasma gunner rolled two sixes and two wound rolls.  Smoking two of my grey hunters and thus turning a 6″ charge into a 7″ charge.  Fail.  Face Palm.  Angry face.  Good game though, probably the most challenging game over the weekend actually.

My third game for day one was against a Dark Angel Death Wing army.

Unfortunately for my opponent the dice just were not on his side this day, and despite him having massive amounts of terminator armour, the amount of 1’s he rolled was greater.  He kept good humour about it though which we all know can be difficult to do when the dice just don’t want to cooperate.

At the end of the first day we had the Charity auction, where I picked up all of the 40k rule books except for 1st Ed and 6th ed (I already have both of these) and a Drop Ship Commander Army starter.  Raised $450 for Legacy so its all good.

IMG_1506

Day two, game 1.  Carcharodon’s V Space Wolves

I have to admit, I was worried about this game.  Space Wolves are a potent army and my opponents force looked strong.  What made it worse too was he stole the initiative! ouch.  In this game my Wolf Lord really shone.  It was a VP mission, and my Wolf Lord accounted for over half the final tally.  He just kept on single handedly killing things.

So by the last game of the last day, having won 3 games and lost 1, I knew my final opponent was going to be strong.  To my despair it was a Drago lead, Grey Knights Army where upto 5 objectives had to be captured.  So it was Drago with his Paladin posse including an Apothecary out front with 3, 10 man squads of Purifiers and 2 Twin linked autocannon wielding dreadnoughts in support.  Ouch.  Knowing they had to move on me, I decided to sit back and let that happen until I could break their momentum (read kill Drago) then begin my own offensive.  Turns out this plan worked (except for the killing Drago part) when fortune smiled on me.  Enter Jaws of the World Wolf.  Remarkably, and I mean remarkably I managed to kill Drago with this, but also 2 of his Paladin retinue.  Amazing.  After that it was pretty much down hill with my Wolf Lord and his retinue mounted in a Redeemer coming out of hiding and assaulting the enemy.  Kicking ass and taking names.

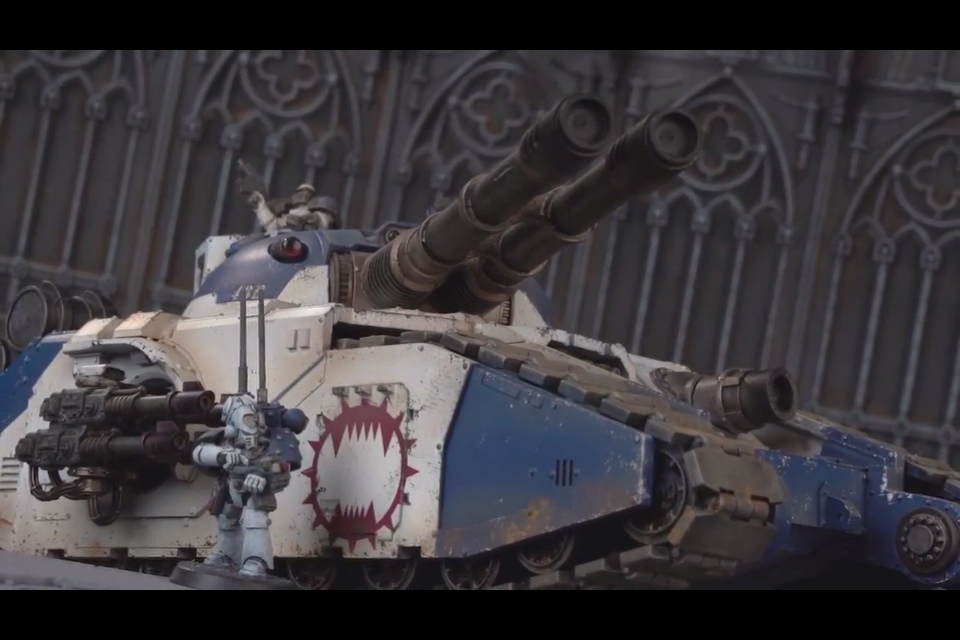
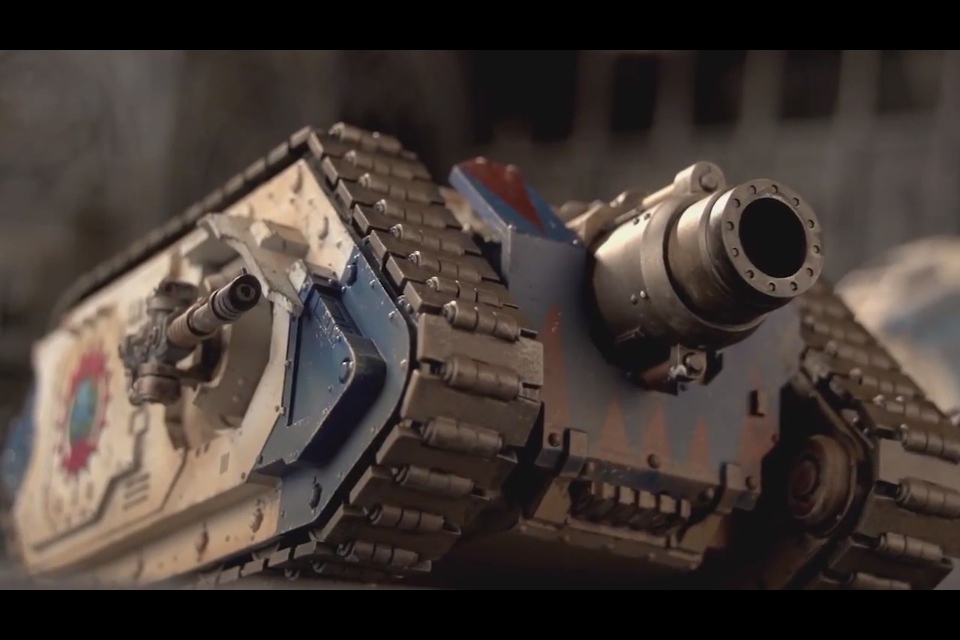
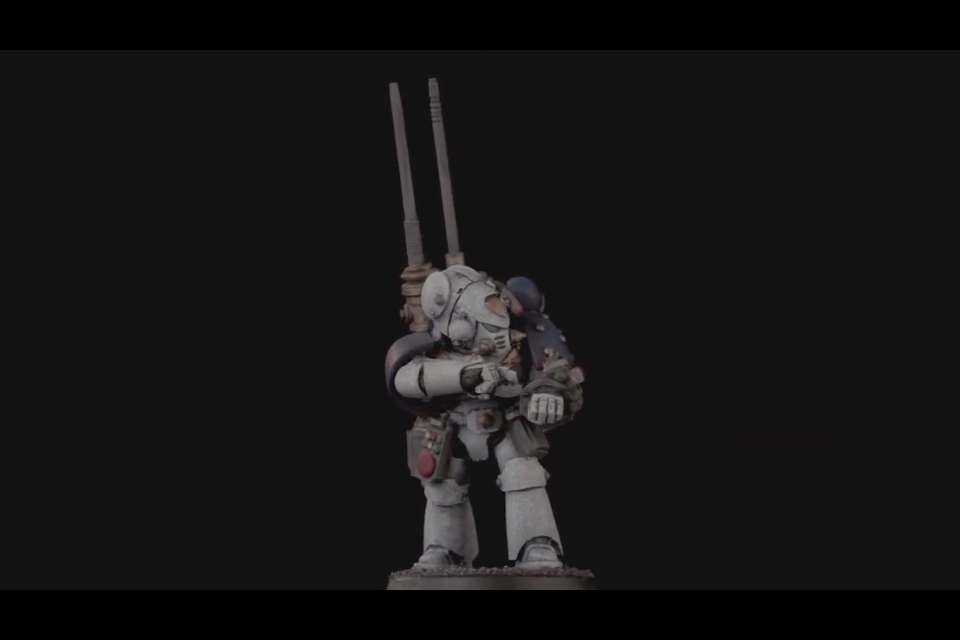
To my opponents credit, his army was beautifully painted (winning one of the peoples choice awards) and I feel it necessary to share some photos of his models.

IMG_1481IMG_1482IMG_1483

So for all my troubles, I managed to get 3rd in the Best General Competition, 3rd Overall, Best Painted Army and Best Painted HQ model.  The weekend was a great success and I’m already scheming planning my army for next year…

If you want to see some more photos of the weekend go to my FB page or the ADFWGA FB page to see some great action over the weekend.

Comments welcome

John

Hello everyone,

As many of you know, FW recently released the 1st book in the Horus Heresy series : Betrayal. Like many, it’s really captured my imagination and the models that FW have released to date are nothing short of exceptional. Aside from the models the actual book has really raised the bar on so many levels for a FW publication. It’s well written, thorough, beautifully presented and the accompanying stand alone rules set and campaign are nothing short of amazing.

Over the past few months I have been steadily reading through this epic tome and every time I’ve found myself thinking of what I could paint next. World Eaters seems interesting with their amazing Primarch model or do I do a Death Guard army? But one thing keeps bothering me and has done for some time. I have these really great looking Imperial Armies that I’ve been collecting for several years now, however I don’t really have a gaming table that is up to the standard that they are painted to.

I have to admit, the thought of building and painting a gaming table isn’t a new one to me. However painting other armies and models has just been a higher priority. Additionally, the table that I’ve always wanted to create has been difficult for me to visualise and justify the cost, let alone the complexity involved in creating it. The table that I’ve always wanted to do is a ruined Imperial city. But done properly, not just a bunch of disparate ruined buildings chucked onto a 6″x4″ board with a few craters and other debris thrown on for effect. I wanted my board to have city streets, cat walks, ruined buildings and even city precincts. The thought of creating this had been quite overwhelming. Until recently.

As some of you know, my armies on parade entry featured a FW board section. I was thoroughly impressed with this section. It had great levels of detail and could provide some great narrative opportunities if I wanted to incorporate it into a regular game. So I knew that the FW gaming board sections were good quality and had many opportunities for gaming with. Then when I saw the newly released realm of battle cityscape sectors I couldn’t stop myself from thinking of some of the possibilities that were available, but still the thought of painting another army was strong.

What I really like about the board sections is that they have “foundations” for you to put your own buildings on and also feature streets etc to give the boards context when arranged together. In addition to that, each board is a mini precinct within itself. So arranged together they can tell an interesting narrative.

So after a lot if thinking and consideration, looking up reference material online and drawing inspiration from some of the amazing cities created in the 6th ed rule book I went online and ordered 2 of the 4 tile packs and a few boxes of the GW ruined imperial sectors that have become available again. Fortunately for me I used mostly price money to buy the plastic GW kits.

20121203-103530.jpg

20121203-103552.jpg

With any luck the boards will arrive before Xmas however I’m not holding my breath, I can imagine that is a pretty busy time of year for FW.

My plan is to create 2 x 4″x4″ city boards for smaller games and one themed 6″x4″ board for larger battles and obviously a 8″x4″ board for something a bit different.

I’ve got some really good ideas on how I’m going to approach this, with a massive cathedral and city square as the feature of the the 6″x4″ board, with a commerce district and small manufacturing precinct featured also.

I can’t wait to get started on this project and wish the board sections had arrived already so I can start building! This is going to be an interesting modelling project and I feel it’s really going to stretch me as a modeller which I’m looking forward to. Plus it’ll be great to finally have a great looking gaming table to play on with my armies and some of the amazingly painted armies my mates have.

Ok, that’s me for now. Thanks for dropping in

John

Hello everyone,

On the weekend I participated in an 8000pt Apoc tournament and placed 3rd overall, and also won “Best Painted”  It was a great tournament, with 4 games being held over the two days.  It was a smoothly run Tournament which would be expected when the steady hand of Jeremy from GW Chermside was at the helm.  As you would have seen if you like my FB page, there were some pretty amazing armies present.  In particular a pretty striking Eldar army, with an amazing Phantom Titan (which whipped my ass)

So the breakdown of the games went like this.

Game 1.  Me Vs Matt.

Matt had a rather large Salamander Space Marine force being supported by two Warhound Titan.  Luckly for me, I smoked the two Warhounds straight away.  Major Victory to me

Game 2.  Me Vs Tony’s Eldar

Phantom Titans are tough to hurt, let alone kill.  That is all – Major loss to me

Game 3.  Me Vs Reds Imperial Guard

My Titans really gave Red’s guard a hammering.  The Reaver was killing super heavy tanks at will, and due to a rather unfortunate deployment roll for Red, meant that the blast templates from my Titans were laying hammer blows everytime they shot.  Major Victory to Me

Game 4.  Me Vs Steve’s Imperial Guard

My opponent conceded half way though my 1st turn.  It was pretty ugly for the Guard.  Major Victory to Me

Apoc 2

Apoc1

The Titans were really fun to play with.  In games of Apoc they seriously come into their own.  It takes a concerted and determined effort to destroy one, let alone 3 (unless your a Eldar Phantom Titan).  The fire power they dish out is astonishing too.  It was very pleasing to see them on the Battlefield, and to get best painted was a rewarding achievement after so many months of painting these 3 massive projects.

Thanks for stopping in

John

Hello Everyone!

This will be a super quick post just to fill you all in on where I’m at on the Reaver Titan.  So after I finished putting the body together I moved onto masking it all up ready for paint.  This is always a fiddly aspect of a kit build and needs to be done very carefully and thoroughly using the right materials otherwise you’ll get over spray on your nicely painted work, or when you remove the mask the paint will come off with it.  So as tedious as it is, I spent a fair bit of time on this part of the build.  As you can see from the pics, there is a lot of work done here.

So now that most of the heavy lifting has been done in respect to the body, its now time to move onto assembling all of the main sub-assemblies for preparing to paint.  As will the body, structural integrity is a very important aspect of this build for me.  I take a lot of time considering how the kit will stand up when its complete and remain that way for a long time.  Thats why I use 2mm steel rod, 2 part epoxy resin and drill shallow holes in the male and female parts of a joint to increase surface tension and provide something for the glue to grab.  Finally, when I set the joints, I always use a large clamp to hold the parts together so that the bond is set firm with minimal gap between the two parts. As I’d already spent a fair bit of time getting the pose of the Titan correct, this process was mostly straight forward.  Just time consuming waiting for the epoxy resin to harden enough so that I could handle the parts…

Although the toes are not structural I do want them to be firmly fixed to the foot.  So I still drilled 2 x 2mm holes in the male and female knuckle and also had a 1mm brass rod joiner.  You’ll see why in a minute.

To ensure the toes are flat I clamped down the foot while the resin was setting…  yes, thats my coffee table.  The grand final was on so I had to move locations so I could watch it…

The legs now fully assembled and standing on their own two feet.  So to speak..

So lastly, I started with getting the base sorted out.  I wanted to get the positioning of the feet right before it was painted.

So I simply traced around each foot then marked out where I wanted each screw to be positioned then drilled a hole.  The base is a 300mm dia 3mm thick piece of clear acrylic.  The same size I used for the Warhounds.  I originally had a 450mm dia one made for the Reaver, however it turns out thats too big.  Perhaps I’ll save it for the Warlord….

As you can see from the picture below, I am using 4 x 20mm screws for the toes, and 1 x 40mm screw for the foot.  This will ensure that the foot and ankle joint are joined even more.

And this is a dodgy as photo just to give you an indication of the size of the Reaver.  Its massive.  That is a Baneblade super heavy tank and one of the Reaver’s weapon systems laying beside it…. Remember too that the Reaver has a carapace weapon mounted on it too…

Just to tie of this post, thanks to everyone who offered to get me some Iayden Darksun paint!  really appreciate everyones offers!  However much respect goes out to Cal who got me a nice new pot of it today.  So I’ll now be able to get on with business.  I also spoke to Tegan today from Maybe Jane about some stencils I’m getting made for this bad boy.  I’m not going to let on too much about what I’ve got planned here, but its going to be pretty awesome if I can get my idea to work.  It’ll be tricky but its worth trying so stay tuned for that one.  I should know in the next 48hrs or so if Tegan can produce what I’m after.

Ok, got packing to do now.

Comments always welcome, and thanks for looking.

John

Reaver Titan WIP

Posted: October 1, 2012 in Titans
Tags: , , ,

Hello everyone,

Its been a long weekend here and I’ve spent the last two days working on the Titan. I wanted to get as much as I can in this weekend, as next weekend I’m moving house and I still don’t know if I’ll be able to do as much painting as I’d like to in the new place as its not as big as my current one. Whatever, so I hit it pretty hard this weekend and made a pretty big dent in it until I ran out of Iayden Darksun and tried to get the new GW substitute and its a very poor match, so I’ve had to use the bro network to try and find a replacement, and until it arrives, there will be no more painting. Sad face.

As I spent most of Sunday (8am til about 11pm) painting and building, and most of Monday morning working on the Reaver, this is going to be a pretty big post, so go grab a coffee or something….

Ok to the pics!

First up I had to get the interior finished before I could move onto any other area of the build. The interior of this kit is pretty amazing, so much detail. Sadly though, a lot of it is obscured from view. However its still important to me that attention is paid to it as its worth doing. So I began with under coating all the areas that were going to form the interior structure of the kit (previous post)

Then I started adding weathering to the kit. As most of these machines are ancient (particularly from this legion) I went pretty heavy on the weathering techniques.

Next was assembling the body of the Reaver. This was going to be a massive job that needed to be done right. So I used a lot of clamps and drilling holes in the parts for the glue to grab. Note I used epoxy resin to glue this kit together, not super glue

To get the right bond with the parts for this build, I had to use clamps to hold the parts together while the resin was setting. This involved glueing one part together at a time. Very slow process, however it yields the best results as each part has been clamped together while the resin sets, creating a very firm bond.

Gluing the main bulkhead into the main body.

attaching the weapon system “controls” to the main body

attaching the reactor and other weapon control panel into place

Finally, adding the final part of the main body…

I think at this stage I’ll put this post up and have a part two cos this one is getting a bit out of hand and there is still a long way to go. In the next part I begin masking up all of the interior sections and then begin assembling the legs and begin painting. So until my next post, thanks for looking.

Comments welcome

John

Reaver Titan

Posted: September 20, 2012 in Titans
Tags: , , , ,

Well, I had some great news yesterday.  My Reaver Titan arrived in the mail, and holy quick delivery batman it arrived in no time at all.  I ordered it last Thursday night and it arrived Wednesday afternoon.  Amazing.  Anyways, this is a seriously massive kit.  By far the biggest I’ve ever seen for a wargaming miniature.  Weighing in at a hefty 5.2kg, this bad boy is an amazing sight to see.

So I went with the Apoc missile launcher, the melta cannon and laser blaster weapon system load out.  As you can imagine I was pretty pumped to get a good look at it, however I didnt get home to late last night so I wasnt able to spend much time inspecting the pieces.  Did I mention there are shit loads of pieces?  Fuck me dead there are a shit tin of pieces!  Its astonishing.  So I took these photos last night just to illustrate the detail of the kit and the quality of the cast.  I’m very impressed.

The bag on the bottom left corner is the biggest and contains all of the leg parts.  By far the most complicated aspect of the model.

aaaahhhh we all know what that is, the very distinctive head of the Reaver.  This kit has an enormous amount of cleaning up to do.  Every piece, especially the larger pieces, have massive pour points attached to them.  I estimate that 1/4 of the weight of the box has gone  just in these pour points.

This is the Tech Priest crew member that dwells in the body of the model.  As usual Forge Worlds minis are correctly scaled, well cast and realistic.  It does have some extremely fine pieces tho and you must be careful not to loose them.

The instructions are much better than I expected and given the audience who’d buy this type of model, well laid out and thorough.

No shit


So today I went out and laid all the parts out to inspect them for any obvious casting errors and ensure that everything was present.  With such a large kit discovering that a part is missing could take many weeks or months if you are not thorough in the beginning.

 As I mentioned, the legs are by far the most complicated aspect of this model.  I was however pleased (and even more so after some further inspection) that the kit is quite posable.  I was concerned that I’d have to settle for a less than dynamic pose for this model as all the pictures I’ve ever seen of it project it as being quite ridged.  This isn’t the case, and in keeping with my other two Warhound Titans, I plan on making this kit in a rather dynamic pose too (as dynamic as you can get for a 470 tone walking city block)

Yep, the head.  I have to say at this point, I was disappointed that this kit unlike the Warhound, doesnt come with the option to have the crew in or out of the cockpit area.  Further to that, I was under the impression that the Titan came with foot crew as well.  I’ll have to order them next time.

 This is the body and its beautifully detailed.  I’ve got some great ideas (in my head anyways) of how I’m going to paint this area.  If what I’m thinking comes out the way I see it in my minds eye, its going to be the illest Reaver Titan around

This is the chassis that goes under the body carapace.  I was really impressed with the way the hip area works on this model.  Again, allaying my fears of it having only limited posing ability.

Cool little bits of detail that you can add on to the kit to personalise it more.  Interestingly, the Warhound has these extras too, however they are different moulds.

The 1st of the Reaver Titans weapon systems.  The Laser Blaster.  Nice

Again, much more impressed with this now that I’ve been able to see it unassembled and unpainted.  A lot more detail that I was expecting.

Last but not least, the Apoc missile launcher.  This is one solid piece of resin.  Insane.  It weighs a shit load.

Ok, so I am extremely pleased with this kit.  My level of enthusiasm  to work on it is very high and expect to see a lot of rapid development in the coming weeks.  I have Titans of War on this weekend so I wont be able to do much work on it, but come next week I’ll be hitting it hard.  Firstly cleaning it all up with my trusty Dremmel and then test fitting to get the pose right.  It looks like I’m going to have to paint it in lots of pieces to get the level of finish I want on the paint job.  Much like when I painted the Warhounds, however there is much more detail here and the level of complexity is far greater.

I hope you’re looking forward to this journey as much as I am, I’ve been thinking about out how I’m going to do this kit for some time and I have high expectations on how its going to look completed.

John

Ok, third post for the day look out!

Again, this is a very quick one to show you some pics of my completed squadron of Iron Hands Landspeeders.  I decided to do a video diary of this build for something different.  I’ve posted the last two tutorials on this pages YouTube channel if you’d like to have a look at them.  I fully magnetised these kits so that they can be put together in various configurations.  I’m a big fan of this now as its difficult to predict what will be a good or bad configuration until you’ve had a few opportunities to pay test them.  Also with all the kits now being plastic its pretty easy to do.

Ok, enough rant

Here are the pics

Thanks for look, comments welcome

John

About 3 weeks ago I played in Quarter Master 3 held here in Brisbane at Greenbank.  Although I didn’t place my Carcharodons did get Best Painted.  Apart from the Trophy I also got some gift certificates that I could spend at an independent gaming store called The Combat Company.  I have to say, I was really impressed with their service.  I ordered the models on a Friday, and I had them on Monday, no fuss.  I ended up getting two, one for my Carcharodons and the other for my Iron Hands.  Now that in 6th Ed troops that have a toughness buff from being on a bike don’t suffer instant death from their original toughness but their buffed toughness, taking out Ork biker Nobz is tough.  But not with this heavy hitter!  Its also really useful at smoking Terminators too who are also a real problem in 6th Ed.  So in my new Iron Hands list that I’ll be using next weekend at Alpha Hobbies Titans of War 1850pt Team Tournament has one it in.

As a matter of fact, I’m so happy with how this one has turned out I’m going to paint the second one as an Iron Hands Vindicator and I’ll be getting another so I can have a Line Breaker formation for games of Apocalypse, which I’ll be playing in Games Workshop Mt Gravatt’s 8000pt November tournament.

Anyways, here are some pics of the finished model.  I have to admit, I really like it without the dozer blade on it.  Reminds me of the old Epic scale Vindicator from back in the day.


ok, thanks for looking

Comments always welcome

John

If you haven’t seen it yet, here is Alan Bligh discussing the new Horus Heresy book being released by Forge World at UK Games Day on the 23rd of September.

Here are some shots I grabbed of the post

20120915-075618.jpg

20120915-075825.jpg

20120915-075914.jpg

20120915-075940.jpg

20120915-075956.jpg

20120915-080008.jpg

Can’t wait for this

If there are any of the people from the UK going to GD and can get me a copy of this you can have my first born AND I’ll dance at your wedding.

Drop me a line on my Face Book Page

Cheers

John

So this is just a very quick post to let everyone know that I’ve just uploaded part 6 of my Landspeeder tutorial onto ThePaintingBunkers YouTube channel.  This part deals with painting and weathering the interior.  I’m just in the process of finishing part 7, decals.  I hope you enjoy.


On a completely different topic I have always wanted to attend Adepticon held each year in Chicago.  I’ve been giving it a lot of thought how awesome it would be to go, and even more awesome to go with a bunch of other guys (or gals) who are into the hobby.  The big hurdle for most people (including myself) is the cost involved.  However in a previous life I knew a lot of people in the travel industry (one of the largest travel agencies in the world, Flight Centre) So I got back in touch with a them to talk about what we could do if there were enough people who’d be keen on coming.  So I put up a small question on my  Facebook page to judge what the level of interest is from other enthusiasts that visit my blog.  Keep in mind that the even isn’t until mid April 2013 so if you do want to go, and all the stars align putting a little cash aside each week would mean that it could happen.

So please take a few moments to let me know what your level of interest would be to attend Adepticon in 2013.  This is really for Australians, but if this gets off the ground it’d be awesome to meet some of you guys in the States.

Ok, thanks for checking it out, hope you like the tutorial!

Comments always welcome

John