Posts Tagged ‘Horus heresy’

I’ve been waiting to tell you all about this for the LONGEST time.  Earlier this year I actually acquired an unassembled (mostly) and unpainted Anphelion Base.  For those of you that don’t know, the Anphelion Base was an extremely ambitious piece of 40k terrain that Forge World made to accompany Imperial Armour IV  – The Amphelion Project.  These kits are very very rare.  When they were released back in the early 2000’s they were over $1,500AUD to buy, and were notoriously difficult to assemble (this one lived up to that reputation)  When I say difficult to assemble, what I mean is, during assembly, most of the time you feel like smashing it to little pieces using a hammer.

So my idea for the base was to make a table that represented some sort of abandoned Adeptus Mechanicus research station, with an entrance to an underground laboratory just nearby.  I’ve been wanting to use the Forge World Imperial Strong Point  I painted for my Carcharodons for some time.  This seemed like the perfect opportunity.  It will act as the entrance to the subterranean laboratory.

Now, this series of blog post is going to be slightly different from my usual ones.  I’m actually going to include work in progress photos along with commentary.  I’m doing this for two reasons.  The first one is this is such an awesome model, I want you all to be able to live vicariously through this blog during the assembly of this amazing model.  The second reason is, I’ve not found many comprehensive blog post on the inter-webs on this model.  I’ve seen a few pics of other modellers here and there, but no ‘this is how I built and painted the Anphelion Base’.  So, in the interests of prosperity, I’ve taken it upon myself to provide the inter-webs with just such a post.

IMG_334003

The first step is to get the layout how I wanted it.  One thing I knew about this kit is that 1.  It was going to be mounted on MDF (Craft wood) and 2.  I was going to have to make molds of certain parts because with what I had, I couldn’t make the layout I wanted.

Lets start with the MDF base.  One thing that really irritates me about scenery mounted on MDF is the lip.  The base for the building or whatever gets cut out of MDF and thats it, just  really harsh shoulder between the board and the model base.  I didn’t want my piece to have this issue, I wanted to make sure that the edge of the MDF was made more into a ramp so that minis can balance properly, and its aesthetically  pleasing on the table.

IMG_334306

The first thing I did was draw outlines of all the various modules of the base on to MDF.  This included the ‘buttresses’

IMG_334710

I then added about 20mm around the module to allow for the ramped lip etc

IMG_334407

Then marked up the MDF ready for being cut out

IMG_335013

The halls were a much easier prospect…

IMG_335114

As was the intersection…

IMG_335316

Then it was time to cut them all out

IMG_335518

One problem I didn’t anticipate was the wide base of the hall going into the narrow base of the intersection.  I had to put my thinking cap on for this one…

IMG_335619

I ended up just making a small modification to the hall base to allow for a smooth transition between pieces.

IMG_335720

So now the hall goes into the module and the intersection smoothly.

IMG_335821

IMG_335922

IMG_336023

Next up with the very messy job of sanding the ramp onto the lips of all the bases.. epic job.  I wouldn’t recommend doing this unless you have a good dust extraction method and dust mask.  MDF is seriously bad stuff to breath in.  Maybe thats why no one bothers to make a better lip transition?

IMG_336124

Nice

IMG_337942

After I’d done this, I went back to all the joins and ‘aligned’ them.  Which basically involved going back to each one and making minor modifications to ensure the joints overlaped and joined smoothly.

IMG_338043

Just another pic of a fixed up joint

IMG_338144

The MDF bases of the base all organised.  This didn’t take as much time as you’d think.  The results will be well worth it in the end.

IMG_336528

So I also wanted some scatter terrain too.  I made a mold of the ‘containers’ so I could have a few floating around the base.  You’ll also notice the landing pad has two ramps indicated on the base.  So yeah… I’ll mold that section too.

IMG_336831

So I mounted the scatter terrain on MDF bases too.  I also added a few barrels etc to give it some more visual interest.

IMG_336932

IMG_337033

IMG_337134 IMG_337235

IMG_337336

IMG_337437

IMG_337538

IMG_337639

IMG_337740

IMG_337841

There you go, the Anphellion base is now ready to be glued onto the MDF, then undercoated.  I don’t know if its clear in the photos but if you look closely you can see the that the layout I’ve come up with is different to the actual models that I’ve got.  So I’ll have to make molds of the pieces I need.  This will be a pretty big job too.  I won’t do a post on the mold making process as thats a series of post in its self!.  You’ll just have to believe me that it happened and I achieved the desired results.  In future posts though you’ll notice the molded sections because they’ll be white.

Ok, thats it for now, until next time.  Thanks for dropping in

John

So, if you want to smoke a whole bunch of marines quickly from afar what do you use?  Plasma cannons.

For those that follow this blog regularly will know that I’m doing both a Loyalist and Traitor World Eaters army.  To distinguish between the two forces, the Loyalists will all be in Mk 4 armour, while the Traitors will be all in Mk 2 armour.  So these guys are Loyalists.

I’ve actually got the rest of the 2000pt Loyalist army on the painting table at the moment, so with any luck I’ll have a few more posts coming up shortly with the rest of these heavy hitters.  It’d be nice to be able to field 2000pts of World Eaters marines.  Mostly infantry too.  I really like marines in 30k.  In fact, I prefer to play 30k these days more than 40k.  Much more interesting game.

I actually used these guys a little while ago in a game.  A squad of Terminators teleported just near them.  The Terminators didn’t move when they deployed (ran in the shooting phase) so were very closely grouped together.  Next turn, these guys smoked them to a man.  Nice.

Devestators 2
Devestators

Ok, thats it for now, until next time

John

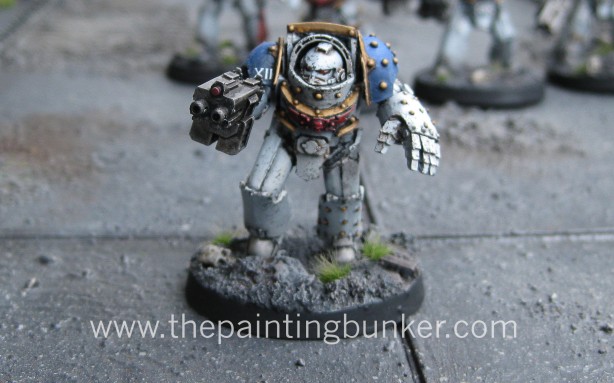
Really happy with this model. I won’t bang on too much about it. I think its configuration is totally impractical in game terms, but damn it looks cool

World Eater Contemptor Dreadnought 1 World Eater Contemptor Dreadnought 2
World Eater Contemptor Dreadnought 3

Comments welcome as always, thanks for dropping in

John Sutton, Brisbane, Qld


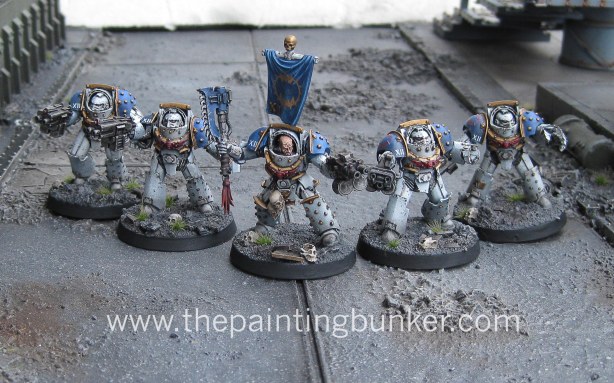
I finished these a few days ago, however I’ve been pretty focused on painting these last few days and wanted to finished of another unit before I took some time out to photograph them both at the same time.  You’ll have to wait until the next post to see what else is finished, but for the time being here are the Terminators.

I’m particularly pleased with how these Terminators have turned out, I’m glad I took the time to modify Tyberous’s torso armour for each of the Terminators.  The ‘lightning bolt’ really fits in with the armies look and is very consistent with other World Eater models in the Forge World range.

The pictures

World Eaters Terminator Squad 1 World Eaters Terminator Squad 2 World Eaters Terminator Squad 3 World Eaters Terminator Squad 4 World Eaters Terminator Squad 5 World Eaters Terminator Squad 6 World Eaters Terminator Squad 7Thanks for dropping in

John


So… this has been a long time coming and now that I’m finished with it, I can say with certainty that it was worth the wait.  Its a great kit by Forge World.  I think I’ll just let the pictures do the talking on this one…World Eater Spartan Assault Tank 1 World Eater Spartan Assault Tank 2 World Eater Spartan Assault Tank 3 World Eater Spartan Assault Tank 4 World Eater Spartan Assault Tank 5 World Eater Spartan Assault Tank 6 World Eater Spartan Assault Tank 7These are the track links that I made for this kit as I wanted to add a little more detail to them than what comes stock.  If there is enough interest, I may actually produce them for sale similar to what I did with the Storm Shield.  Just a quick point about them, is that I’ve run very coarse sand paper over them to give them a used look, they are quite detailed if thats not your thing.  So flick me an email or leave a comment if its something you think you’d be interesting in seeing available for purchase.

If you look in the progress shot gallery you’ll se clearer images of what they look like fresh

Thanks for dropping in

John Sutton, Brisbane, Qld

Well, its been a long time coming but I finally got around to it.  I’ve started painting my 30k World Eaters army.  Bit late maybe, but who cares, they’re going to be bad ass.  I’ve actually been quite busy this last week or two with painting and modelling however I’ve been so focused on painting and modelling I’ve neglected to do any posts.  Plus the weather has been seriously crap here in Brisbane this last week so the light hasn’t been very conducive to taking good quality photos.  I did manage to get some pictures of my finished squad of 10 Blood Letters of Khorne and my Iron Hands Storm Eagle, however I had the wrong exposure setting on my camera and the pics turned out seriously crap.  So once the light improves here I’ll do up a post each for those two completed projects.

Anyway…  Back to the XII Legion.  So this is a pretty ambitious project for me, however instead of tackling it all in one hit, I’ve broken it down into smaller pieces to make it a bit more manageable.  I’ve actually gone and purchased over 5000pts worth of resin crack for the army, however I’m not going to attempt to paint them all at once…. I did think about it though… Plus, I’d like to enter Armies on Parade (September 28 in Australia) this year too and I figured having another Horus Heresy era army in the competition wouldn’t hurt…

Moving right along, the first lot of units on the painting table for the World Eaters are:

1.  Angron (of course),

2.  Terminator Squad,

3.  Rampager Squad,

4.  Legion Heavy Support Squad,

5.  Spartan Assault Tank (pimp mobile for the Terminators),

6.  Storm Eagle Gunship, and

7.  Contemptor Dreadnought

Heres what all that looks like in a box after I cut off all the tabs, pour point etc incase you’re wondering….

IMG_262401

So lets take a look at these units shall we…  By the way, the pics are pretty poor quality so please bear with me

Angron

Can I just say this model is amazing.  I know its been done to death on the interwebs but I just have to have a chop at it too (pardon the pun).  The detail is astonishing and Simon Egan well and truly exceeded everyones expectations with this model.  I won’t bang on too much about it but I’m seriously looking forward to painting this model.

IMG_265229

Terminator Squad

I knew very early on I wanted the squad sergeant to be based on the Tyberos model of Carcharodon fame.  This was for several reasons, the first is I really like the stance of this mini, and secondly, it has no Imperial Eagle on the breast plate.  As you may know, only the Emperors Children were allowed to have the Aquila on their breast plate, and the final reason is I like the studs on the armour and its baroque look, and well… its just a cool model and its character really suits that of the World Eaters.

This opened up an interesting can of worms for me as the terminator models I wanted to use for the actual squad are the Tartaros pattern terminator squad.  When I purchased these models, the Legion Tartaros pattern squad were not available so I had the armour I wanted, but the torsos were festooned with Aquila’s and the legs had no studs on them.  I also had a bunch of left over Tyberos models from when I did my Carcharodon army a year or two ago.  So I decided to go and make the torso from the Tyberos model the torso for the Tartaros squad. This required a fair bit of cutting, drilling and chopping but I got their in the end.  I also added studs to the legs and power fists of the models.  I’m pretty happy with the overall result.  Here are some pics, and also I’ll included a thumb nail gallery of the progress shots I take with my phone as I’m going along.  As I’ve mentioned previously I do these mostly for myself so I can remember how to I did something if I need to go back to it at some point in the future so they are not the most wonderfully framed shots.

I really like the squad sergeant (the whole squad will have the same should pads too)


IMG_265027


The squad preped and ready for undercoating

IMG_265128

Rampager Squad

These bad boys are the blood thirsty crazy psychopaths that have had the Butchers Nails implants. I guess they eventually went on to become Khorne Berzerkers… seems to fit.  I tried to have as many Chain Axe variants as I could for this squad and I made the squad leader out of an actual Rampager with a massive two handed Chain Axe.  I actually see these guys more as a Legion Tactical Squad that have just swapped their Bolters for Chain Weapons and Bolt pistols as opposed to a real Rampager squad, but for the sake of this post, lets just call them Rampagers.  I made sure they are all shod in MKII armour, which the XII Legion favoured.

IMG_266743

Legion Heavy support squad

The army needs someone to do the heavy lifting, so I thought some heavy weapons would be a good idea at this point.  So I threw in some plasma cannons.

IMG_266138

Spartan

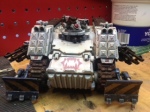
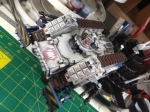
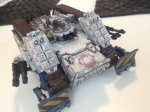
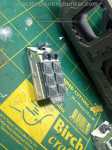
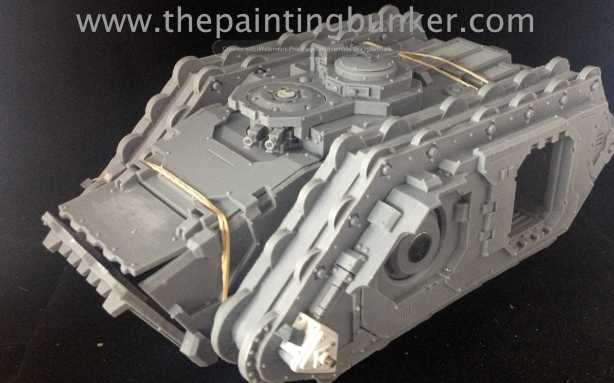
This is one seriously bad ass tank.  If you haven’t read the Betrayal rule book yet, you may not know that in 30k these tanks were hard hitting, teeth pulling mo fo’s.  With a few upgrades they are practically indestructible, easily capable of delivering up to 12 Terminators to the enemies door step to wreak havoc whist along the way delivering hammer blows to the enemy.  So I decided to go balls out with this bad boy and stick practically every upgrade you can put on a Spartan on this model.  One in particular that I’ve wanted to do on a Landraider for some time is a dozer blade so this was a good opportunity to give it a shot.  This is perhaps what I am most proud of on this model, I hope it turns out ok once its all painted.  I intend on painting the interior of this model so the hull isn’t assembled yet. A few other obvious upgrades I’ve added to this model are a remote weapons platform for the multi melta and HK missile, frag assault launchers and track upgrades.  Behold

IMG_267550

The dozer bladeIMG_264926

Track upgrade

IMG_266642

Storm Eagle Gunship

Just cos they’re cool (that gap in the hulls been filled by the way)

IMG_267348

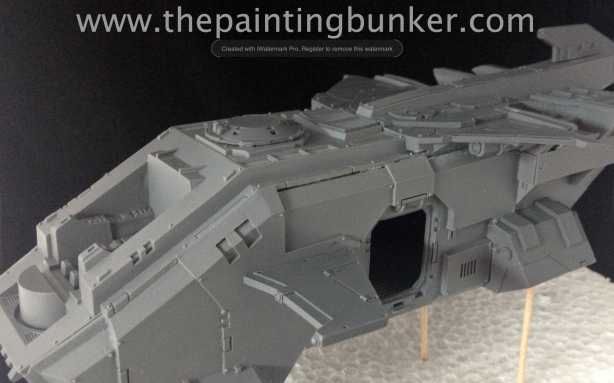
Assembling this kit is a real punish…

IMG_266844

Finally…  The Contemptor Dreadnought

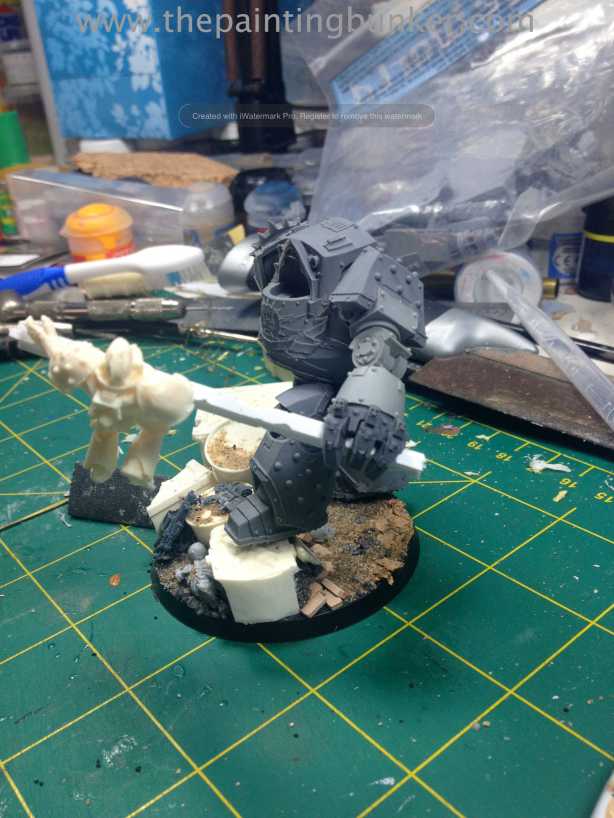
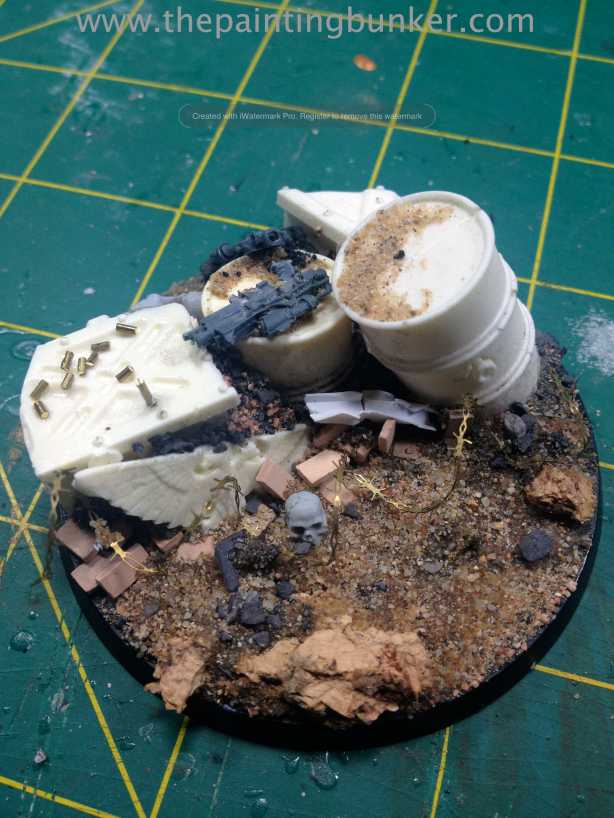
So I’ve had this idea for a Contemptor for some time now that involves said Contempotor back handing a marine across the battlefield with a massive iron bar.  Yep, brutal.  It was sort of inspired by the cover of the Black Library Book Betrayer.  I wanted the base to tell a small story too…  So basically the dreadnought has been swatting marines with a random I beam that he’s found somewhere along the way.  A marine is behind some make-shift battlefield barricade frantically trying to hold off the assaulting force, and this dreadnought has just rocked up under fire and smacked this marine with massive I beam out from behind his cover.  You can see on the base spent bolter casings and an unloaded bolter on one of the drums.

IMG_265734


IMG_265633IMG_265936

Thats it for now.  Thanks for dropping in, hope you’ve gotten something from this post.  As usual, comments welcome.

Until next time

John


Hello everyone!

Its been a while since my last post as I’ve been busy with study, life and just well, I needed to take a bit of a break to recharge my painting mojo…  it came back pretty strong on Wednesday morning and I cracked open the bunker and went on a mini painting bender and smashed out two test models for my up and coming 30k World Eaters.  This is something that I’ve been thinking of for quite some time however for some reason I couldn’t decide in my mind exactly what I wanted to do in terms of how I was going to paint them.  I had a few different ideas for the white actually, and I was torn as to which method I’d ultimately use.

So I just decided to paint one model with each method and compare and contrast the results.  So sit back and I’ll take you though what I did and how I did it blow-by-blow.  Hope you enjoy it.  By the way, if you follow my Facebook page you’ll already have seen the end results, and if you don’t follow my Facebook page, go do it now….  I was actually so pleased with how both models turned out that I posted the pictures up on my Facebook page to show them off.

So here we go….

Let me begin by giving you some idea on where my head was at before I commenced painting these two models.  White is a tricky (tint, its not a colour) to paint and the colour that is under it has a very strong influence on how we perceive it.  The look that I want to achieve with my World Eaters is one that gives the viewer the impression that they have been in, or are in combat.  So lots of grime, dints, dust and grittiness.  However I don’t want them to look like they’ve just been thrown in a washing machine with a couple of bricks either.  Lets face it, Marines would get shot at a lot, firstly because they are generally numerically inferior to their opponent and secondly, it would take a lot of fire power to drop an Astartes.  Achieving this balance is a major technical and aesthetic challenge with white.

This is why I’ve gone for experimenting with two different base colours for the models.  One has a very light grey base colour, and the other has a very light brown base colour.  The light grey model ultimately had its panel lines cut it with a black oil wash, while the light brown model had its panel lines cut in with a dark brown oil wash.  So lets take a look at the stages and I’ll walk you through it.

As some of you who’ve followed my painting updates perviously will know, I’m really big on preparation and batch painting.  I like to create a system and document it when I paint an army so that if and when I revisit it I can reproduce it, and also its a devision of labor idea, where I attempt the use my time when painting an army as economically as possible.  However I like to keep in mind the end result and in painting models fast, I don’t like to compromise the finish either…  So I spend a bit of time preparing models before painting them, so that when I paint I can achieve a standard which I consider slightly above table top standard for my rank and file models.

How to paint World Eater Space Marines 1

So here we have stage one.  The body of the marine built, with its head, arms, backpack, shoulder armour and weapons attached or mounted on tooth picks which are held in place with polystyrene foam.  When I say mounted on what I mean is for items like the arms, backpack, head and weapon I actually drill a 2mm hole in them and just force the tooth pick into the hole.  This saves time glueing them onto the tooth pick and if I bump them and they fall off, I can just re-attach them.  Everything is cleaned up, barrels are drilled and the paint is ready.  I’ve got a clear picture in my mind of what I want the finished model to look like.

How to paint World Eater Space Marines 2

Black undercoat.  Nothing really revolutionary here. How to paint World Eater Space Marines 3

Once the black undercoat is applied I take the pieces that will be getting different treatments and fix them to separate foam plinths.  Here the bolters have been painted with Citadel Leadbelcher.    How to paint World Eater Space Marines 4

Just like the bolters I’ve segregated the shoulder armour and back packs.  One thing that isn’t shown in this picture is that they were actually all aligned to face the same direction they would when on the marine.  This will assist later when it comes time to shading them.  The base for the blue is Citadel Kantor Blue.  Once that had dried, I gave each piece a small highlight with Citadel  Caledor Sky, and then finally a even smaller highlight with 70% Caledor Sky and 30% White Scar.
How to paint World Eater Space Marines 5

The first marine is given his black undercoat a base coat of Citadel Dawnstone.  I didn’t go over board with coverage, as I want the black to remain in recesses etc to add to the  pre-shading of the white when it eventually goes over the top.  How to paint World Eater Space Marines 6

As per the stage above except with Citadel Baneblade Brown.How to paint World Eater Space Marines 7

The first coat of white.  I created a mix of 90% Citadel White Scar and 10% Citadel Dawnstone.  This stage you want to make sure that you apply the colour with a “top down” notion in mind.  Remember that most of the time the source or light (the sun) is above the marine, so we expect to see shadows in areas where shadows would normally be created in natural light.  So lightly dust this mixture on ensuring that you keep the model pointing up as you are painting it.  Don’t go over the top either, just like the Dawnstone, you want to make sure that the coverage isn’t complete, you want some Dawnstone, and if you’ve done the job right, some of the black to still be showing through.

Once that was done, I gave the model a very light coat of just straight White Scar to make the raised areas really pop.  You need to be very delicate with the paint application at this stage otherwise you run the risk of making the white too bright and ruining the effect you were trying to achieve by using the black and grey undercoat.
How to paint World Eater Space Marines 8

As above except with Citadel Baneblade brown.How to paint World Eater Space Marines 9

I then added chipping with a small sponge, painted in the detail and gave the models a coat of gloss varnish in preparation for oil washes.  How to paint World Eater Space Marines 10

I really like this picture for many reasons.  Mainly because it clearly demonstrates the distinct difference between the brown and grey undercoat.  I deliberately chose to use brown and black oil paint respectively on each model to further accentuate the undercoat colour coming through the white and thus further emphasise the two “looks” I was going for.  I actually think the one on the right would be a great base for a Death Guard….

Once i’d finished painting the bases, finishing up the detail etc, I gave each part a good coat of matt varnish, assembled each marine, hit it with some weathering powders and then gave it another hit with matt varnish.  Below are the pictures of the finished models.

OLYMPUS DIGITAL CAMERA

OLYMPUS DIGITAL CAMERA

OLYMPUS DIGITAL CAMERA

I’m really please with the results and very really anxious to get started on the army proper now.  I’ve decided to go with the grey undercoat after all that as I think it give a more authentic white and is in line with how I’d imagine the XII Legion to look.

What are your thoughts?

Thanks for dropping in, comments as always are very welcome.

John Sutton, Brisbane, Qld

So I want to build a new army for use in both games of Horus Heresy and games of 40k.  Seeing as there are similar structural aspects to the Horus Heresy 30k list and new CSM 40k list, I thought it would be easy to make them cross compatible with few modifications.  As most tournaments and social games are now 1850 points I am basing the list around this points cost.

I’m aiming to create a reasonably competitive CSM 40k army list and I’d be interested in hearing your thoughts on the army composition and whether you think it could be improved with regards to its competitiveness, playability  and flexibility against different opponents.  There are a few limitations on the CSM 40k army list selection however.  Obviously I’m wanting to create a 30k army list with this too, so units like Hell Drakes, Defiler’s, Forgefiends etc can not be used in this army list as they would be inconsistent with the theme/look of the army I’m wanting to achieve.

Why World Eaters? They’re bad ass.

So lets go through the army list, remembering that I’ll be using Horus Heresy era miniatures to built it with

HQ

Kharn (As himself using a converted 30k model)

Daemon Prince with Mark of Khorn & Axe of Blind Fury (Angron)

Troops

20 x Khorne Berzerkers with Icon of Wrath, Melta Bomb (Kharn allows these guys to be troops and gives them hatred)

5 x CSM with melta gun

10 x CSM with 2 x melta guns (bolt guns)

10 x CSM with 2 x melta guns (bolt guns)

Fast Attack

3 x CSM Bikes with 2 x melta guns

3 x CSM Bikes with 2 x melta guns

Heavy Support

5 x Havocs with 2 x auto cannons, 2 x missile launchers with flak missiles

5 x Havocs with 2 x auto cannons, 2 x missile launchers with flak missiles

Vindicator

Fortifications 

Aegis defence line with Quad Gun

1850 points exactly 

So the general scheme of manoeuvre is that the Aegis, Havocs, Vindicator and the 5 man CSM squad manning the quad gun will castle up on some decisive terrain in my deployment zone with the bikes and CSM squads on each flank and the Berzerkers, with Kharn & Angron positioned to advance and decisively engage the targetable centre of gravity of the enemy army.  The 10 man CSM squads will move to secure objectives and support the Berzerkers advance and assault if needed.  Kharn, Angron & the Berzerkers will be my main effort.

To provide cover fire for the Berzerkers advance the havocs, quad gun and Vindicator will engage and suppress enemy units at maximum range that pose a threat to the advancing Berzerkers, while the bikes turbo boost with their melta guns onto enemy armour or other high value targets to pose a creditable threat in the next turn should they not be dealt with thus restricting enemy armour freedom of movement and target selection.  Enemy Flyers will have their freedom of movement restricted by the Quad gun and flak missile launchers within the havoc squads.

So I’m keen to get any constructive feedback on this army list compression.  Any considered suggestions would be appreciated, I know there are a lot of pretty serious players out there who have a lot of experience in this department.

Cheers

John Sutton, Brisbane, Qld

Hello everyone,

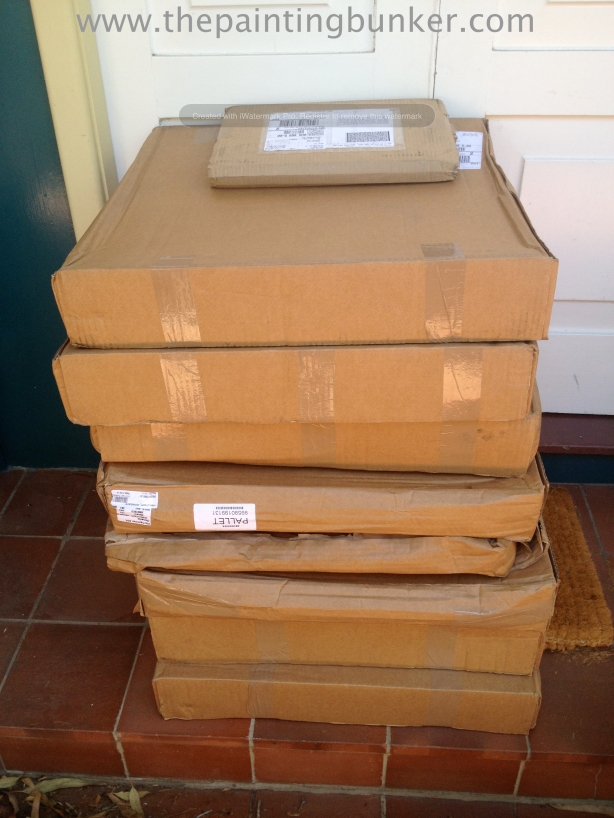
Two posts in one day! So today when I got home this was on my door step and my heart was filled with joy

Forge World Realm of Battle Cityscape Board 1 via www.thepaintingbunker.com

So as you know, a few weeks ago I decided that my next project was to build a gaming table so that I’ve got some good quality scenery to play on, which hasn’t been a feature of my collection. So as you can imagine when I saw these babies on the door step I was pretty keen to open them up and have a close look at the boards.

First off, can I say that there were no breakages at all and all the sections were well packed, each section in its own individual box. I have to admit, my prior experience with a Forge World Realm of Battle board had raised my expectations high. What I enjoyed most about my first experience with their boards was the very high level of attention to detail. For example on my first board one of the emplacements had small tally marks scratch into the wall, and bits of war gear lying around too. Just little things that made painting the model a real pleasure.

So lets look at a few areas that I was particularly impressed with.

Forge World Realm of Battle Cityscape Board 2 via www.thepaintingbunker.com

Here we see a smashed Rapier Laser platform. This is featured on the Concourse Sector. The detail is clear and crisp.

Forge World Realm of Battle Cityscape Board 3 via www.thepaintingbunker.com

Another great feature hidden on one side of Generatorum sector.

Forge World Realm of Battle Cityscape Board 4 via www.thepaintingbunker.com

Again from Generatorum sector board. A simple, well executed feature. I’m looking forward to painting this part actually.

Forge World Realm of Battle Cityscape Board 5 via www.thepaintingbunker.com

What I really like about these boards is they are covered in details such as these. Small patches where their are pouches, empty magazines and other small bits of random objects scattered around.

Forge World Realm of Battle Cityscape Board 6 via www.thepaintingbunker.com

This shot is from the Shattered Plaza sector. I’ve already been looking at photos of old marble structures in Rome and Italy to draw inspiration from so I can get a quality painting result for these pieces. It appears that there is a plinth for a model to be mounted on adjacent to each Eagle head. Rather than put a marine or something like that there in a statue form, I’m thinking of putting some sort of Daemon, or Gargoyle there for effect, similar to architecture features found on many sandstone buildings around the world.

Forge World Realm of Battle Cityscape Board 7 via www.thepaintingbunker.com

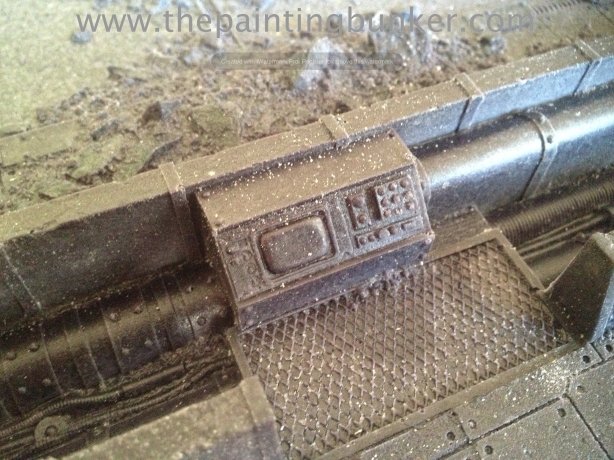
This is a control panel across from the main foundation located on the Primus sector. It’s like the designer intended it to be the controls for some sort of generator or other such device situated on the foundation. It gives me a few ideas…

Forge World Realm of Battle Cityscape Board 8 via www.thepaintingbunker.com

I’m sure many of you have noticed this feature on the Primus Sector board. I thought I’d put a close up of it because I really like it. It appears as if its been hit by an artillery round and the back half of the Rhino has been destroyed. Again, the surrounding area is festooned with all manner of random war gear.

Forge World Realm of Battle Cityscape Board 9 via www.thepaintingbunker.com

The reverse angle shot of the Rhino. Good stuff.

Forge World Realm of Battle Cityscape Board 11 via www.thepaintingbunker.com

Now, its all not sweetness and light. I do have two criticisms of the Realm of Battle Cityscape board sections. The first one is that like the Realm of Battle Imperial Strong Point each board section isn’t exactly 2′ x 2′. Its a little bit less. Unlike the Games Worksop Realm of Battle board sections, which are made of injection moulded plastic and are exactly 2′ x 2′. Now don’t get me wrong, these are exceptional pieces of modelling, but it is a bit irritating knowing that they are about 3mm shy of 24″. This isnt a big deal when Forge World Realm of Battle Cityscape board sections will only be aligned next to other Forge World Realm of Battle Cityscape board sections. But it does cause problems when you try and match them upto GW sections, like you must with the Imperial Strong Point.

My other criticism is of the Forge World Realm of Battle Cityscape Shattered Plaza section. The raised platform is bowed. I suspect its because its such a large surface, but it means I’m going to have to do some sort of reinforcing underneath it so that it sits flat. I’ve been considering my options and one idea that has come to mind is actually getting some expandable foam and coating the inside with it. Its not going to be easy but it will mean that the sections will be very strong indeed, capable of withstanding being trodden on and remaining intact. Another thing I’m considering is magnetising the corners so there is some positive connection between the pieces when they are on the table set up. I’ll have to give it more thought.

So overall I am tremendously pleased with these new additions. When you consider that four sections cost +/-$430AUD V’s the GW Realm of Battle Boards that cost here in Australia $450 rrp, I know which one I’d purchase day in day out. Yes the GW product is a 6’x4′ table compared to the Forge World product which is 4′ x 4′, however the Forge World Realm of Battle Cityscape board sections are orders of magnitude more impressive no matter how you measure it. I’m anxious to begin painting these sections, and with the prize money I got from ADFWGA Championships on the weekend ($200!!!!), I purchased more Imperial Sectors from The Combat Company so I can get a good looking table happening.

I’m hoping to hit this project pretty hard over the xmas break, so there should be plenty of updates coming shortly.

Thanks for dropping in

John

Well, today is a good day.

I’ve finally finished the Reaver Titan I started in September.  It’s been a massive project and I have to admit I’m grateful for the experience I gained from building the two Warhounds when I set out on this massive endeavour.  I pitty anyone who would attempt to build a Reaver without having first built a Warhound.  I thought the Warhounds were complicated, the Reaver makes them look like a lego man by comparison.  Anyways, I’ll cut to the pics so everyone can enjoy the massive!
Behold the God Machine!

Forge World Reaver Titan 1 via www.thepaintingbunker.com Forge World Reaver Titan 9 via www.thepaintingbunker.com Forge World Reaver Titan 8 via www.thepaintingbunker.com Forge World Reaver Titan 7 via www.thepaintingbunker.com Forge World Reaver Titan 6 via www.thepaintingbunker.com Forge World Reaver Titan 5 via www.thepaintingbunker.com Forge World Reaver Titan 4 via www.thepaintingbunker.com Forge World Reaver Titan 3 via www.thepaintingbunker.com Forge World Reaver Titan 2 via www.thepaintingbunker.com

I can’t wait til the final? book of the Forge World Horus Heresy book comes out that deals with the assault on the Imperial Palace on Terra.  The Fire Wasps take a big part in the defence.